It’s been a year and a half since we moved into the new house, and I finally have the servers racked in the garage. Looks pretty nice compared to my old setups.
My old setup was as follows:
Two DELL OptiPlex 990 small form factor machines with Windows Server 2008 R2 as Hyper-V servers. One server ran the important 24/7 VM’s, the other was used for testing and test VM’s. The 24/7 VM’s included a W2K8R2 domain controller and a W2K12 file server.
For storage I used a Synology DS2411+ NAS, with 12 x 3TB Hitachi Ultrastar drives, configured in RAID6, and served via iSCSI. The the iSCSI drive was mounted in the Hyper-V host, and configured as a 30TB passthrough disk for the file server VM, that served files over SMB and NFS.
These servers stood on a wooden storage rack in the garage, and at the new house they were temporarily housed under the desk in my office.
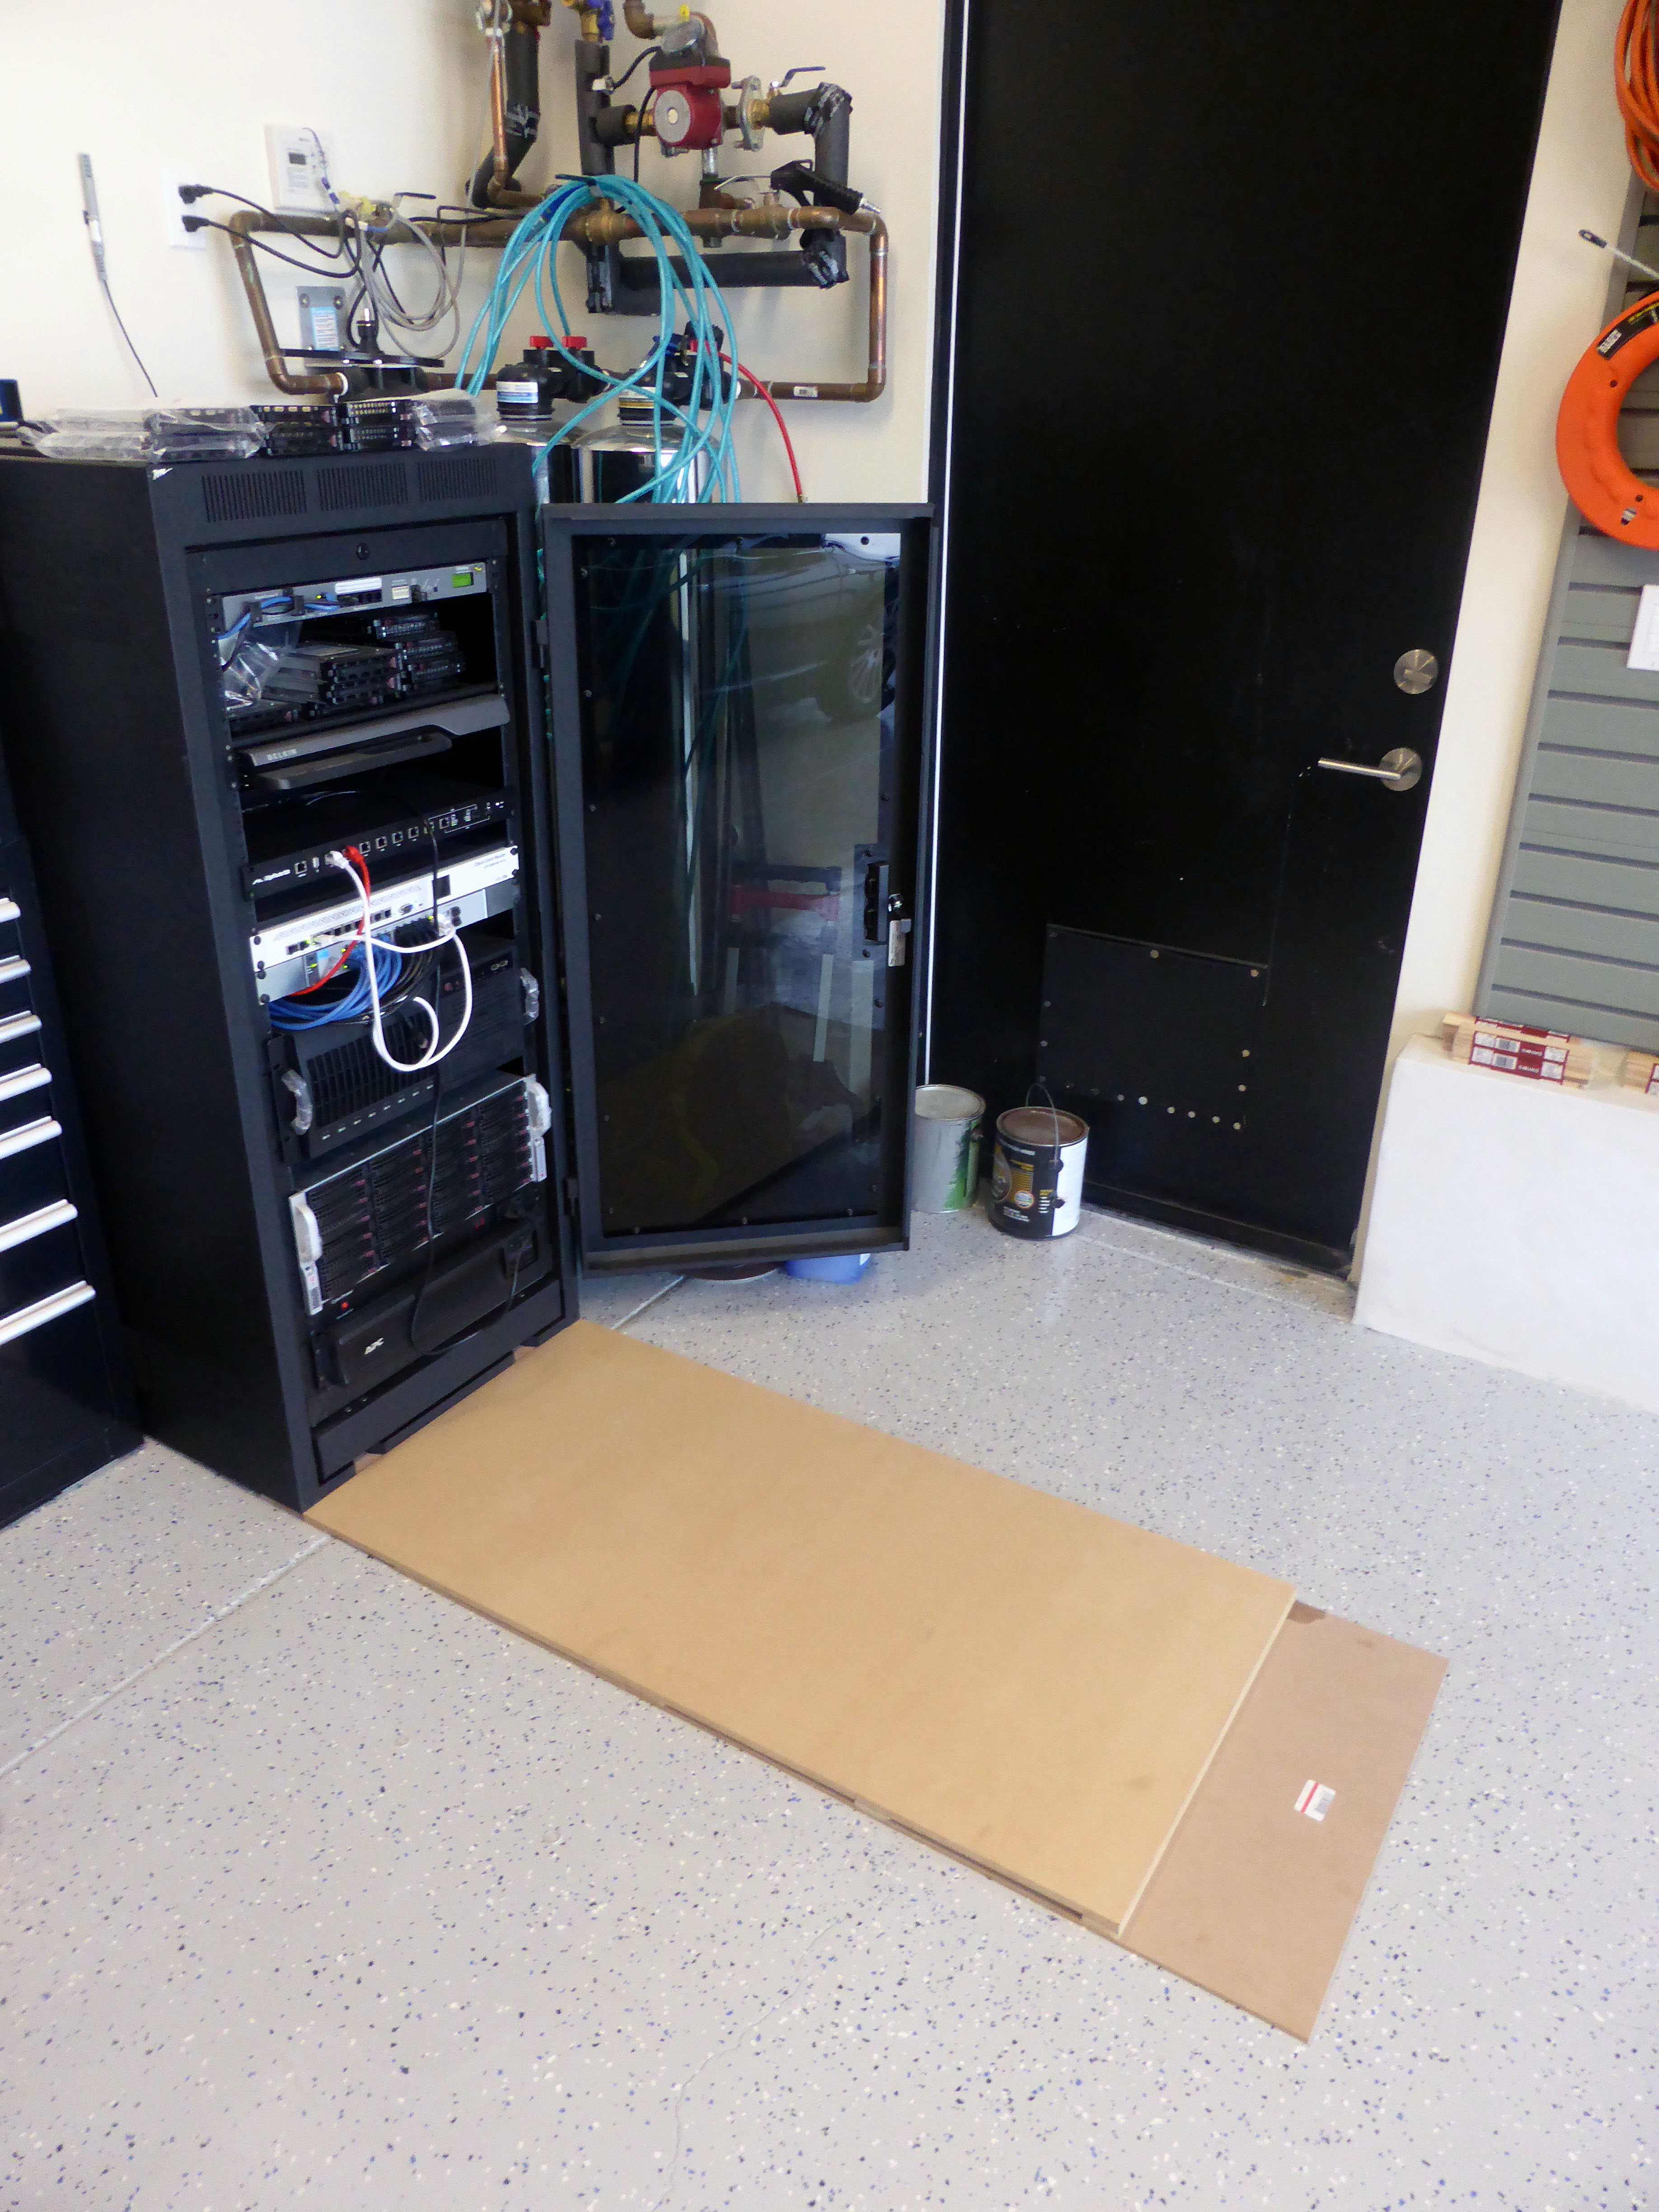
One of my primary objectives was to move the server equipment to the garage in an enclosed server rack, with enough space for expansion and away from dust. A garage is not really dust free and does get hot in the summer, not an ideal location for a server rack, but better than finding precious space inside the house. To keep dust to a minimum I epoxy coated the floor and installed foam air filters in the wall and door air inlet vents. To keep things cool, especially after parking two hot cars, I installed an extractor fan. I had planned on connecting it to a thermostat, but opted to use a Panasonic WhisperGreen extractor fan rated for 24/7 operation, and I just leave it on all the time. We have ongoing construction next door, and the biggest source of dust are the gaps around the garage door. I’ve considered applying sticky foam strips next to the garage door edges, but have not done so yet.
In retrospect, preparing the garage concrete surface by hand, and applying the Epoxy Coat kit by myself, is not something I would recommend for a novice. If you can, pay a pro to do it for you, or at least get a friend to help, and rent a diamond floor abrasion machine.
I did half the garage at a time, moving everything to one side, preparing the surface by hand, letting it dry, applying the epoxy and flakes, letting it dry, and then repeating the process for the other side. I decided the 7″ roller that came with the kit was too small, and I bought a 12″ roller, big mistake, as soon as I started rolling the epoxy there was lint everywhere. From the time you start applying the epoxy you have 20 minutes working time, no time to go buy the proper type of lint free roller. I did not make the same mistake twice, and used the kit roller for the second half, no lint. With the experience gained from the first half it was much easier the second time round, and the color flake application was also much more even compared to the first half.
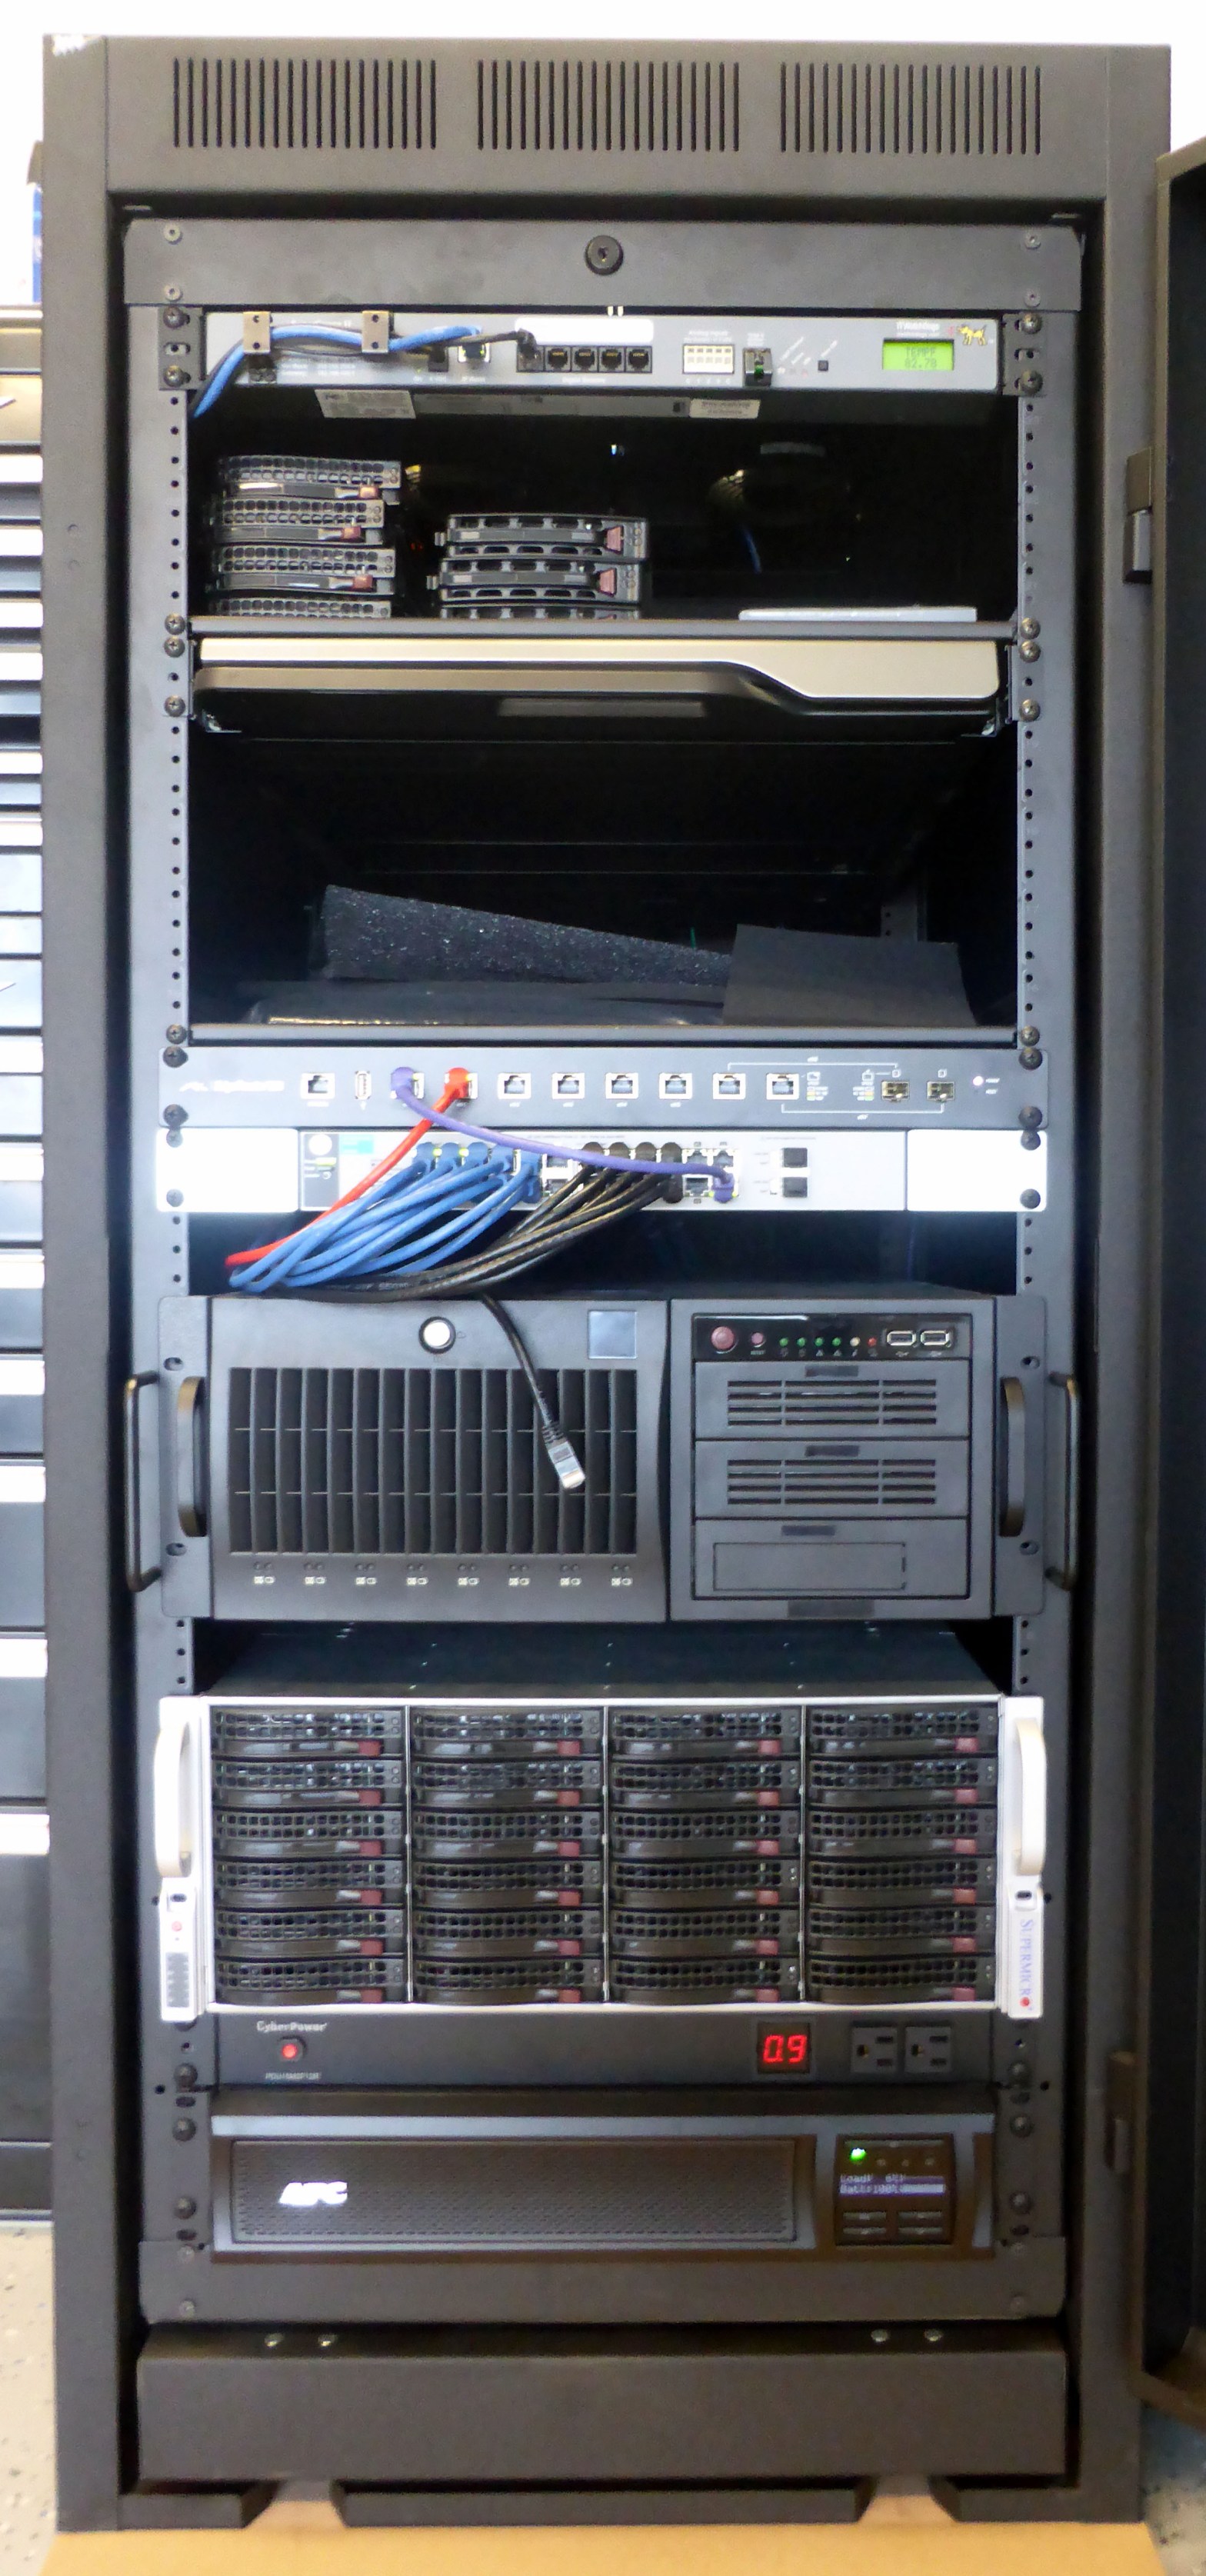
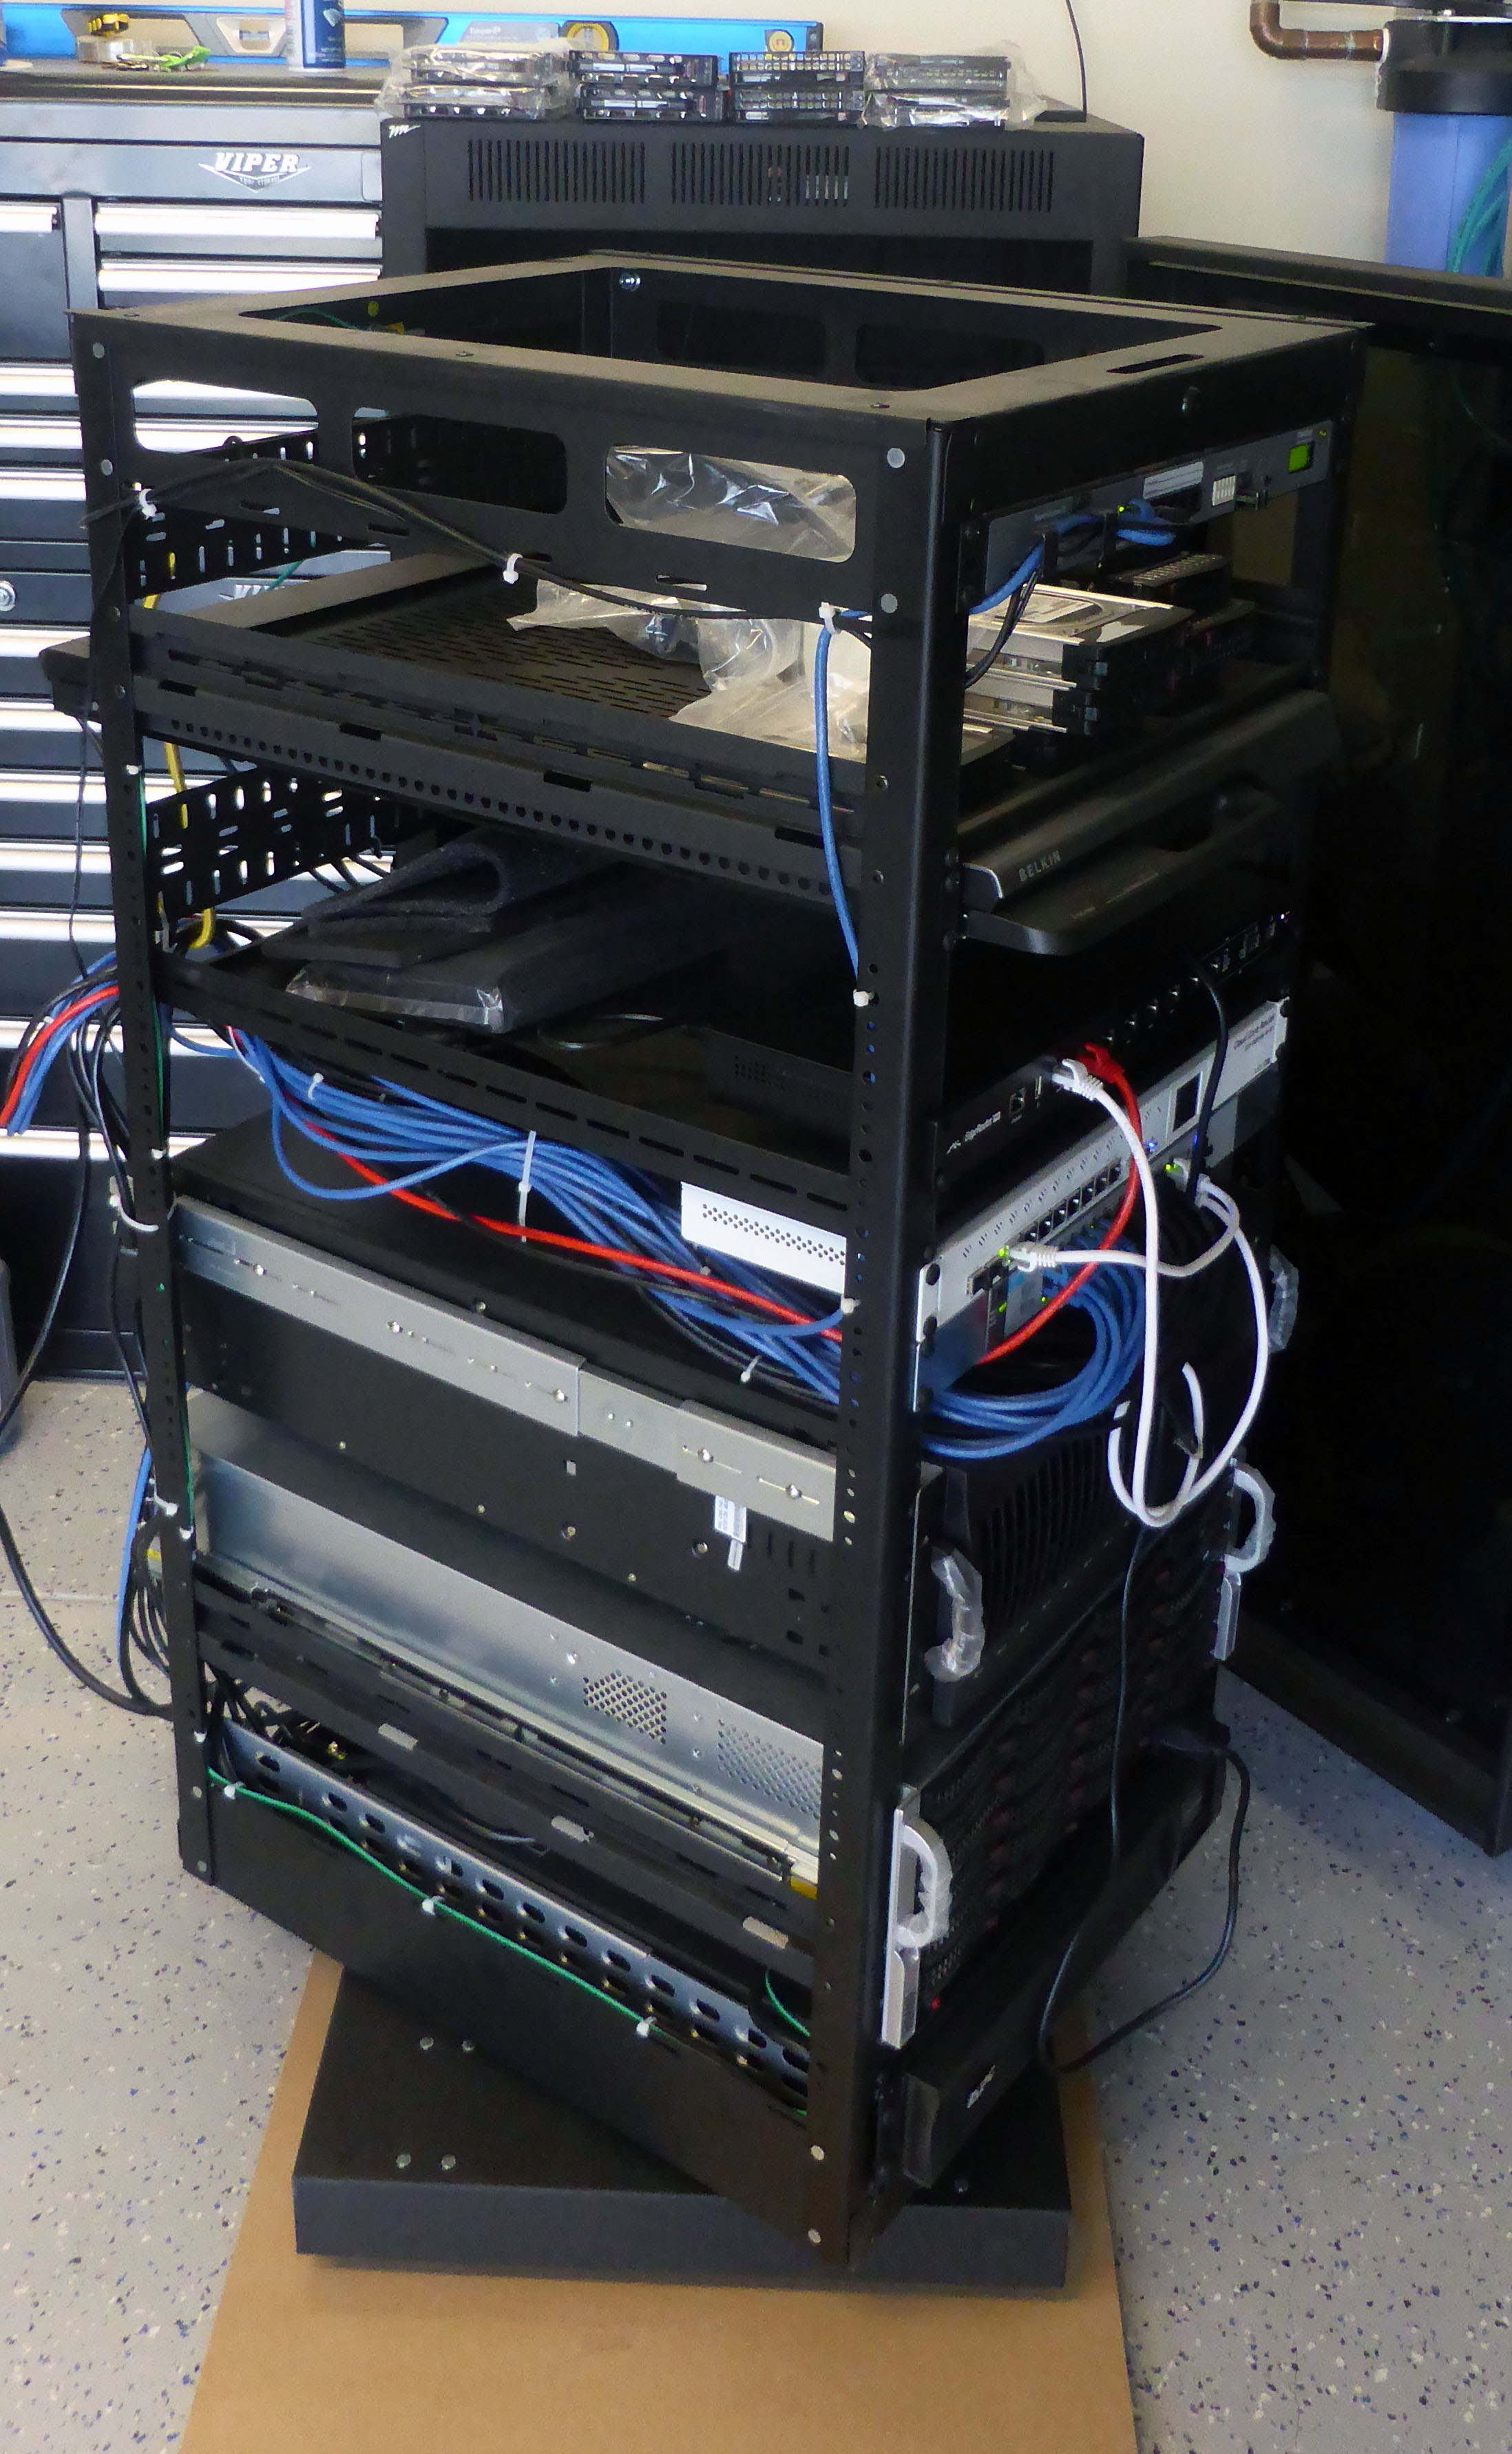
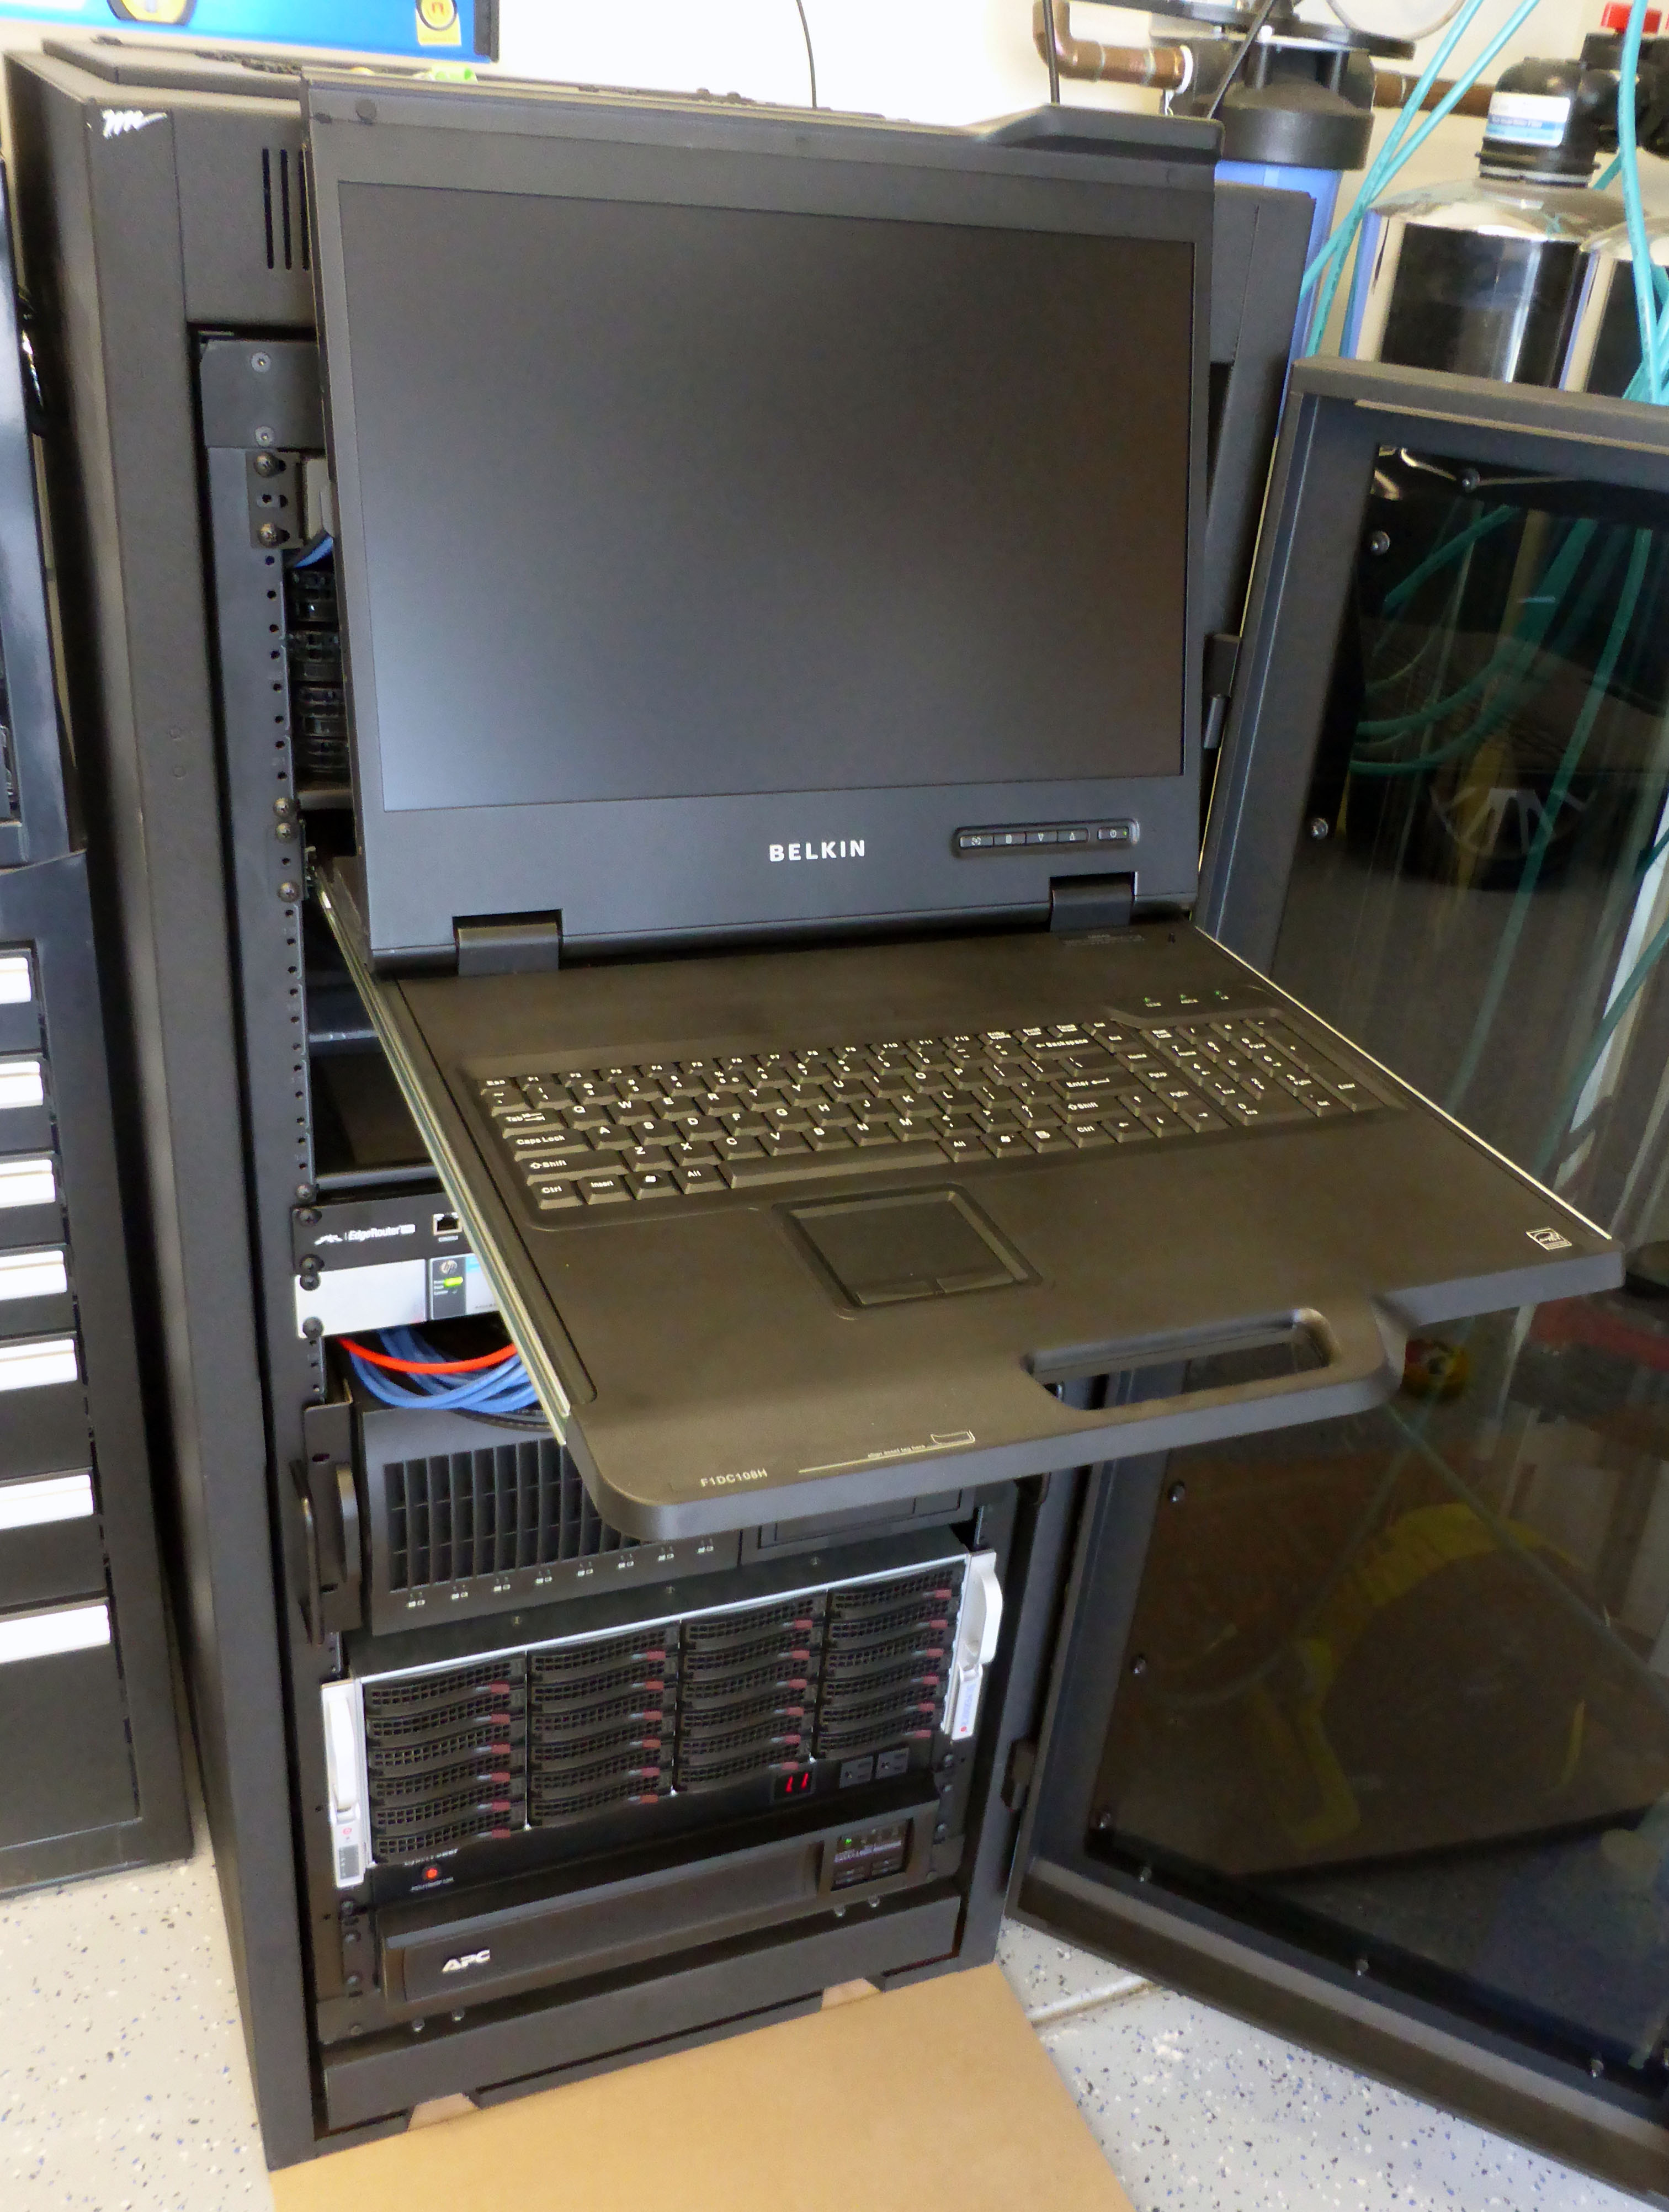
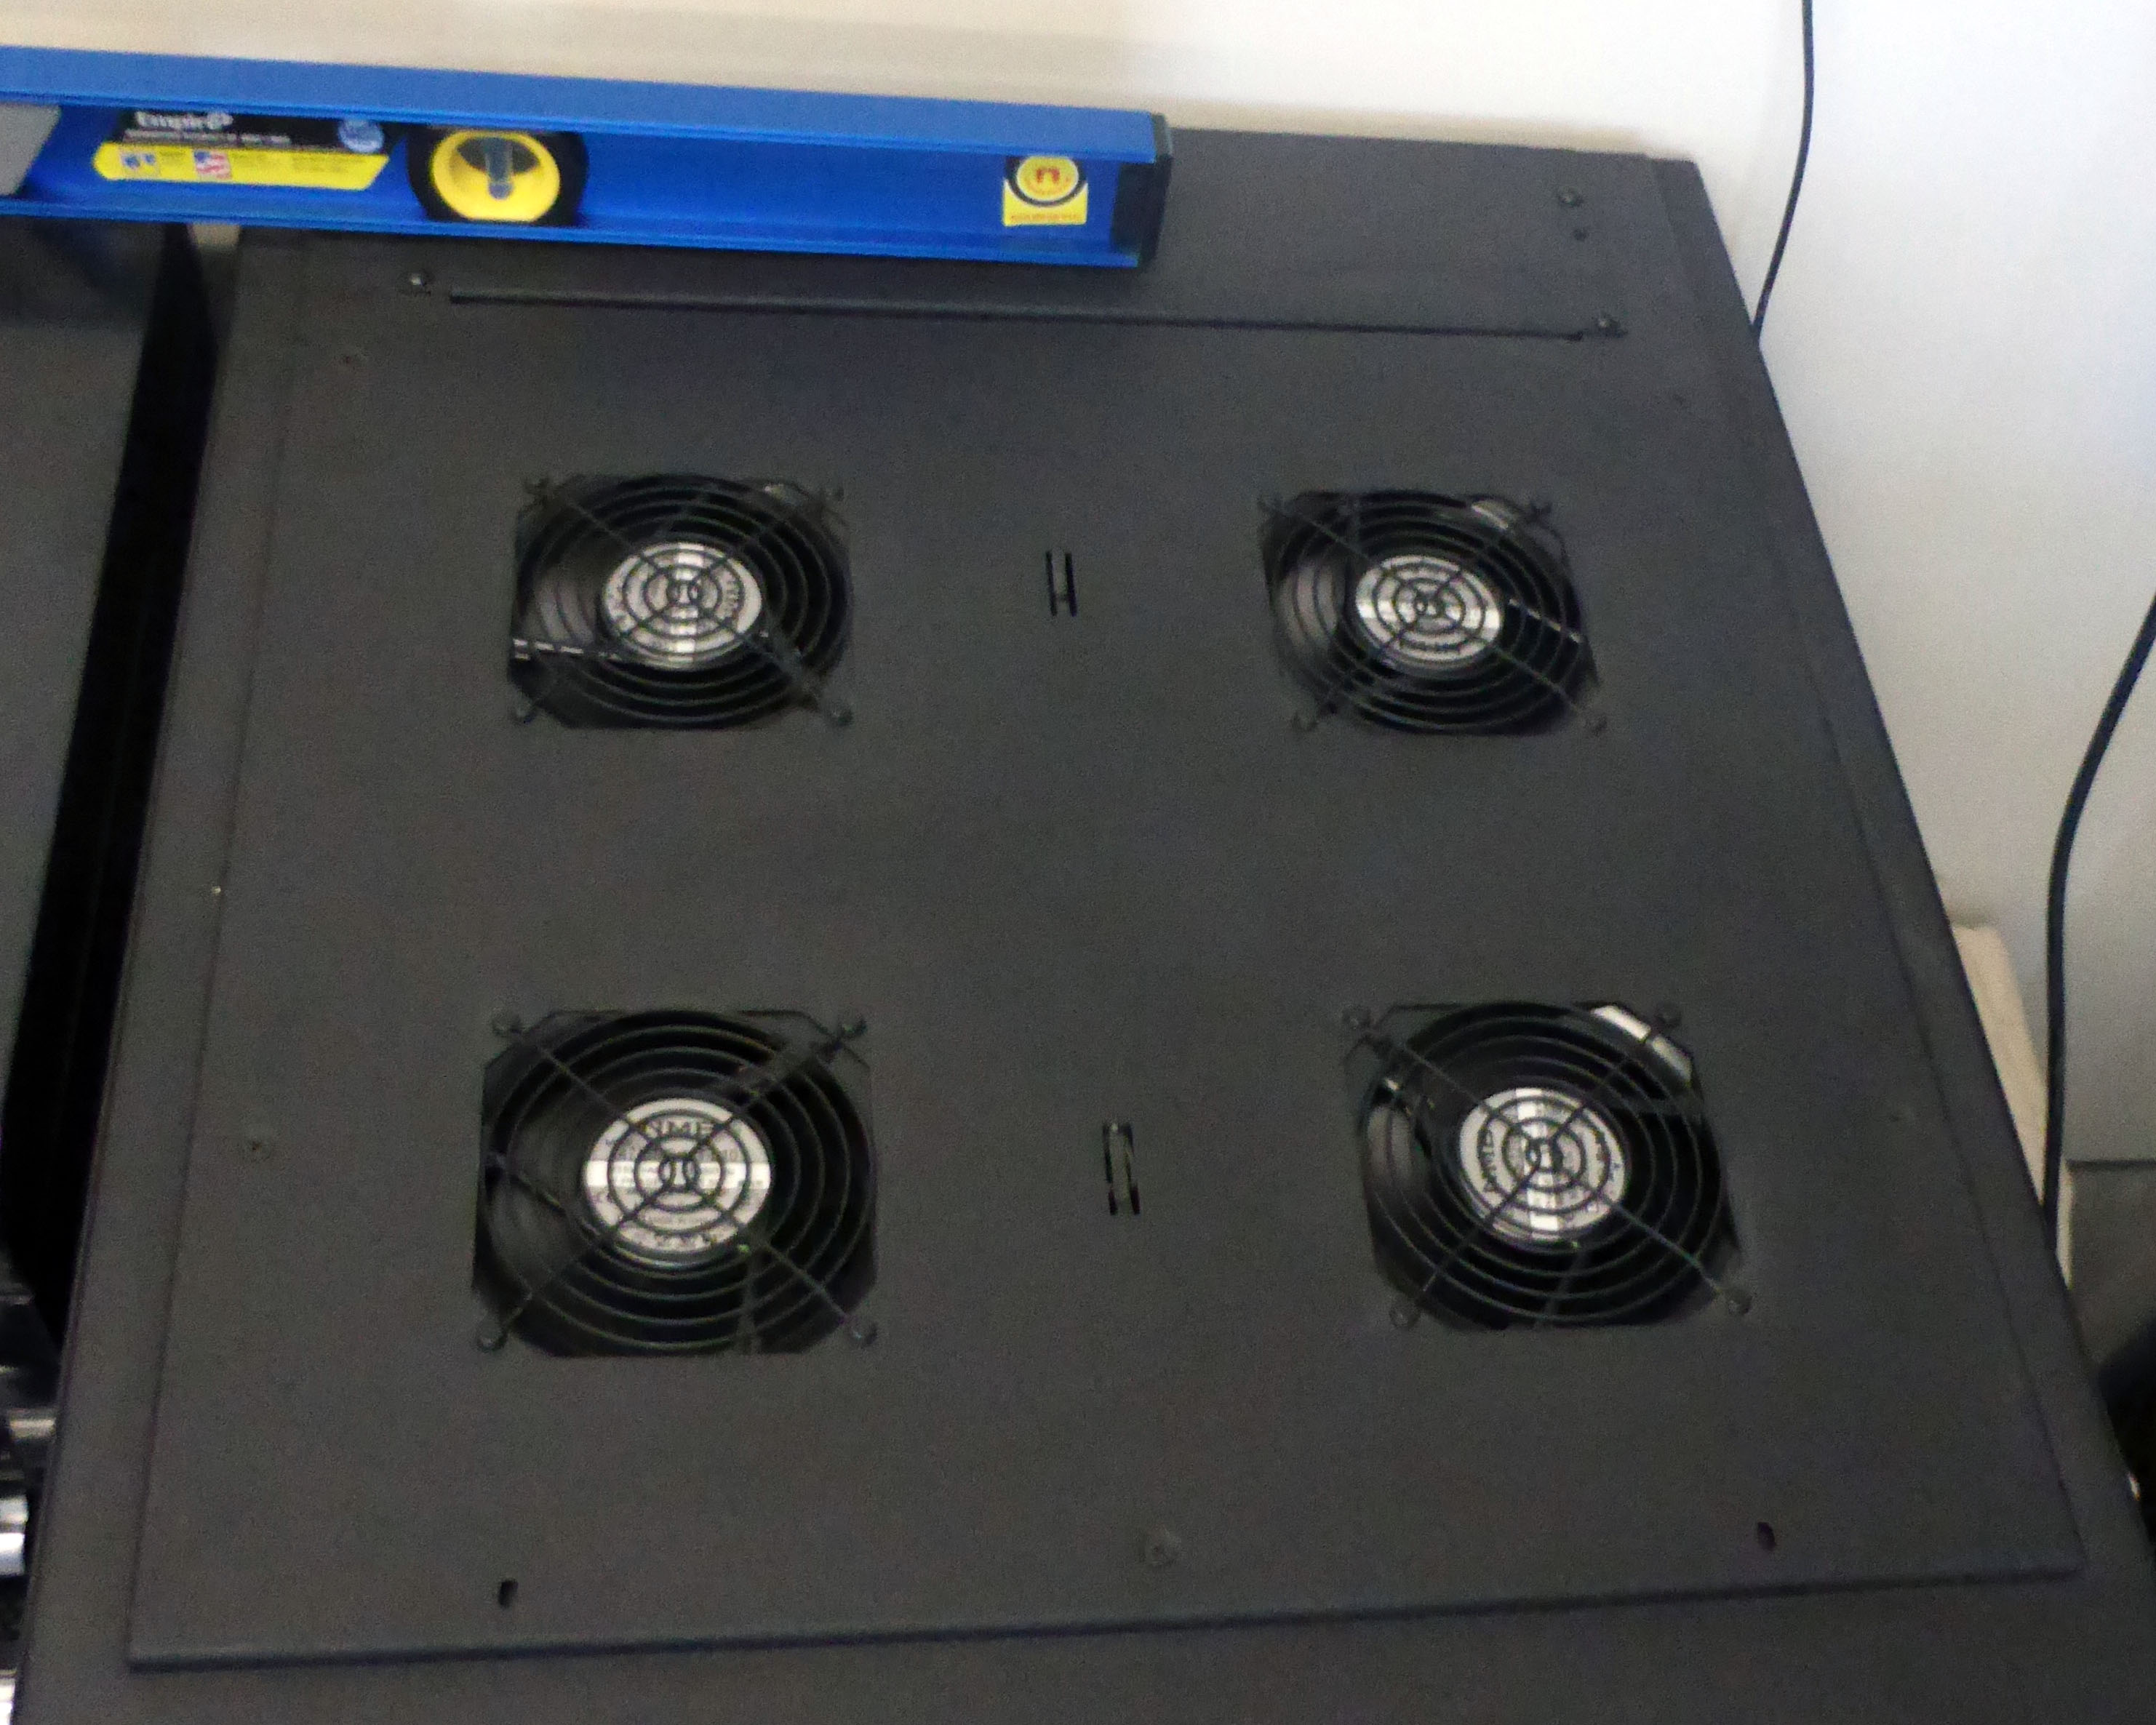
To conserve space in the garage I used a Middle Atlantic WR-24-32 WR Series Roll Out Rotating Rack. The roll out and rotate design allowed me to mount the rack right against the wall and against other equipment, as it does not require rear or side panel access. I also used a low noise MW-4QFT-FC thermostatically controlled integrated extractor fan top to keep things cool, and a WRPFD-24 plexiglass front door to make it look nice.
The entire interior cage rolls out on heavy duty castors, and the bottom assembly rotates on ball bearings. The bottom of the enclosure is open in the center with steel plate tracks for the castors, and must be mounted down on a sturdy and level surface. My garage floor is not level and slopes towards the door, and consequently a fully loaded rack wants to roll out the door, and all the servers keep sliding out of the rails.
I had to level the enclosure by placing spacers under the front section, and then bolting it down on the concrete floor. This leaves the enclosure and the rails inside the enclosure level, but as soon as I pull the rack out on the floor, the chassis slide out and the entire rack wants to roll out the door. I had to build a removable wood platform with spacers to provide a level runway surface in front of the rack, that way I can pull the rack out on a level surface, and store the runway when not in use.
The WR-24-32 is 24U high, and accommodates equipment up to 26″ in length, quite a bit shorter than most standard racks. The interior rack assembly pillar bars are about 23″ apart, with equipment extending past the pillar ends. This turned out to be more of a challenge than the 26″ equipment length constraint. When the rack is in its outside rotated position, the 23″ pillars just clears the enclosure, but the 26″ equipment sticking out past the pillars do not, and prevents the rack from rotating. This requires brute force to lift the castors, and a very heavy loaded rack, over the rail edge and pull the enclosure out all the way before the rack would rotate freely.
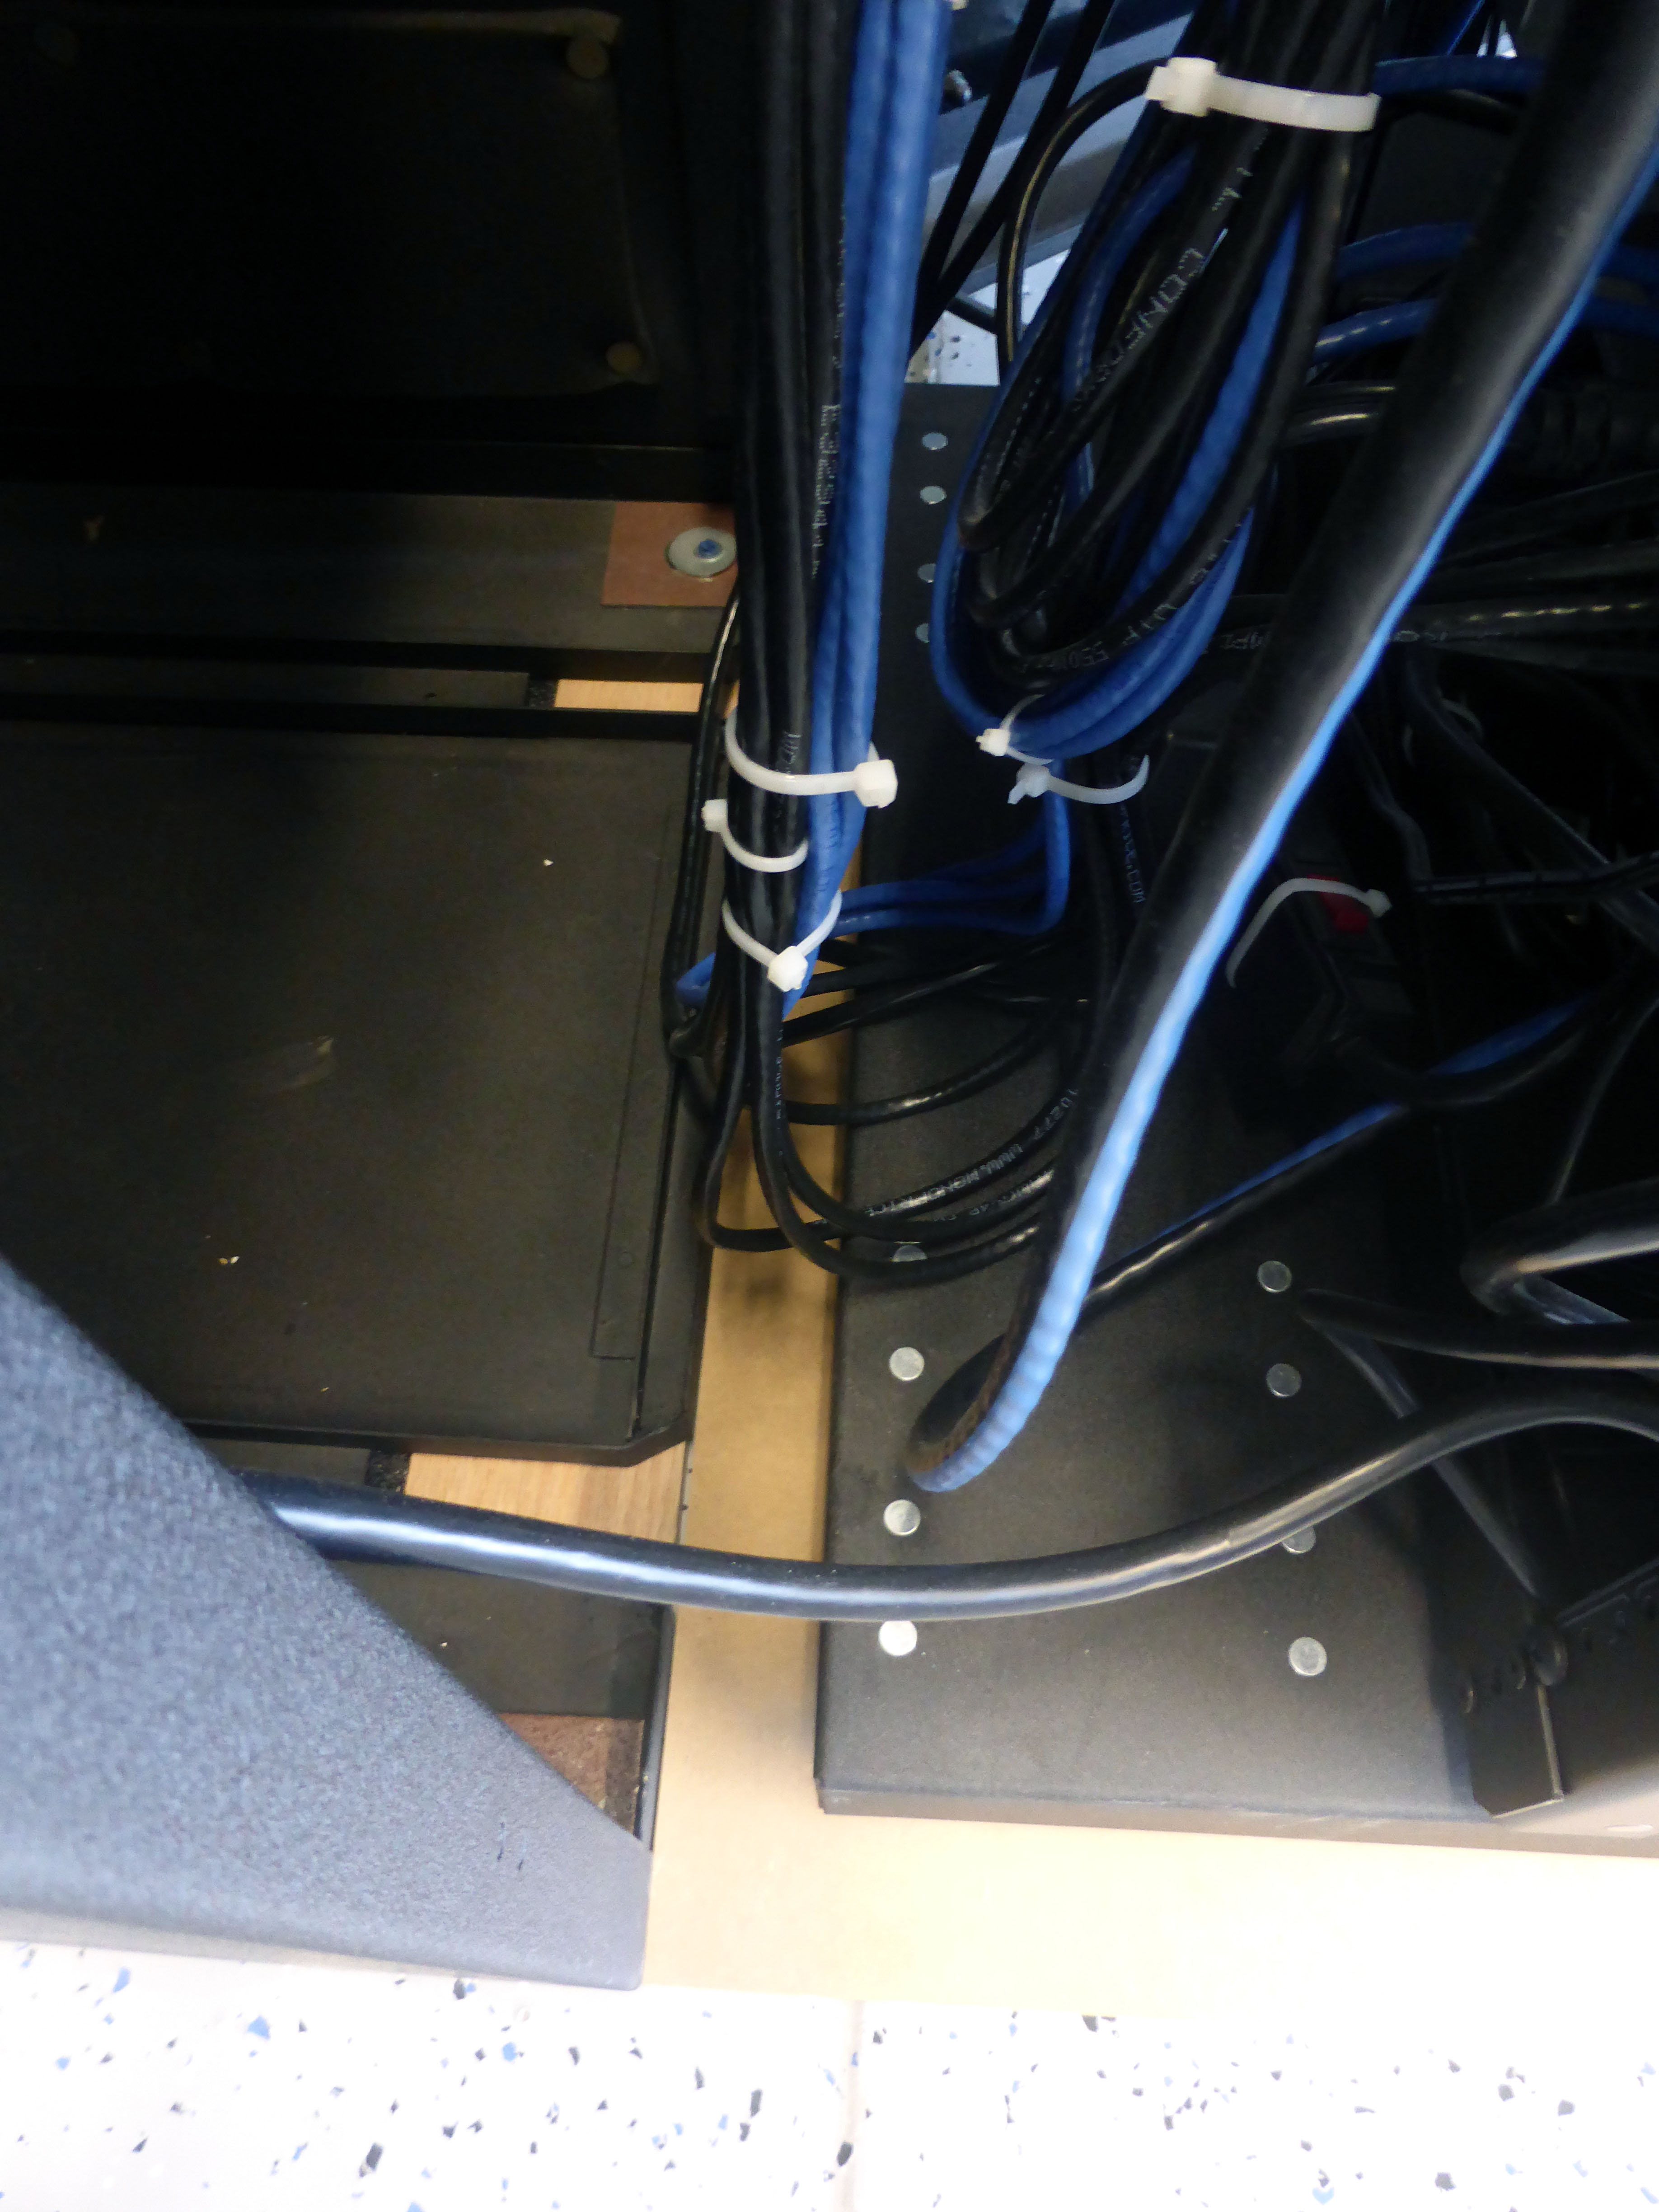
Another problem with the 23″ pillar spacing is the minimum adjustable distance for the 4U Supermicro chassis rails is about 25″, and they would not fit between the pillars. I had to order a shorter set of adjustable rails, and use the chassis side of the original rails to match the chassis mounting holes, and the rack side of the rails to clear the pillars, fortunately they fit perfectly into each other, but not on the rack. The WR-24-32 has tapped 10-32 screw holes in all locations, i.e. no square holes anywhere, which meant I had to use my Dremel to cut the quick mount tabs from the rails in order to screw them on instead of hanging them on.
Rather than using another NAS based storage solution I opted for direct attached storage, so I was looking for a 24-bay chassis, less than 26″ in length, with low noise fans. I opted for a Supermicro 4U 24-bay SuperChassis 846BE16-R920B for the main file server, and a 4U 8-bay SuperChassis 745BTQ-R1K28B-SQ for the utility server. It was the SC846’s included rails that were too long to fit between the posts, and I replaced them with a MCP-290-00058-0N short rail set.
I used Supermicro X10SLM+-F Xeon boards with Intel Xeon E3-1270 v3 processors for both systems. Low power and low heat was a higher priority than performance, and the E3 v3 processors were a good balance. I’ve had good experiences with the X9 series SM boards, but I have mixed feelings about the X10 boards. Kingston dropped support for these boards due to memory chip incompatibilities, and SM certified memory for this board is very expensive, and I had endless troubles getting the boards to work with an Adaptec 7805Q controller. The 7805Q controller would simply fail to start, and after being bounced around between SM and Adaptec support, SM eventually provided me with a special BIOS build, that is yet to be publicly updated, that resolved the problem. I had no such problems with the newer 81605ZQ controller I used in the 24-bay chassis.
For the 24-bay system storage, I used 2 x Samsung 840 Pro 512GB SSD drives in RAID1 for booting the OS and for MaxCache, 4 x Samsung 840 EVO 1TB SSD drives in RAID5 to host VM’s, 16 x Hitachi 4TB Coolspin drives plus 2 x hot spares in RAID6 for main storage. The 56TB RAID6 volume is mounted as a passthrough disk to the file server VM. To save power and reduce heat I host all the VM’s on the SSD array, and opted to use the consumer grade Hitachi Coolspin drives over the more expensive but reliable Ultrastar drives. The 8-bay system has a similar configuration, less the large RAID6 data array.
The SM boards are very easy to manage using the integrated IPMI KVM functionality. Other than configuring the BIOS and IPMI IP settings on the first boot, I rarely have to use the rack mounted KVM console. Each server runs W2K12R2 with the Hyper-V role. I am no longer running a domain controller, the complexity outweighed the benefit, especially with the introduction of Microsoft online accounts used in Windows 8. The main VM is a W2K12R2 storage file server VM, with the RAID6 disk in passthrough, serving data over SMB and NFS. My other VM’s include a system running Milestone XProtect IP security camera network video recorder, a MSSQL and MySQL DB VM, a Spiceworks VM, a Splunk VM, a UniFi Controller VM, and several work related VM’s.
I had Verizon switch my internet connection from Coax to Ethernet, and I now run a Ubiquity EdgeRouter Pro. I did run a MiktroTik Routerboard CCR1009-8G-1S-1S+ for a while, and it is a very nice box, but as I also switched out my EnGenius EAP600 access points to Ubiquity UniFi AC units, and I replaced the problematic TRENDNet TPE-1020WS POE+ switches with Ubiquity ToughSwitch TS-8-Pro POE units, I preferred to stick to one brand in the hopes of better interoperability. Be weary of the ToughSwitch units though, seems that under certain conditions mixing 100Mbps and 1Gbps ports have serious performance problems. I am still on the fence about the UniFi AC units, they are really easy to manage via the UniFi controller, but some devices, like my Nest thermostats, are having problems staying connected. Not sure if it is a problem with access points or the Nest’s, as there are many people blaming this problem on a Nest firmware update.
I used an APC Smart-UPS X 1500VA Rack/Tower LCD 120V with Network Card for clean and reliable power, and an ITWatchDogs SuperGoose II Climate Monitor for environmental monitoring and alerting.
After building and configuring everything, I copied all 30TB of data from the DS2411+ to the new server using robocopy with the multithreaded option, took about 5 days to copy. I continued using the old systems for two weeks while I let the new systems settle in, in case anything breaks. I then re-synced the data using robocopy, moved the VM’s over, and pointed clients to the new systems.
VM’s are noticeably more response, presumable due to being backed by SSD. I can now have multiple XBMC systems simultaneously watch movies while I copy data to storage without any playback stuttering, something that used to be an issue on the old iSCSI system.
The best part is really the way the storage cabinet looks 🙂
This is the temporary server home under my office desk:

Finished product:

The “runway” I constructed to create a level surface:
Pulled out all the way, notice the cage is clear, but the equipment won’t clear:
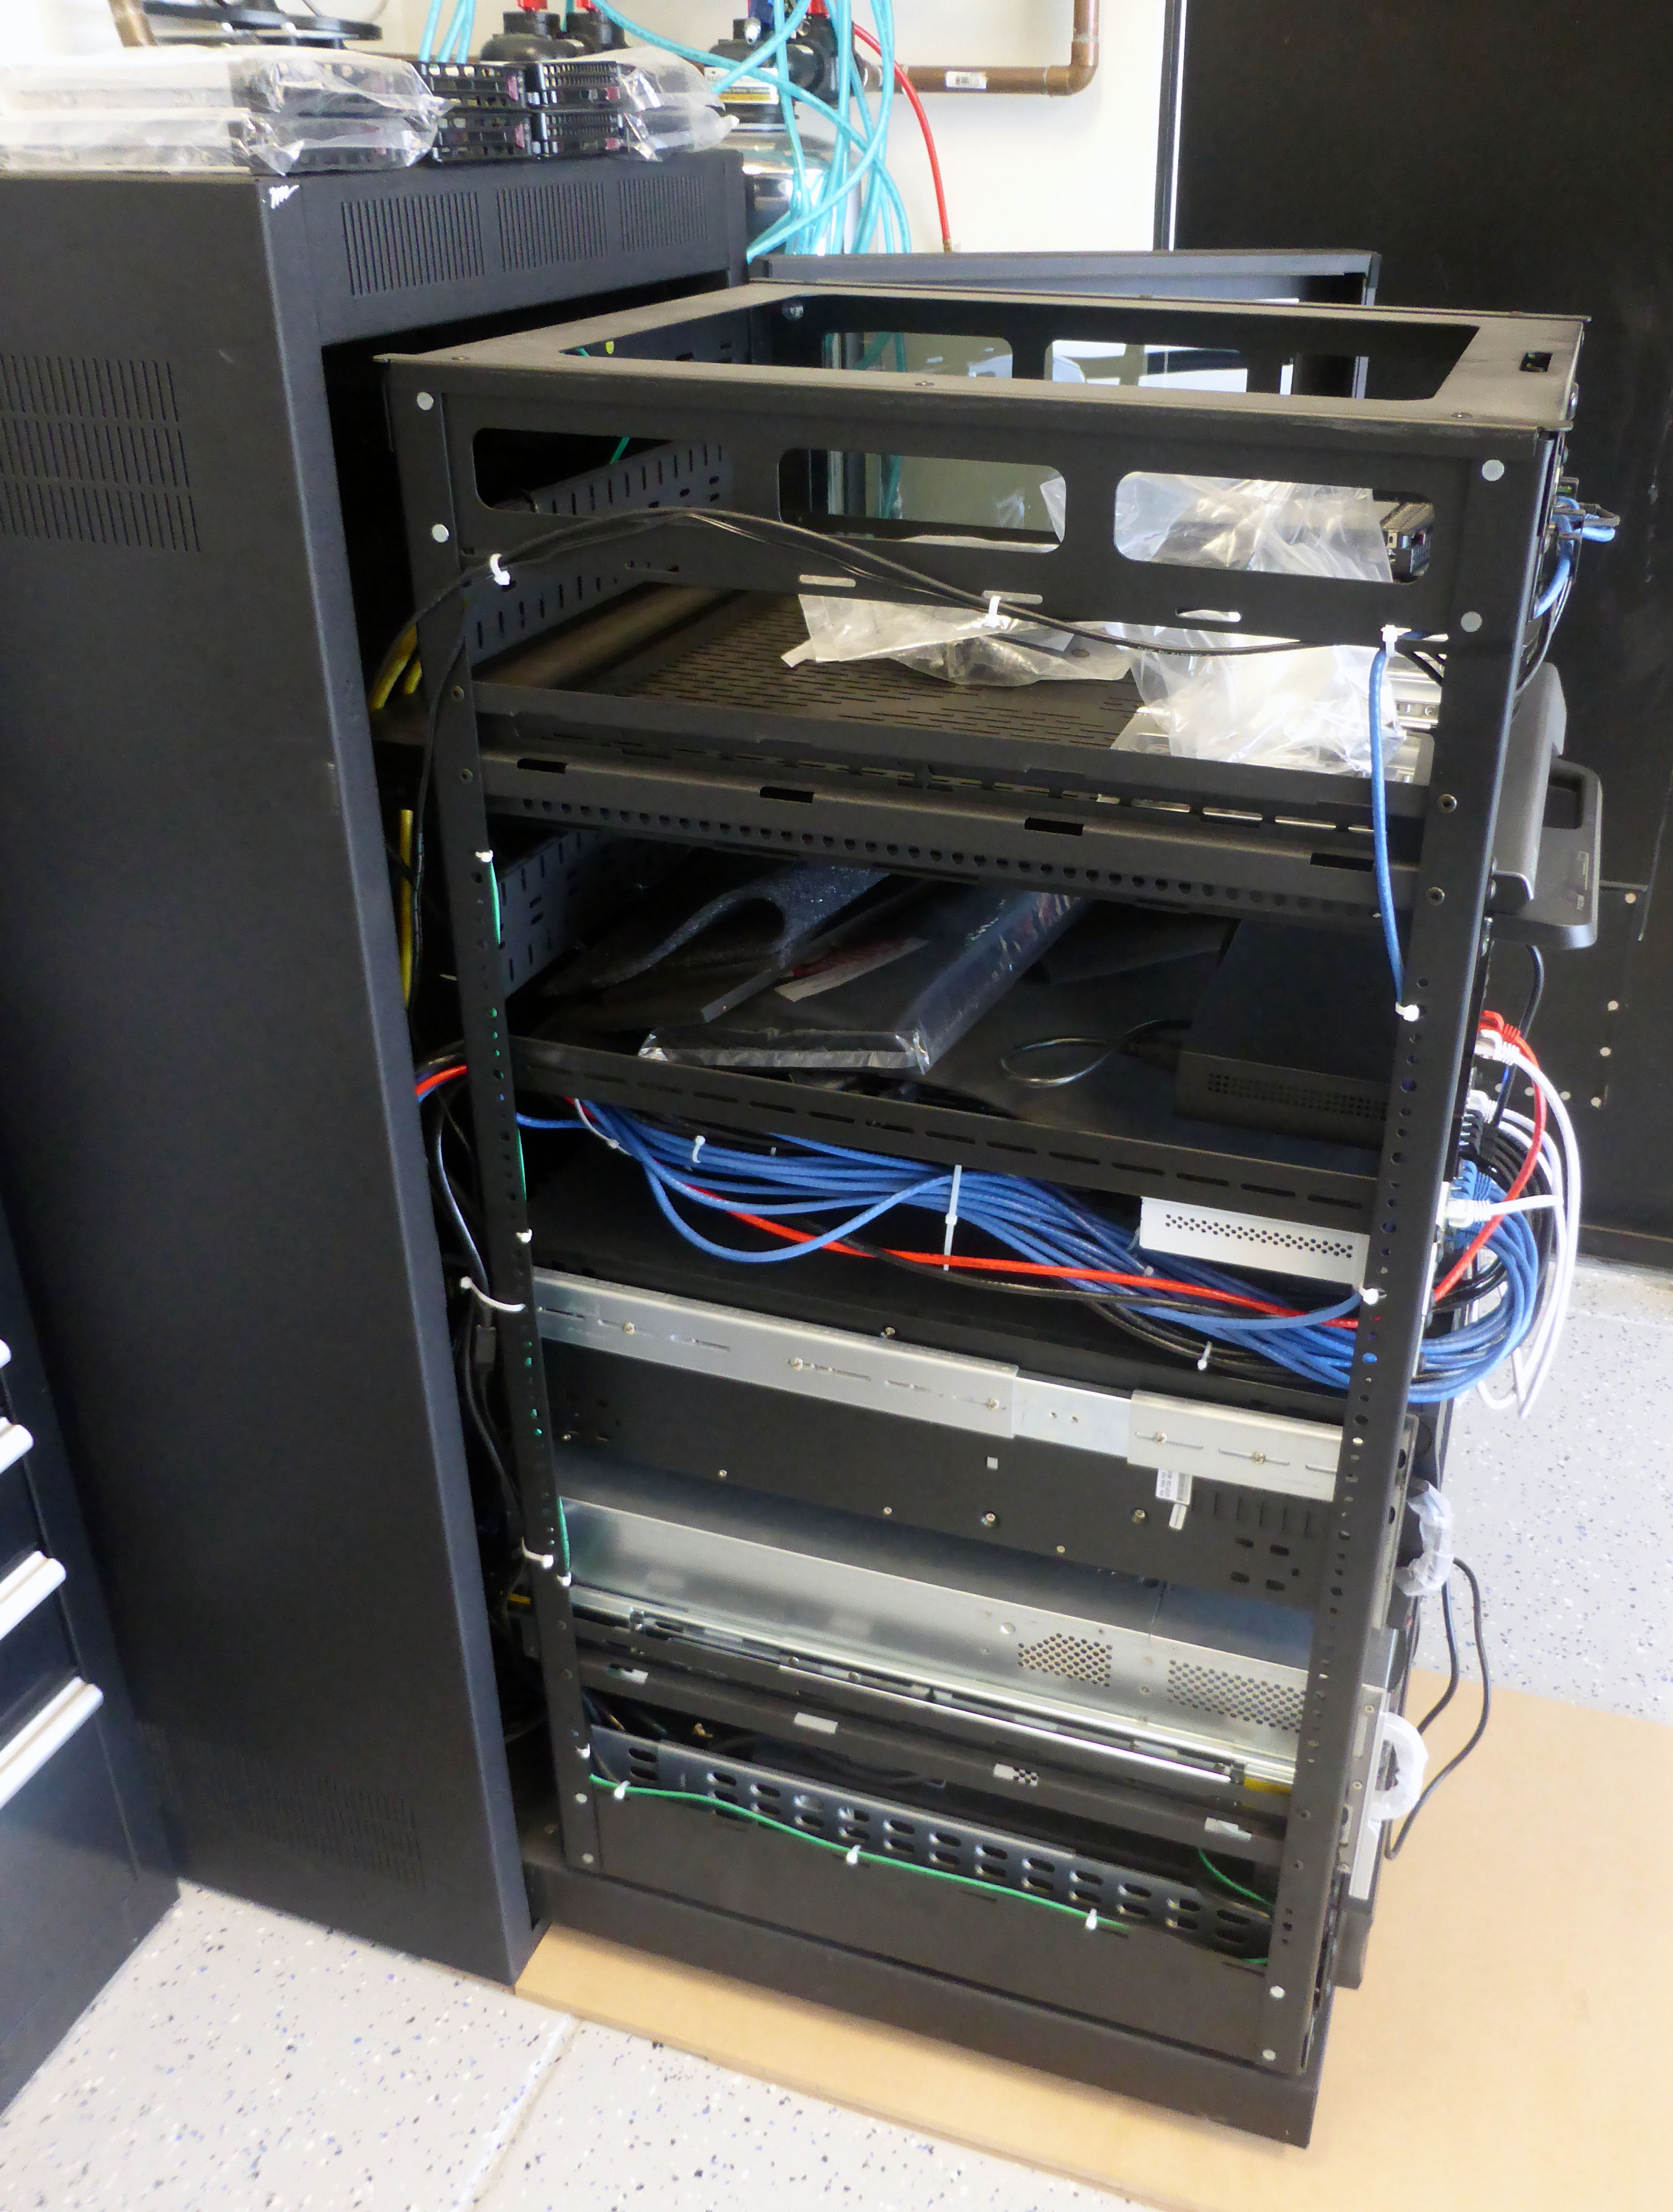
To clear the equipment the castors have to be pulled over the edge:
Rotated view:
The rarely used KVM drawer:
Extractor fans:
Night mode:

I’m curious – what’s the aluminium box with the pcbs sticking out on top in the first picture?
LikeLike
High power USB hub and USB ASIC Bitcoin miners, no chance of profit, but interesting to play with.
LikeLike