I planned whole a house energy monitoring setup when we built our house. But in all these years I never completed the Brultech GreenEye installation, I officially called that plan abandoned, and instead installed Sense energy monitors.
First a bit of a history, skip to the end if you’re not interested in my procrastination journey.
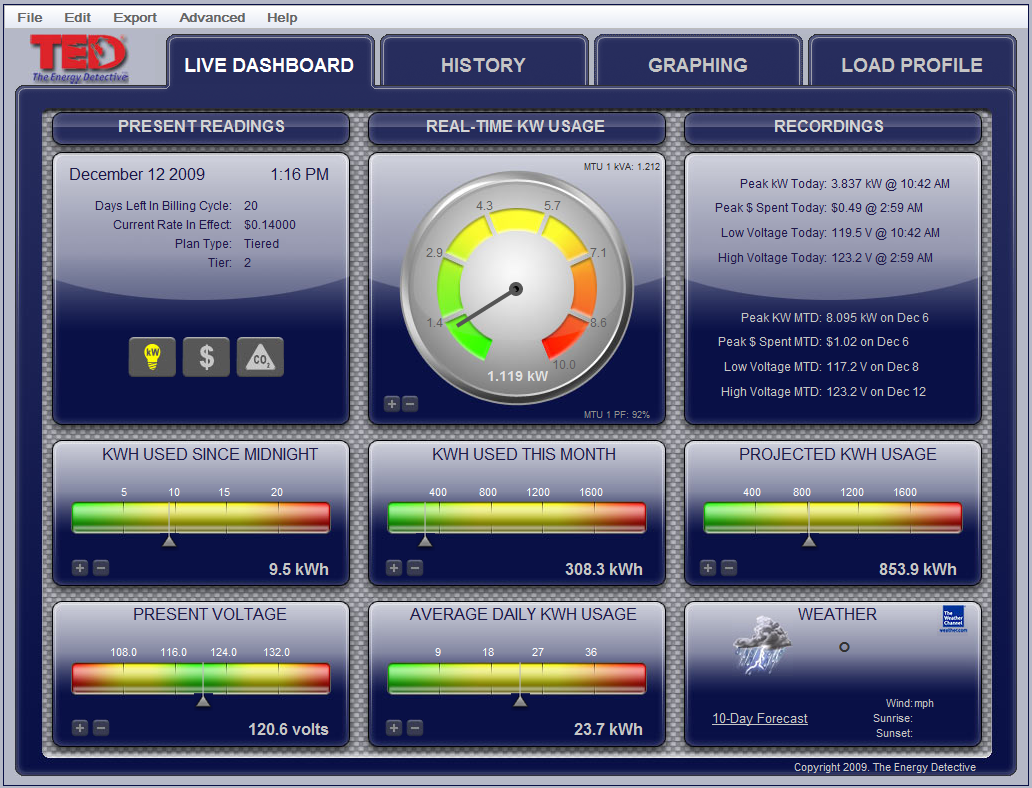
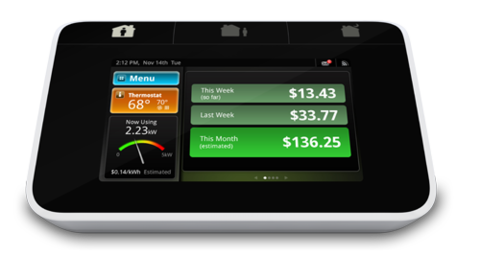
I installed my first energy monitor, circa 2009, a The Energy Detective TED-5000 connected to Google PowerMeter.


Although our power utility (SCE) had installed smart meters, it took them several years, circa 2012, to enable Home Area Networks (HAN). I installed an EnergyHub Home Base, that turned out to be too unreliable due to the too long distance for ZigBee from the meter to our condo. I ordered the starter kit, that also included an energy monitoring power strip, but the power strip was unusable due to the excessive loud high frequency noise it generated.


We started construction on our new house, circa 2012, and I made provision for power, water, and gas consumption monitoring. My research showed several potential candidates for whole house energy monitoring, and I narrowed it down to the following products; Smart Energy Groups SEGMeter, Open Energy Monitor emonTx, and Brultech Green Eye Energy Monitor.


I opted for the Green Eye Energy Monitor (GEM); it was a commercial product, with an active user community, that supported 4 pulse sensors (for gas and water) and 32 current sensors, and ethernet connectivity (or RS232 or ZigBee or WiFi).
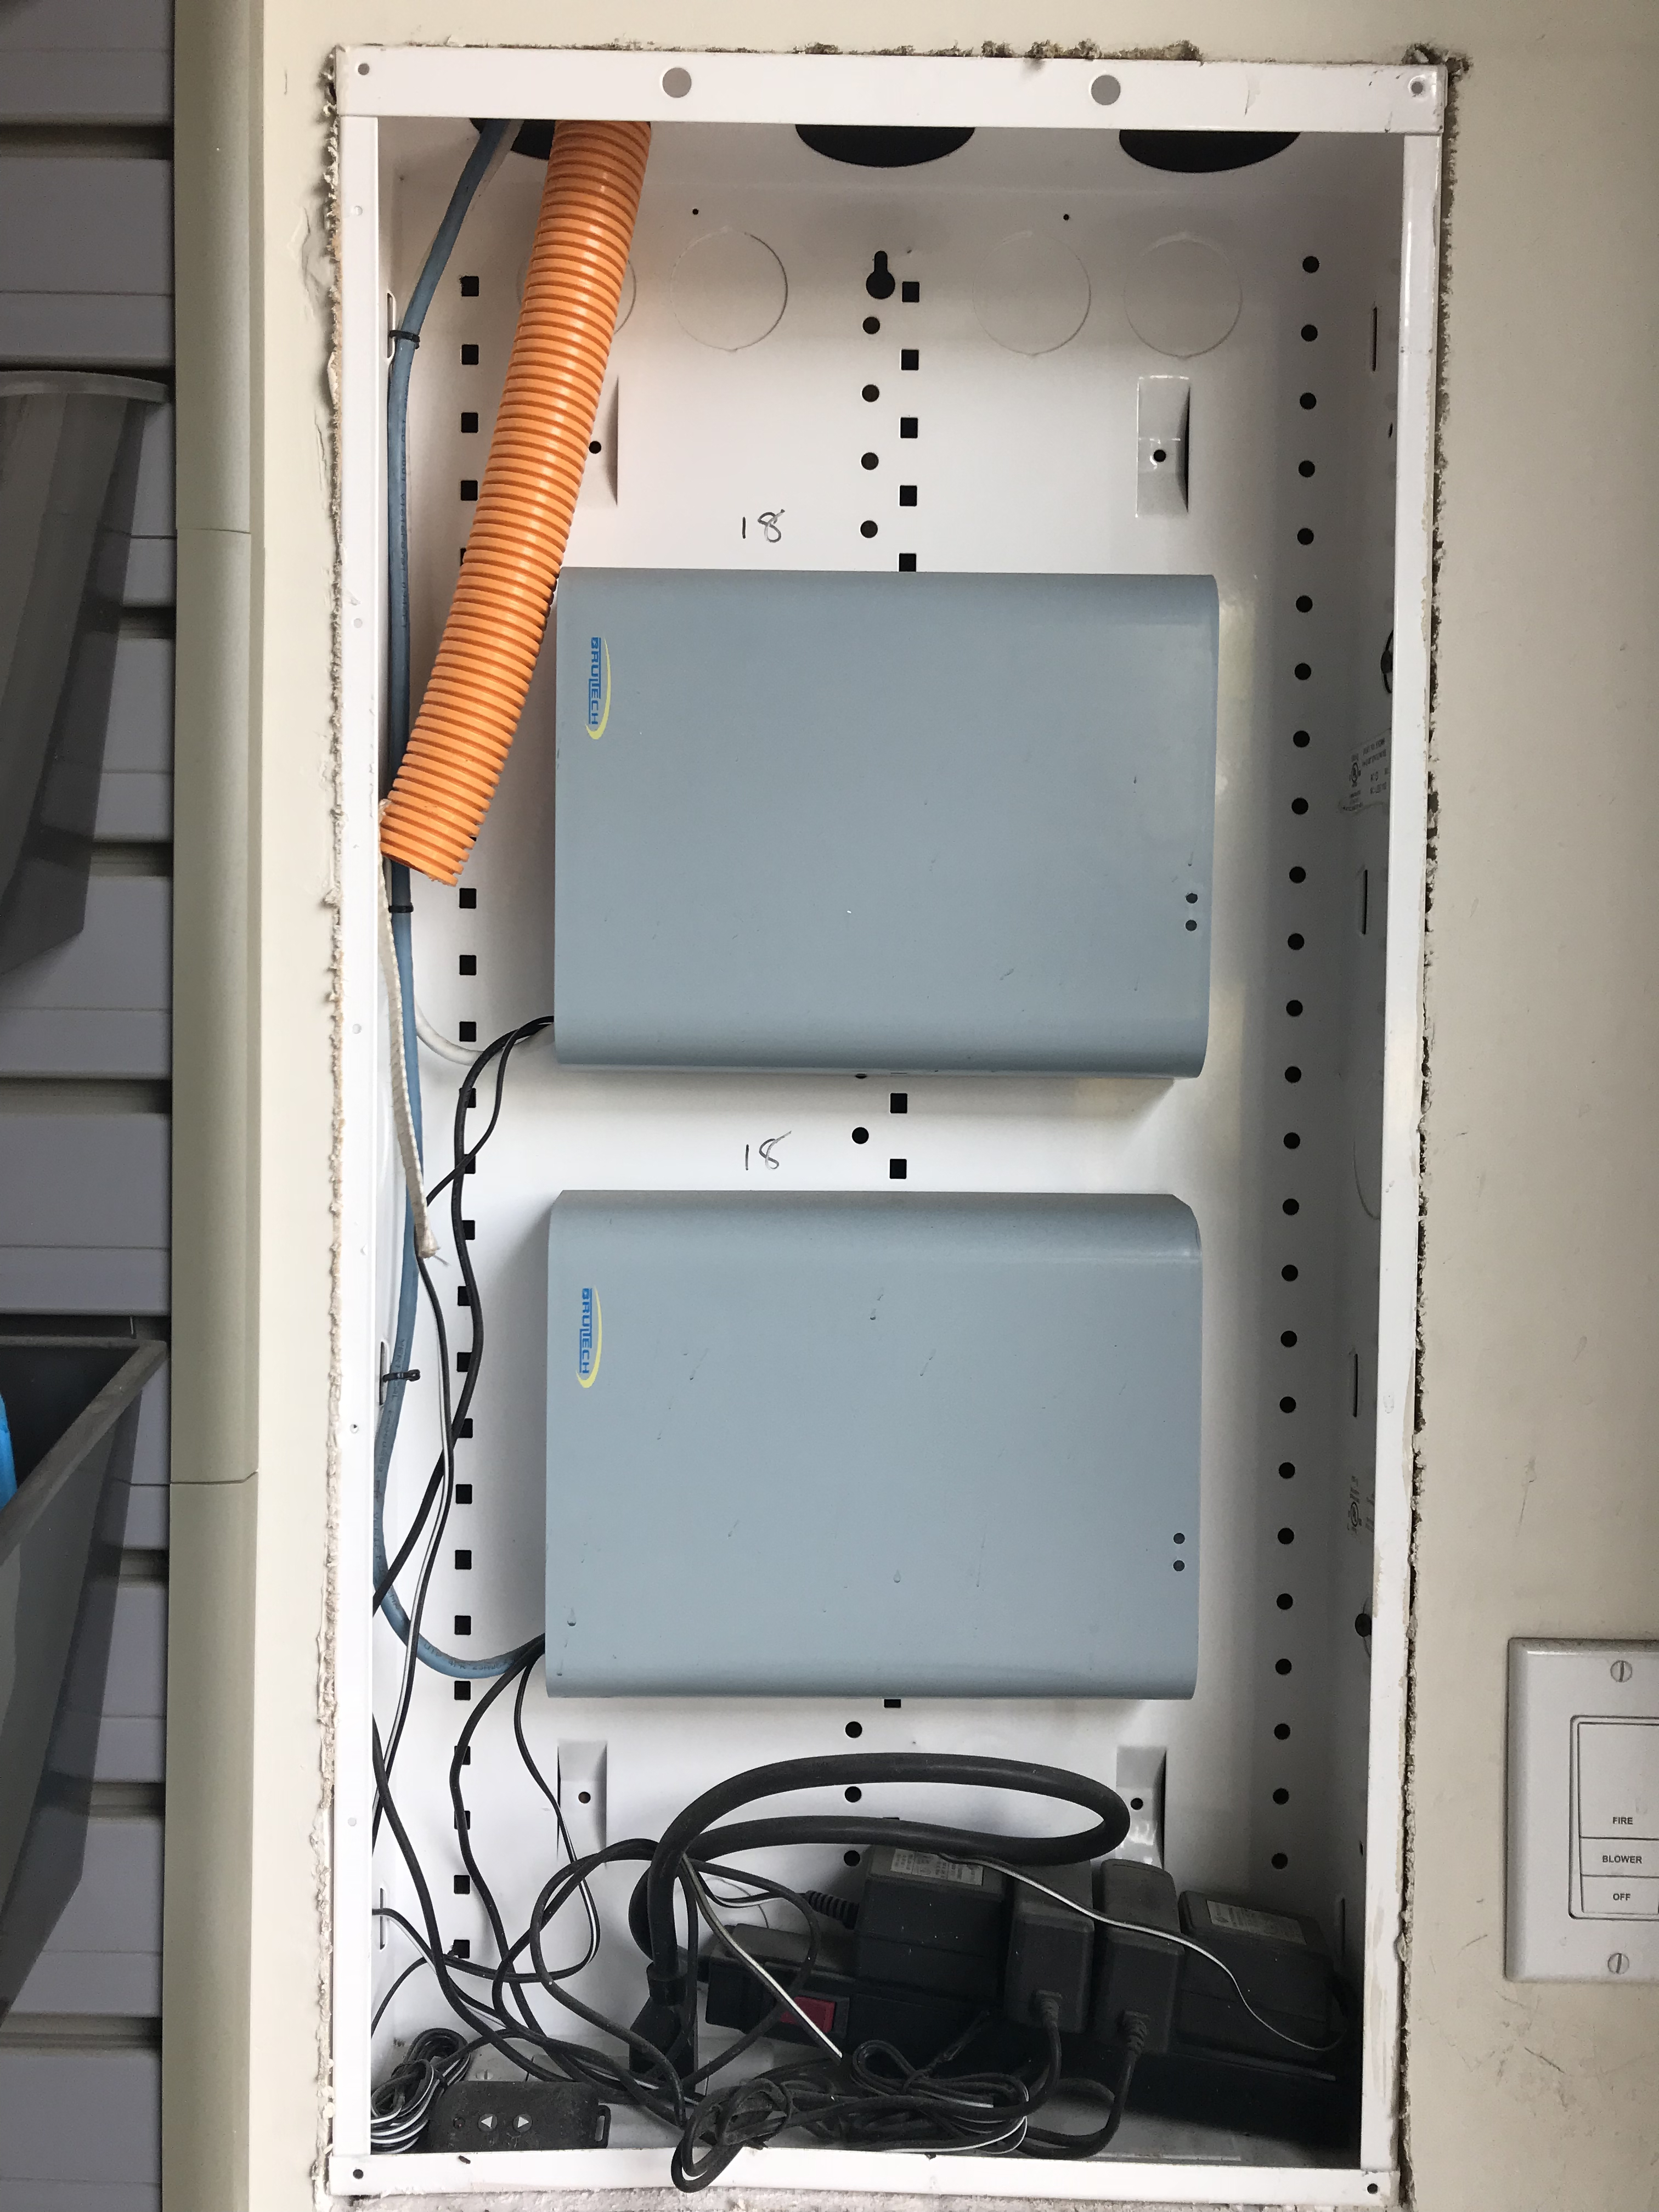
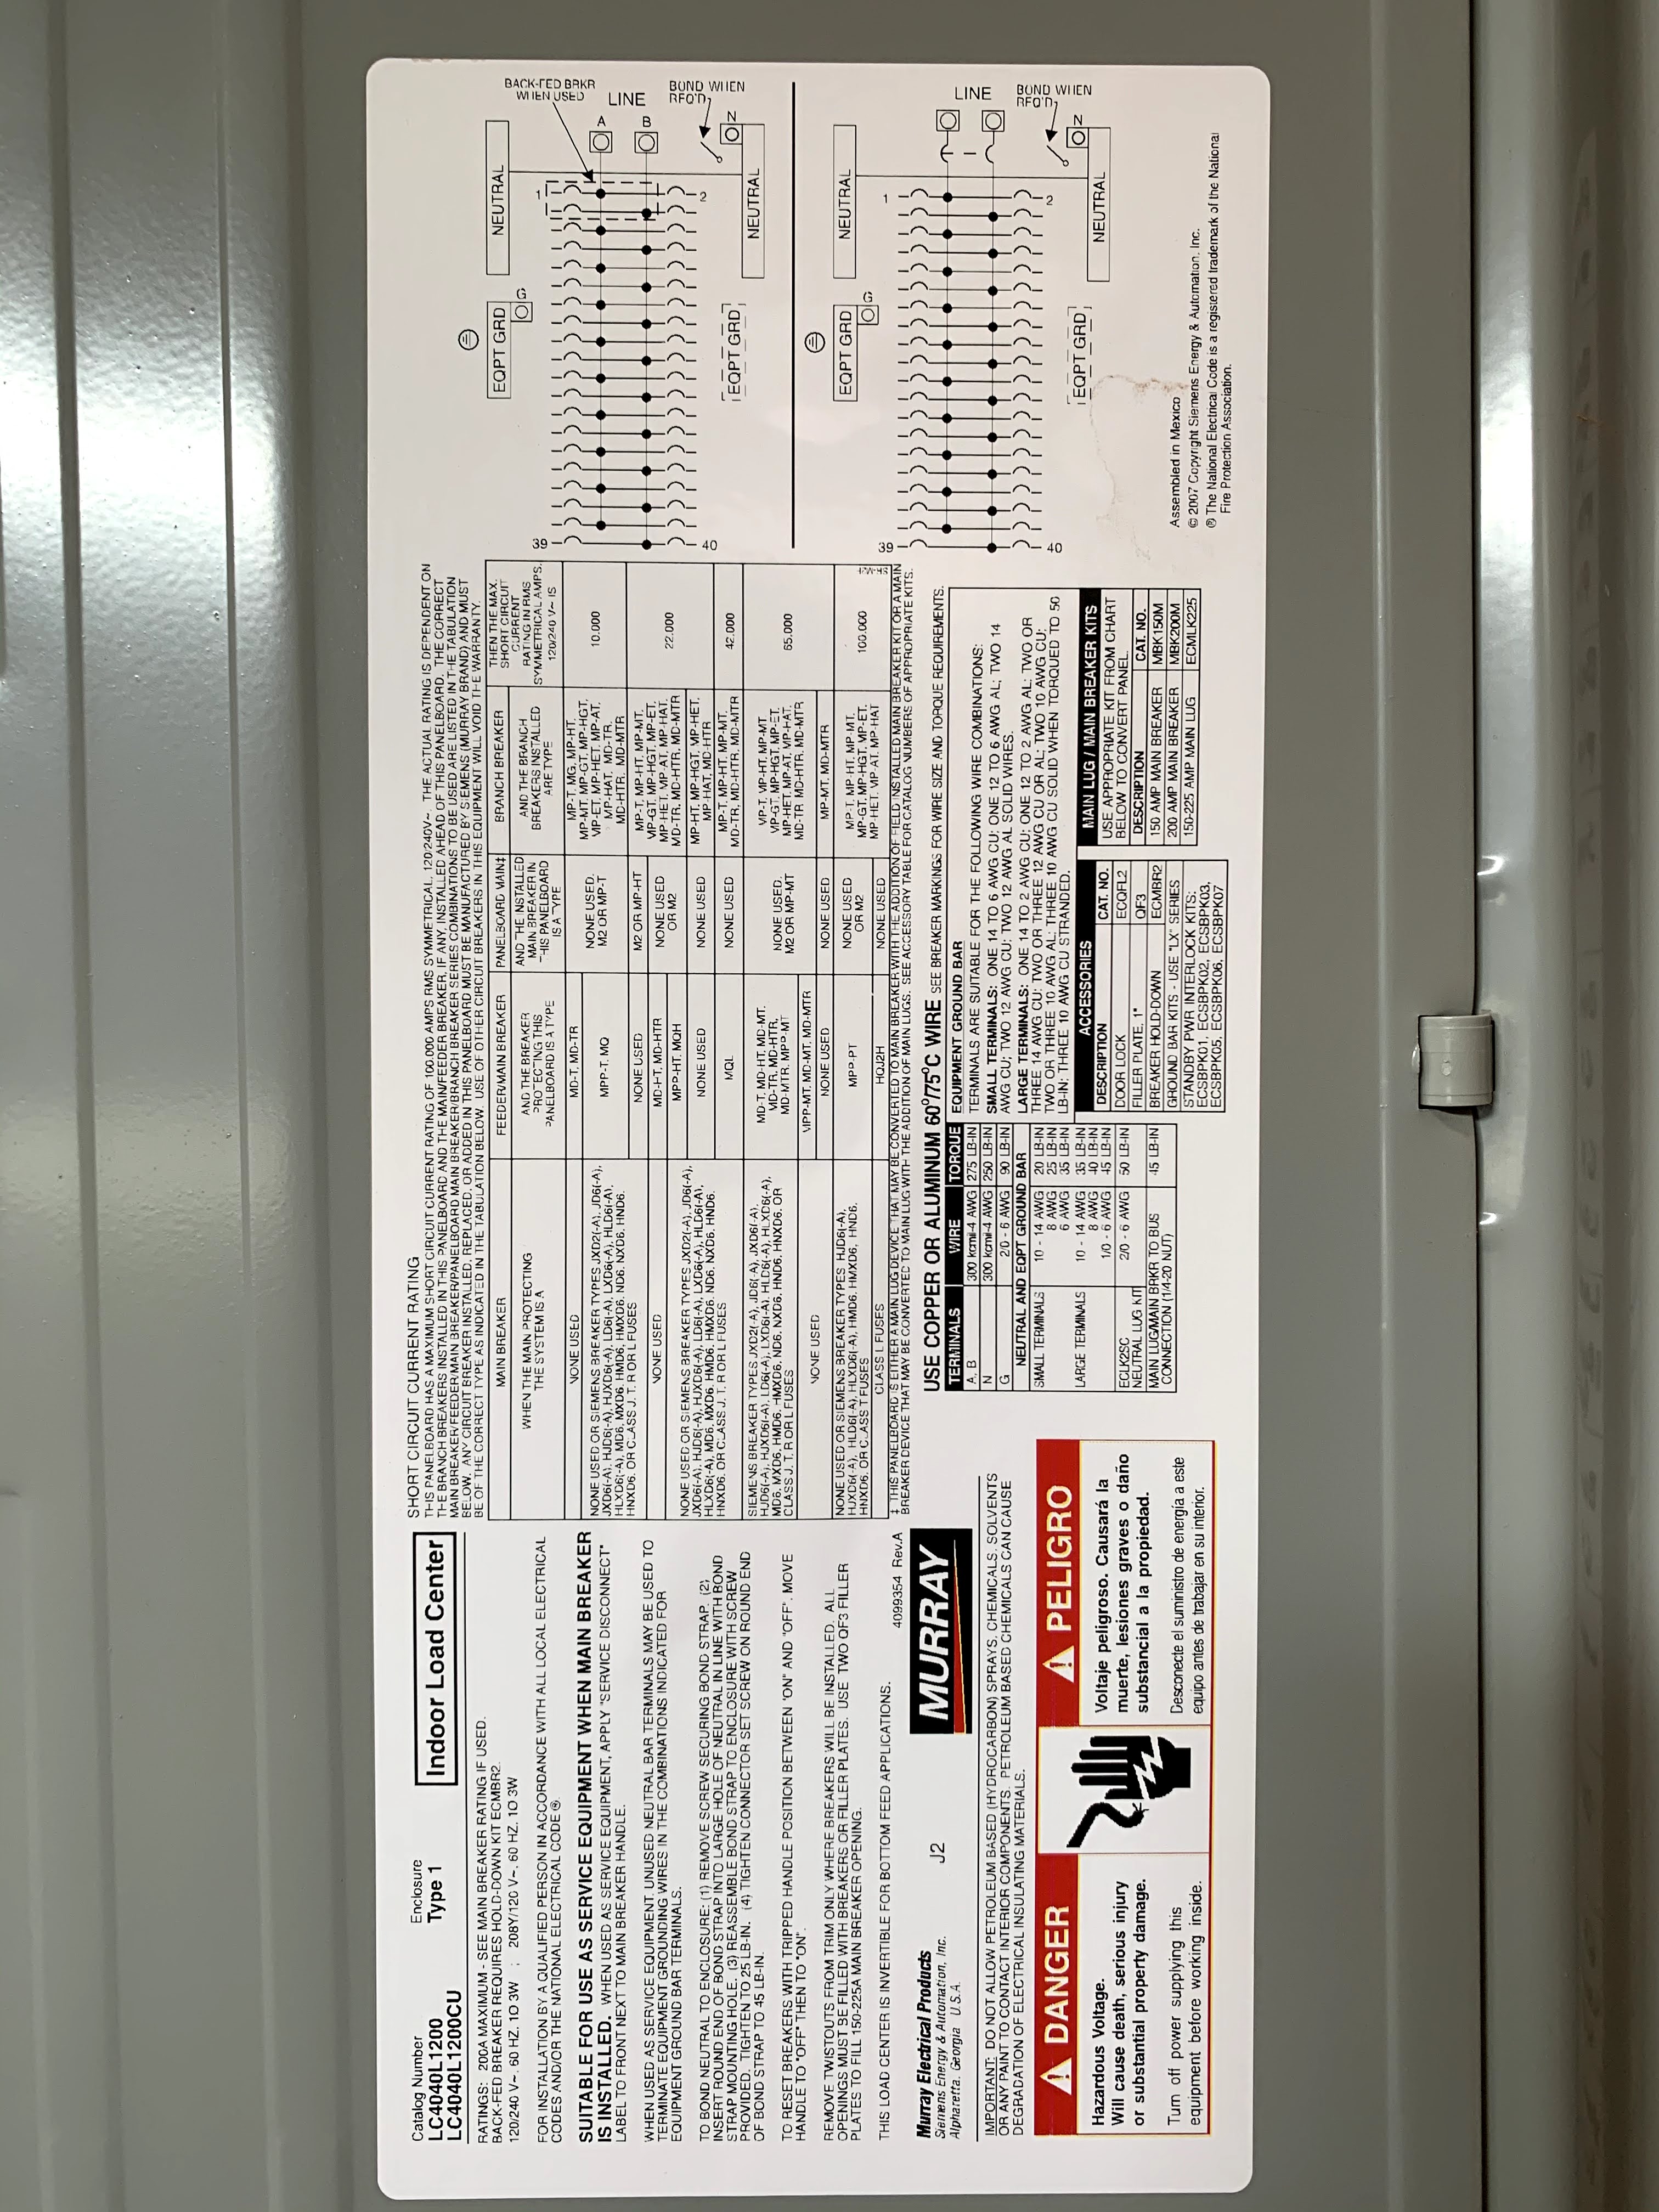
Our house has 400A service, with two 200A subpanels, and each panel has 42 breakers. Since the GEM only supported 32 circuits, I installed two GEM units, in recessed utility cabinets, near each panel, and ran a conduit between the electrical panel and the utility cabinet. This is where the long delay started; the electrician was reluctant to install the current transformers, the city inspector had no idea if it was allowed by code, and I did not want to cause undue delays or wasted installation effort, so I simply left the GEM’s disconnected, and closed the panels in order to pass inspection.

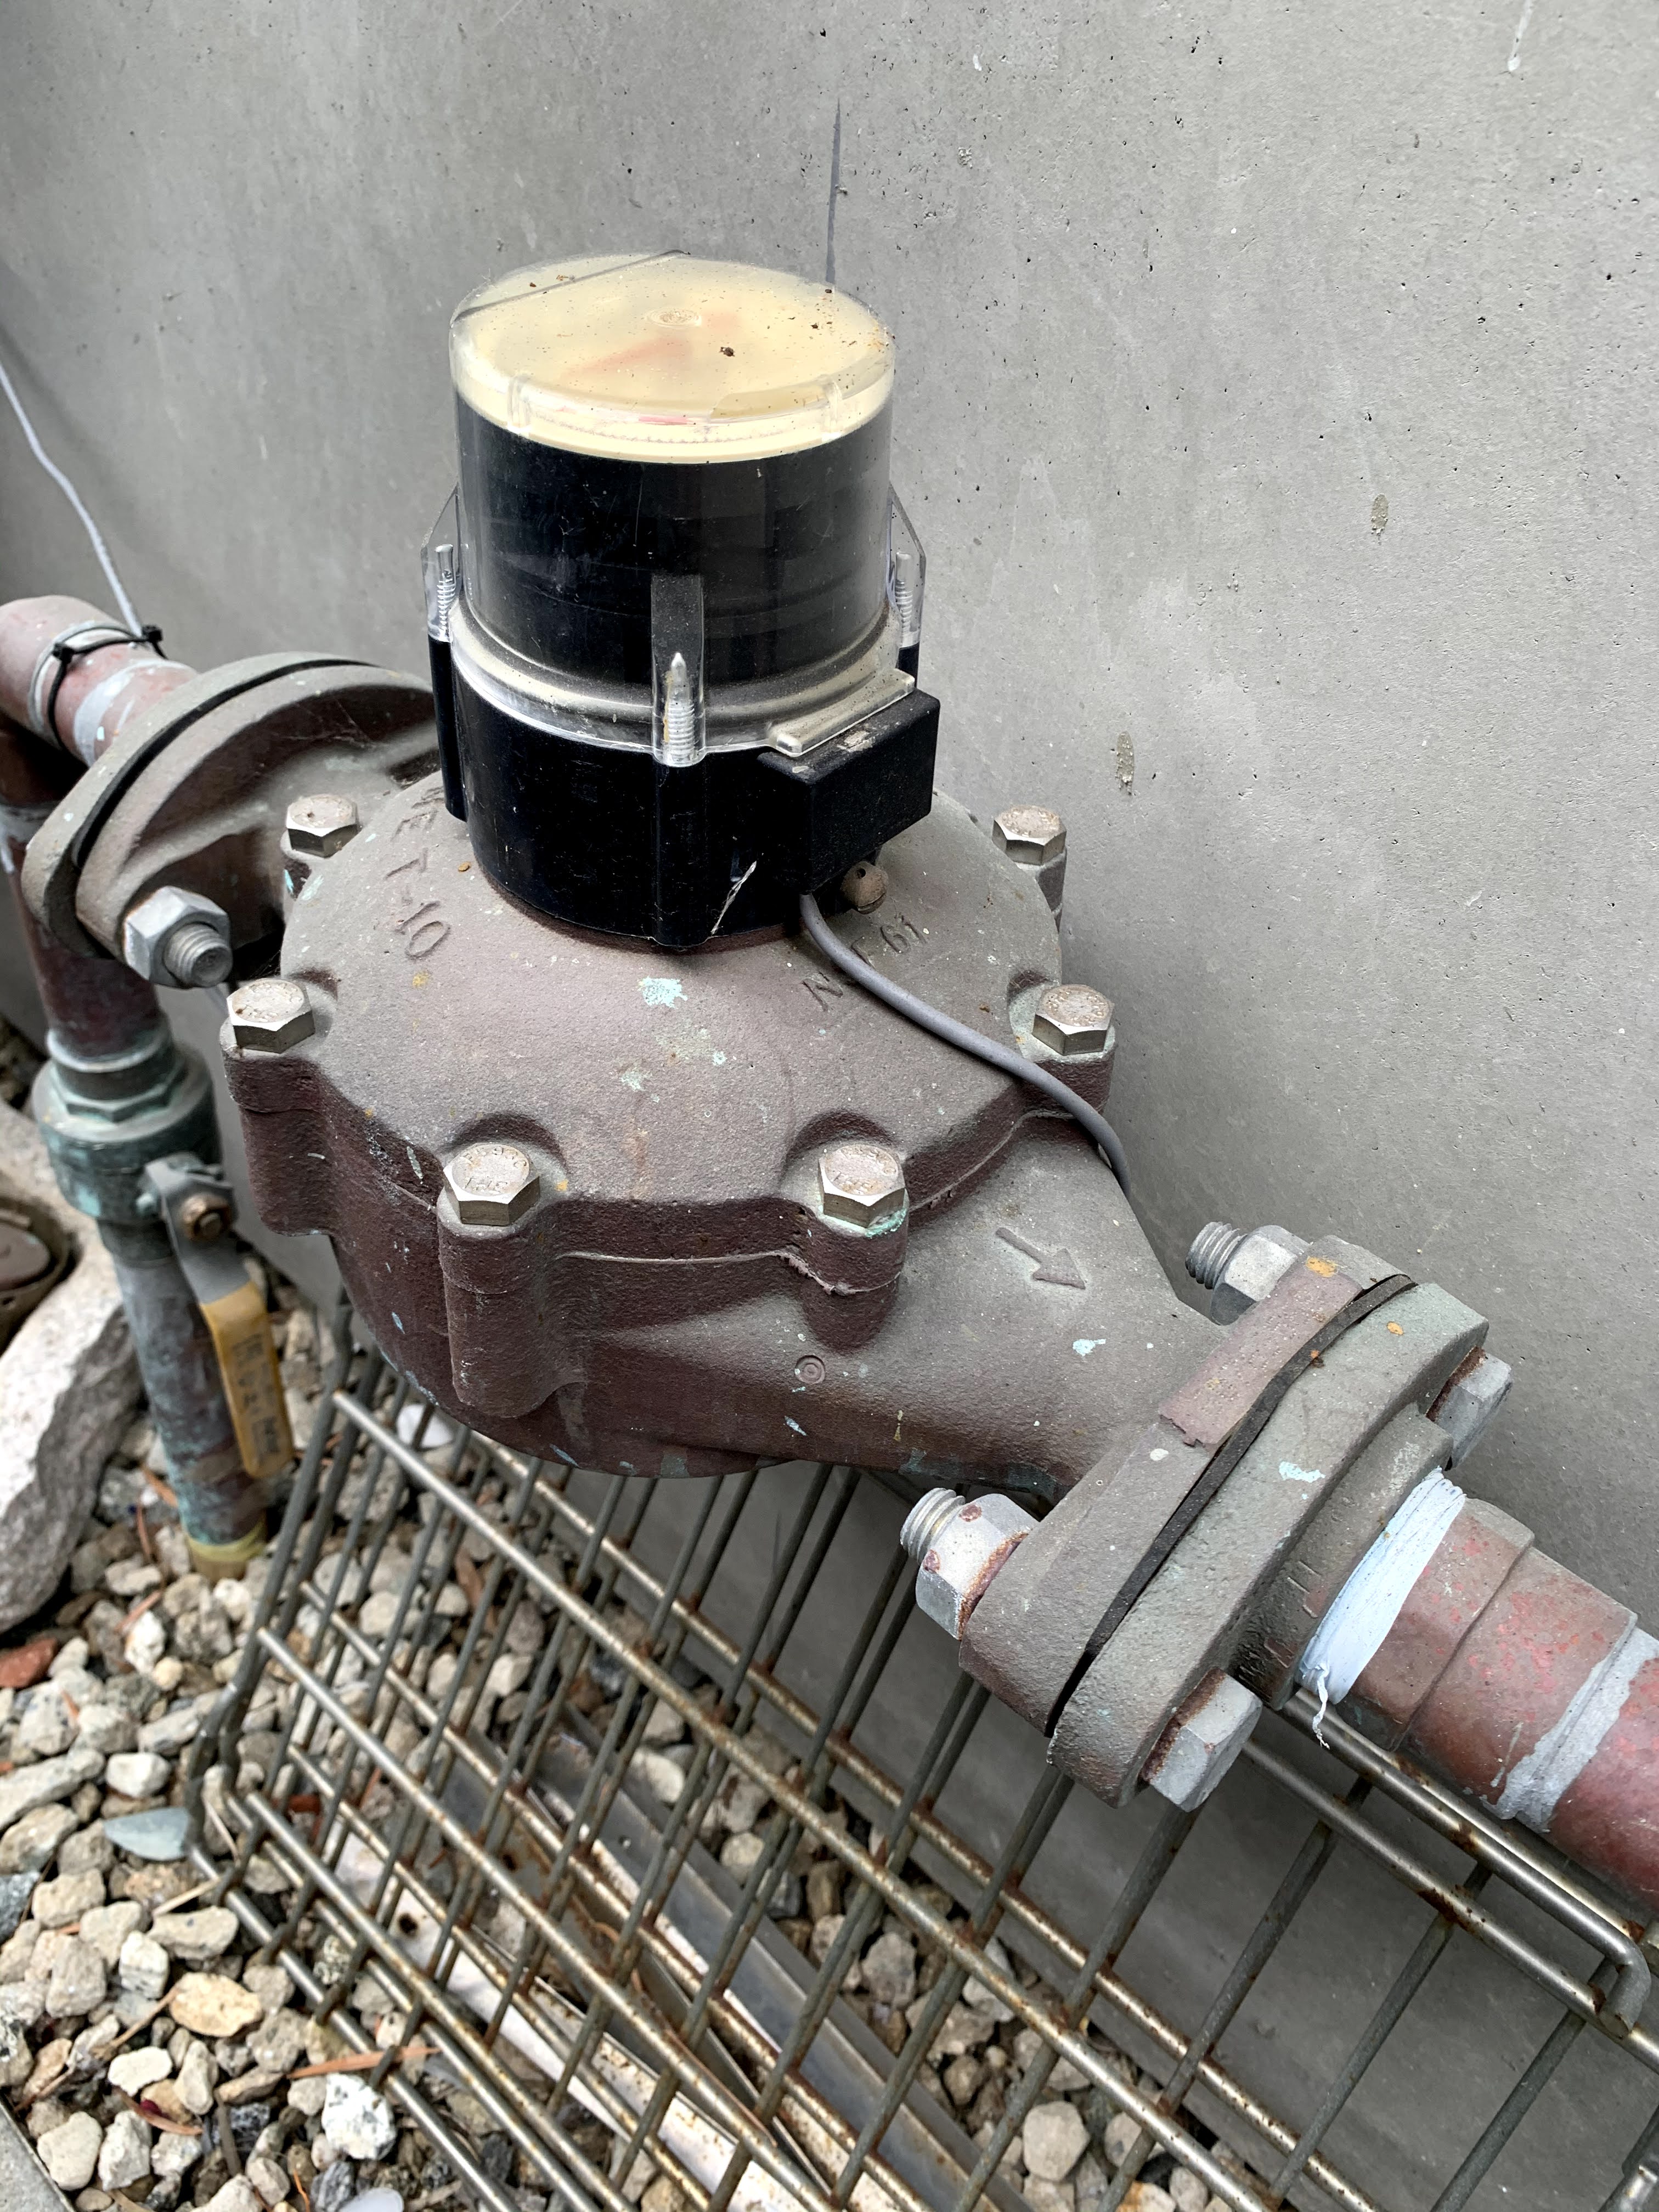
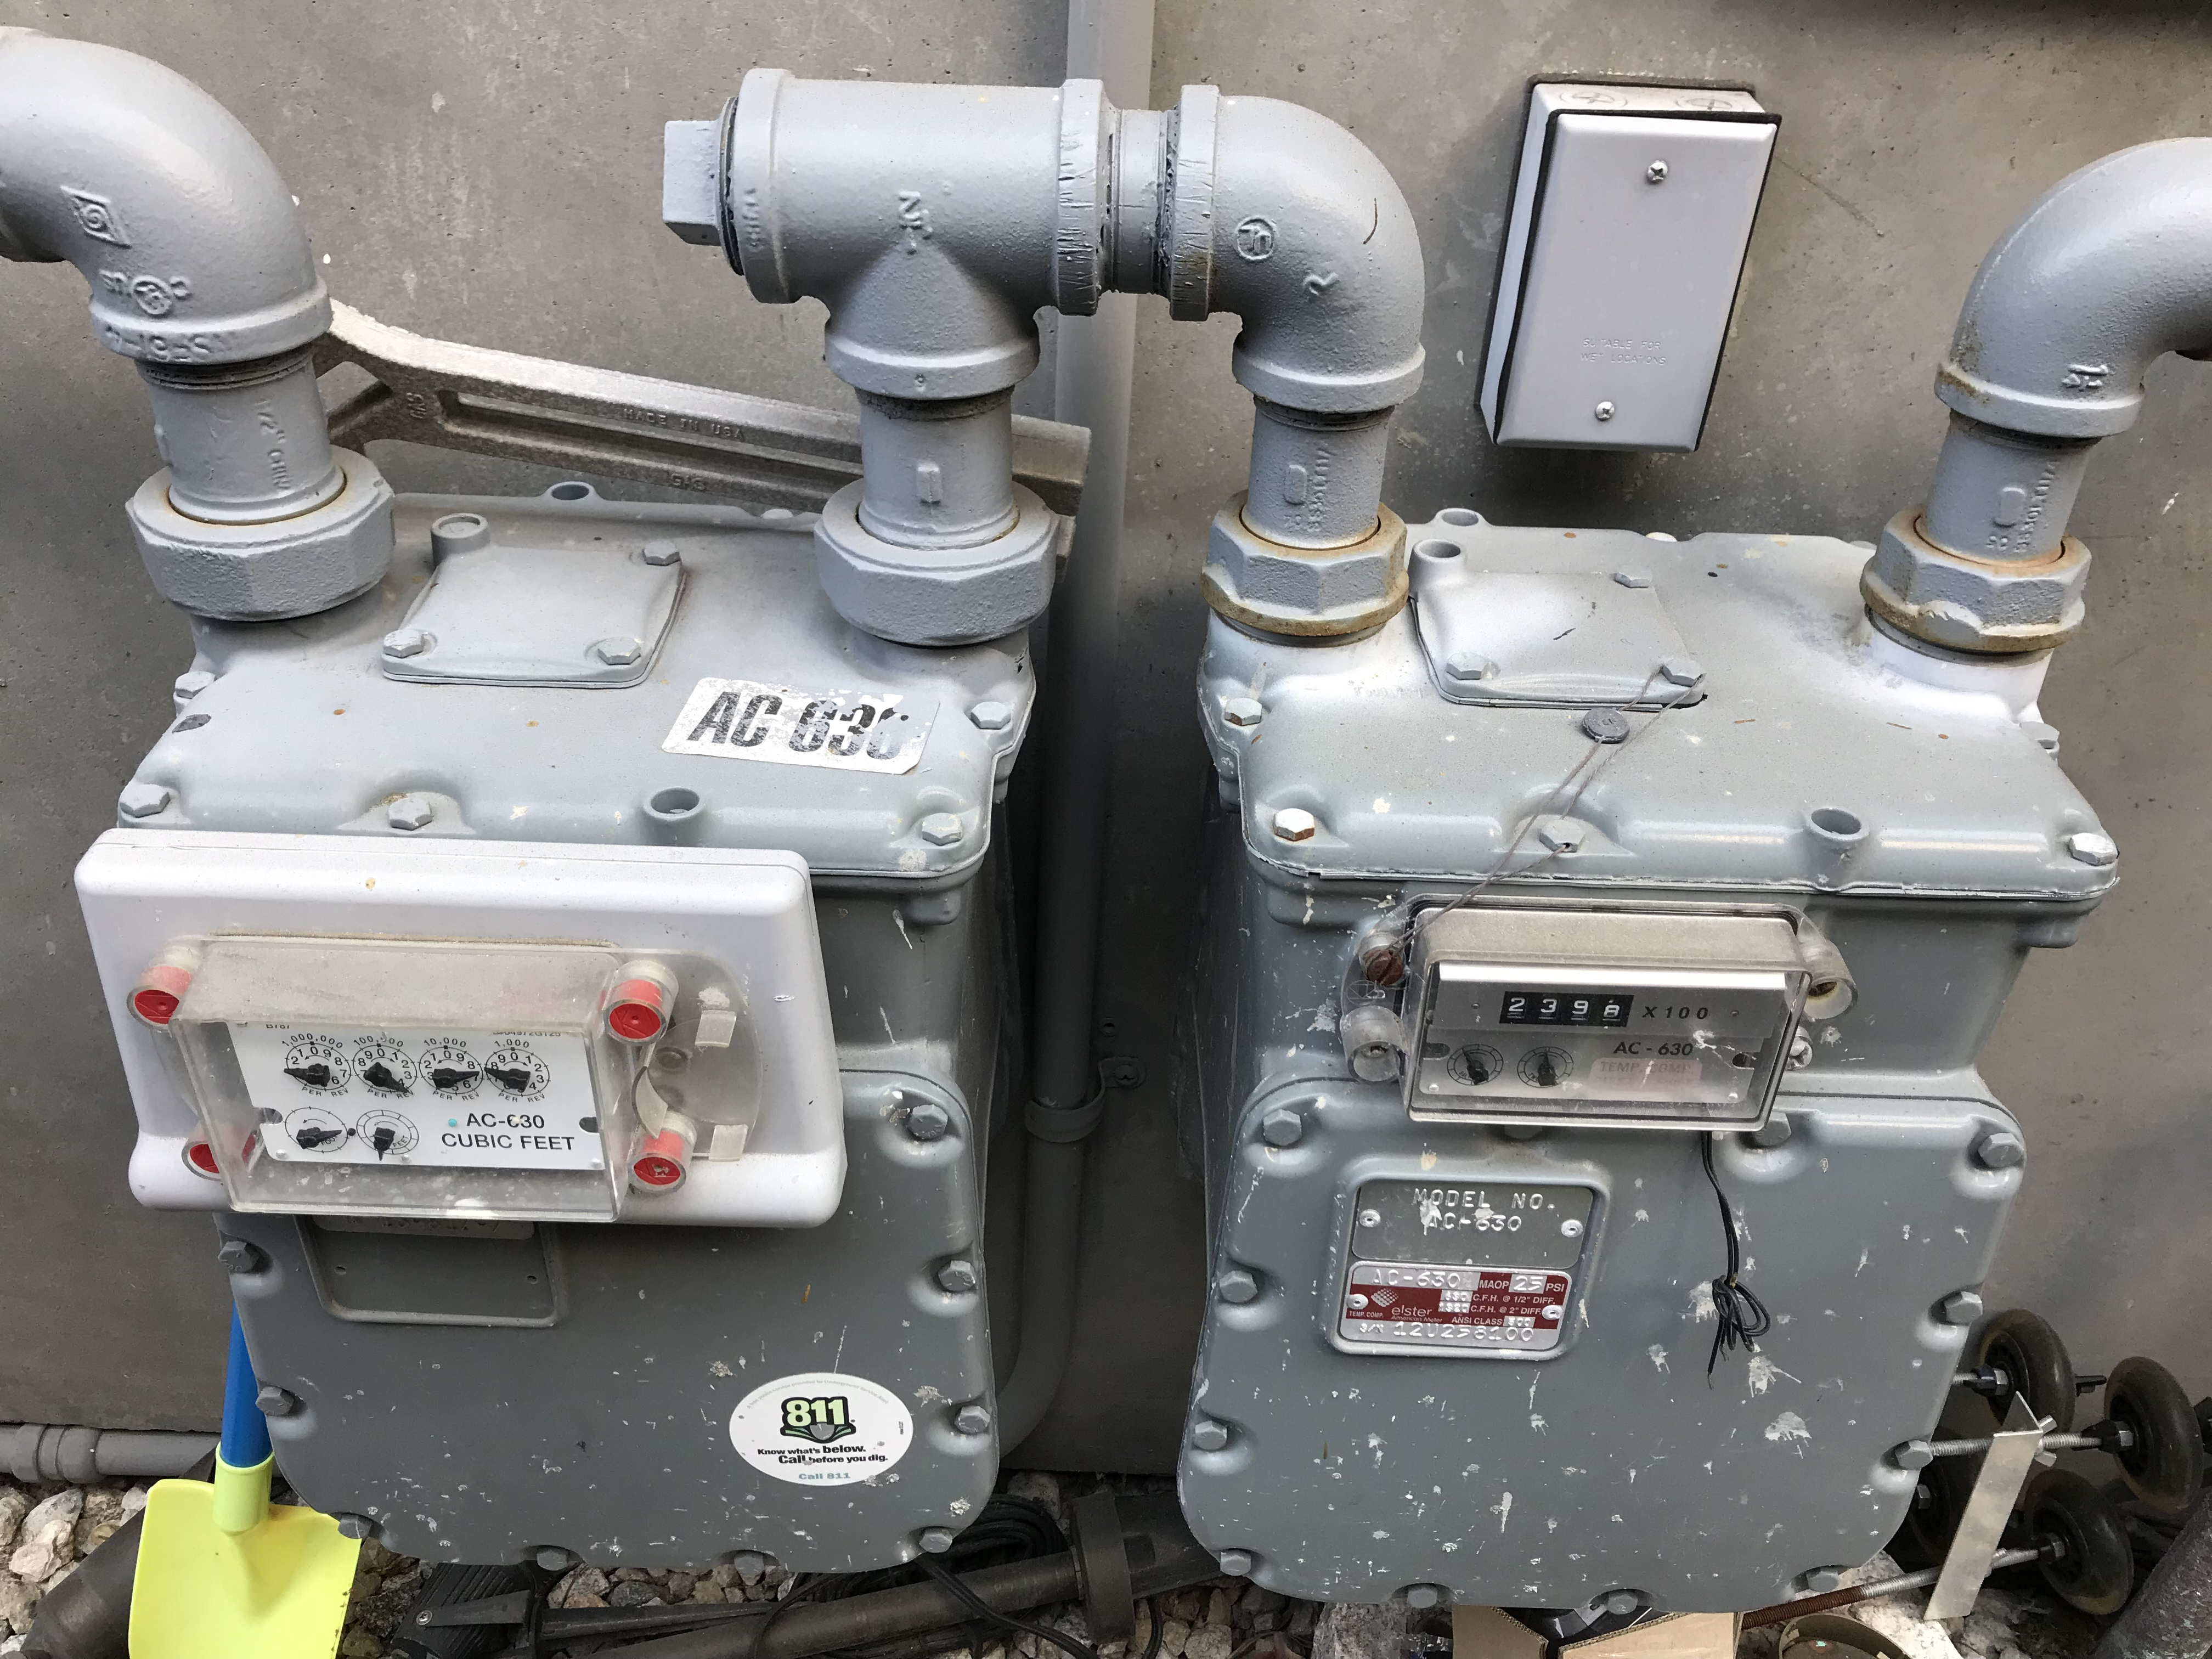
Another problem was the city utility water and gas meters, where I was not allowed to attach any type of device, not even an optical sensor, to the meters. The water meter was by the street, so even if I wanted to, I could not easily monitor it. I had to install my own dry contact pulse output gas and water meters inline with the utility meters, and to pass code, my meters had to be the same model as the utility installed meters, making it expensive. The water meter is a Neptune T-10 1½” Direct Read with a Tricon/S. The gas meter is an Elster American Meter AC630 with a Digital Pulser.
After we moved in, I endeavoured to install the current transformers, but I found the wire leads were too short to go from the electrical panel to the GEM’s. The leads are about 5′ in length, but the total required length between my electrical panels and utility panels is about 11′ at the furthest point. I really don’t understand if the short leads is a cost saving measure, or if there is not demand for longer leads. Either way, I would be happy to pay more for longer wires vs. having to extend 2 x 48 x 2 = 192 wires by hand, and looking at the forum, I’m not the only person with this problem. This effort further delayed the installation.
I eventually decided to run multi-pair CAT3 cables between the panels, connect the CAT3 and current sensor leads with terminal blocks, and safeguard the terminal blocks in plastic enclosures. I was concerned about the cable thickness, and if I’d be able to pull the cable through the connecting conduit, so I ordered various types of 12-, 25-, and 50-pair CAT3 cable samples. In retrospect, fitting all the leads in one 1″ conduit may have been a problem even if the CT leads were long enough.
While I waited for the CAT3 cable samples, I started setting up one of the GEM’s with a pair of CT’s for testing. The software configuration turned out to be frustratingly confusing, with the instructions and screenshots in the manuals not matching the current version of the tools, and documented configuration settings no longer being accurate. It took trial and error, and back and forth with support, to get the GEM updated and configured.
The firmware updates were particularly frustrating, e.g. the baud rate needs to be lowered else the update fails, why does the tool not lower the baud rate by itself, or the update added support for a password, and instead of setting the password to a known value, I have to do a complex password reset by means of button pushes timed with flashing LED’s.
The UX of the tools are indicative of engineers writing tools for themselves vs. their customers.


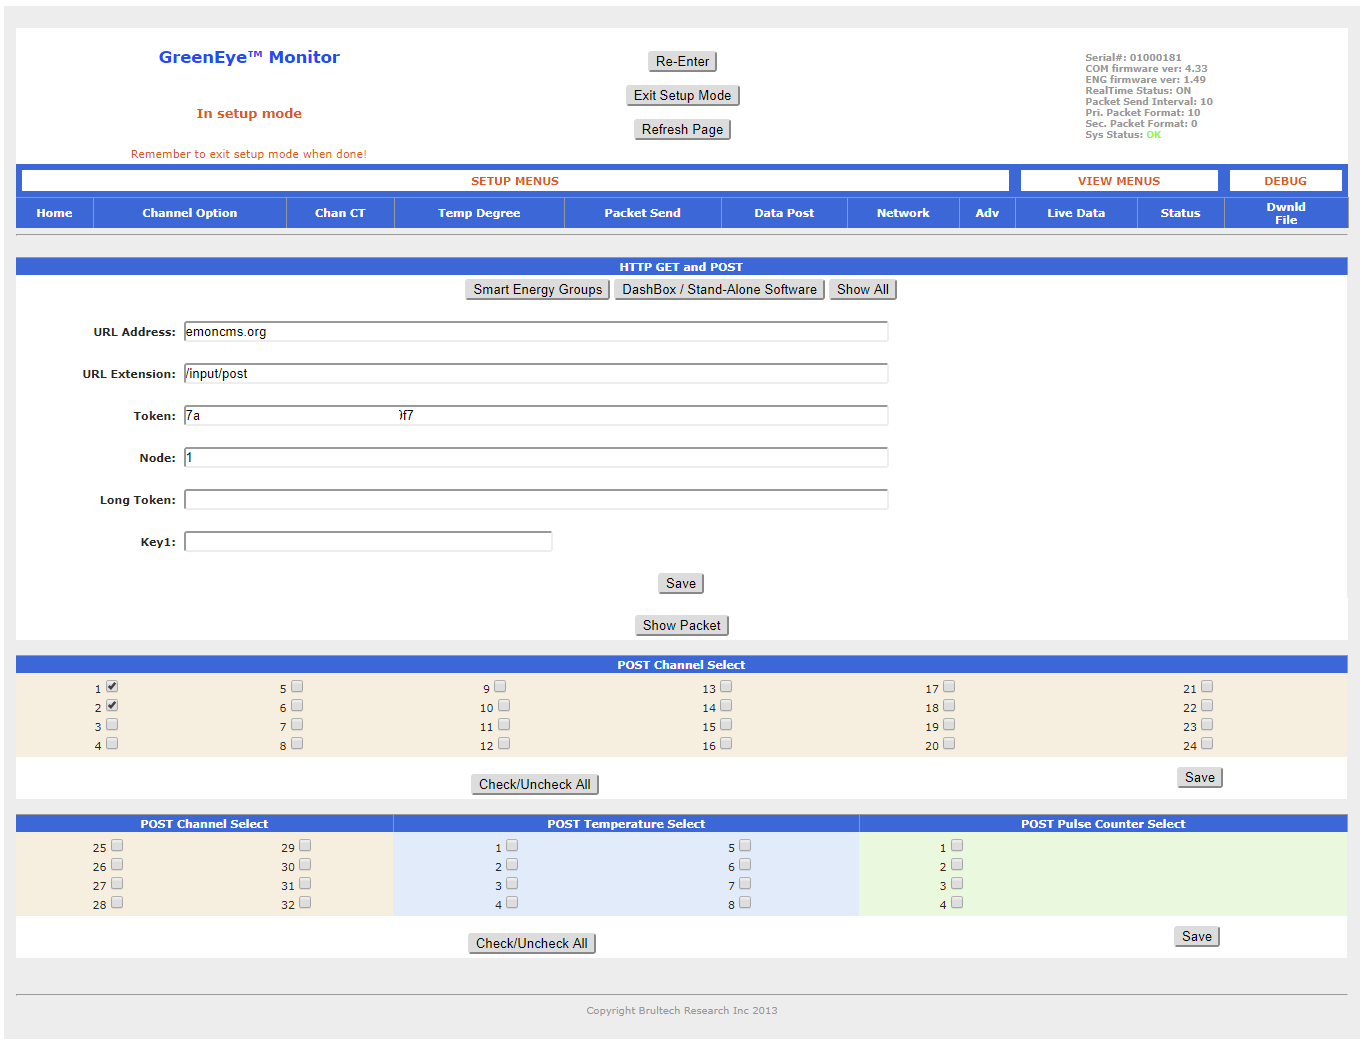
Once I had the GEM updated, and it was producing measurement data, I wanted to configure it to directly post data to the Open Energy Monitor emonCMS service. The configuration steps did not work, and neither the GEM nor the cloud hosted emonCMS provided any means of debugging or troubleshooting help.
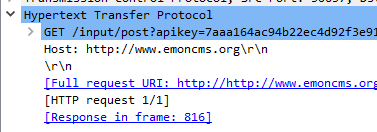
I resorted to troubleshooting the HTTP traffic, comparing my observations with the emonCMS API documentation. I use a Ubiquity UniFi Security Gateway, and with a bit of SSH and tcpdump magic, I could observe router traffic from WireShark running on my Windows 10 workstation.
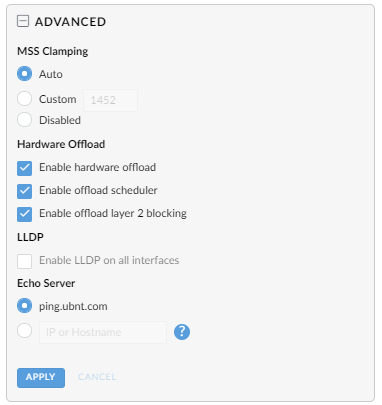
plink.exe -ssh admin@192.168.1.1 -pw secret "sudo tcpdump -ni eth0 -s 0 -w - not port 22" | "C:\Program Files\Wireshark\Wireshark.exe" -k -i -When I took the first captures I was confused by the many errors and partial traffic, a bit of head scratching, and I realized I have to disable hardware offload on the router, and the streams cleared up. Once I filtered out the HTTP traffic, the problem was clear, the GEM was creating an incorrectly formed HTTP GET request. The config UI calls for a URL, but the code prepends HTTP://, so the edit field needs to be a FQDN only.


I received my multi-pair CAT3 samples, and more so than ever it looked like a lot of effort to get all the current sensors hooked up, time passed, always easy to do nothing.
I abandoned the idea of using emonCMS, and since I adopted Home Assistant (HA) for my home automation needs, I wanted to connect my GEM’s to HA. Fortunately there was a GEM integration for HA, but I could not get it to work reliably when using multiple GEM units. I did some troubleshooting by writing a GEM network test tool, and it became clear that reliable operation requires both the GEM firmware and the WIZ110SR TCP to Serial bridge firmware to be up to date, and specifically configured. With a stable hardware platform, the author of the GEM HA integration assisted and rewrote the code to support multiple GEM units.


By now I had abandoned the idea of wiring all those GEM current sensors, and I was looking for alternatives.
If I could build today, I may go for a panel-integrated solution from Leviton, Eaton, or ABB. I do anticipate US home building code for energy efficiency eventually catching up to European high standards, e.g. watch Grand Designs on Netflix, and I anticipate home energy management systems of the future will look more like commercial building energy management systems of today, but readily available and affordable.
On the open source front, the general availability of integrated power metering devices, like the ATM90E32AS, have made devices cheaper and more capable, and the CircuitSetup Expandable 6 Channel ESP32 Energy Meter is one of my favorite designs.
I run a Fluke VR1710 power quality monitor at my house, and I really would like to see more open source power quality monitoring projects. The only active open source power quality monitoring project I am aware of, is the Open Power Quality Project from the University of Hawaii. Their hardware project uses an AMC1100 isolation transformer with a AD7684 ADC for signal analysis.
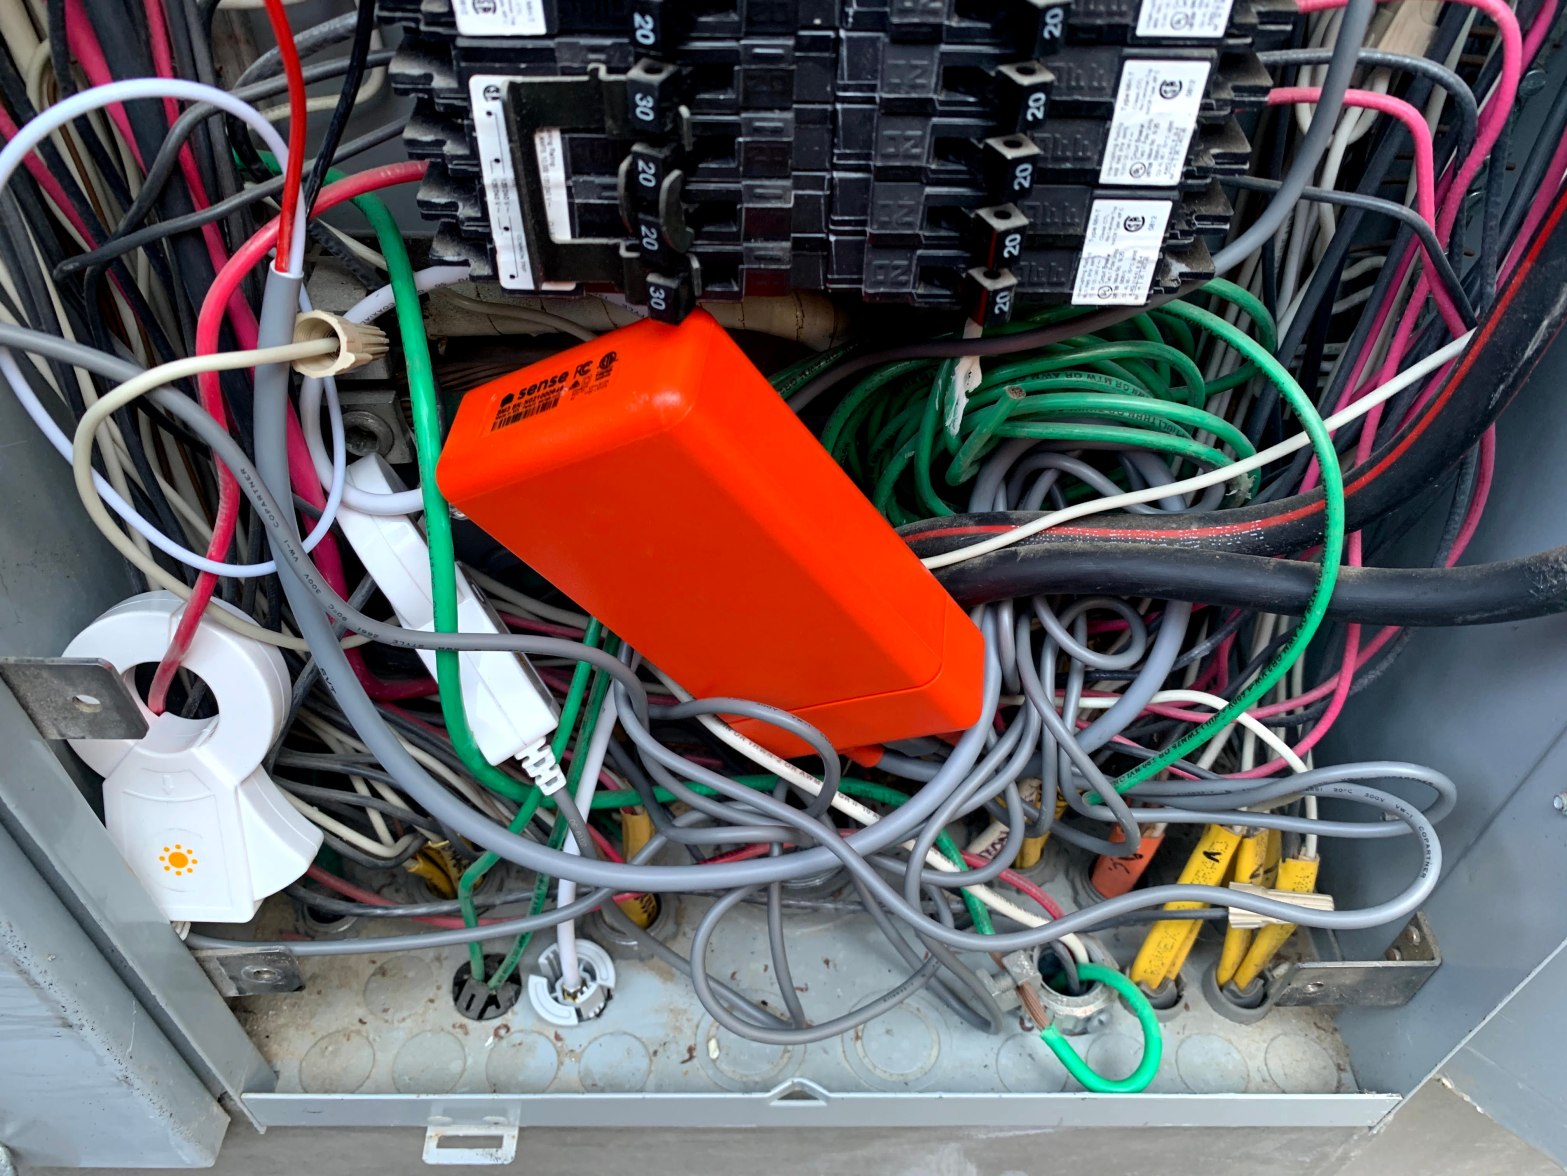
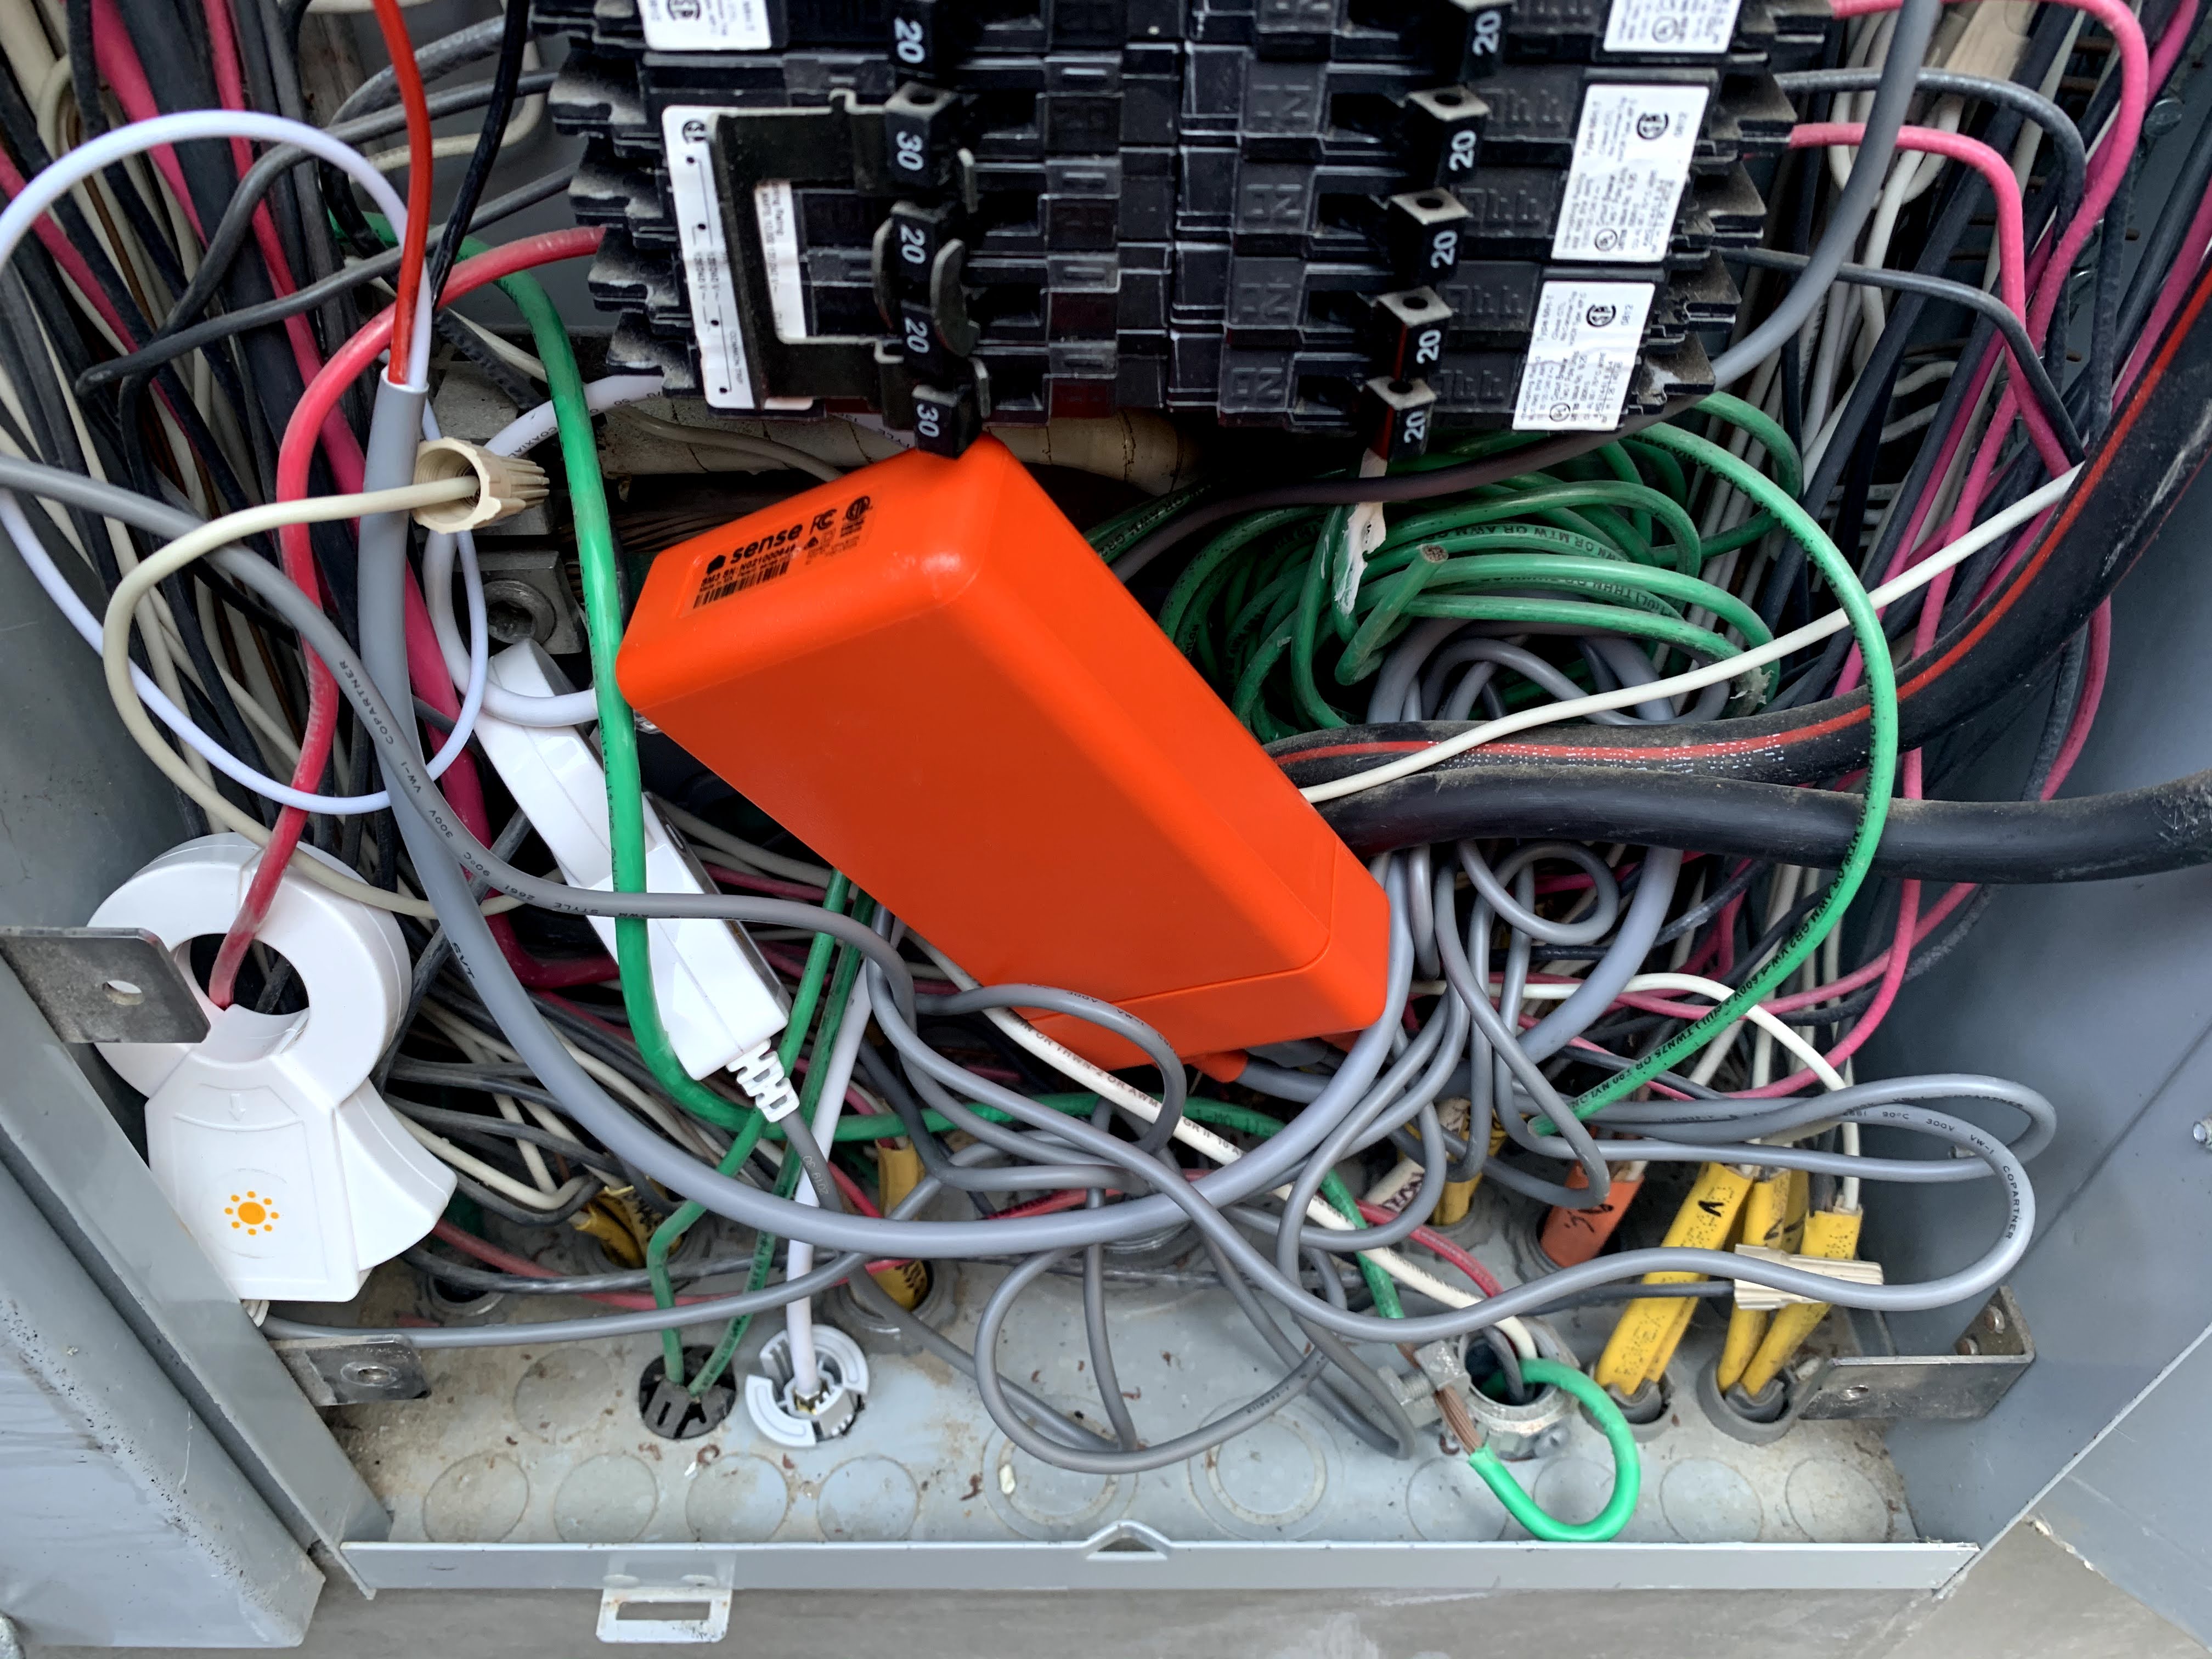
I decided to forego the installation complexity of per-circuit monitoring, and opted to install two Sense energy monitors, one with solar monitoring, and one without. Like the Phyn Plus does for water, the Sense uses machine learning to identify individual electrical loads by means of signal analysis. I’ve been aware of Sense for a number of years, and a detractor had always been the lack of 400A circuit support.
My home uses a 400A split circuit, with the 400A feed split into two 200A breaker panels. Sense only recently added support for 400A circuits, but they use the solar port for the second 200A circuit. This still won’t work for me, as I have solar and 400A, so I either need support for three sets of current sensors, or a current sensor that is rated for 400A. Like many other users with a similar configuration I opted to install two Sense units, one with Solar for one panel, and one without solar for the other panel. The downside is that you need two separate Sense accounts. Some users do report installing the 200A rated current clamp around the 400A feed, but this requires the electrical supplier to agree to the installation, and open the restricted supply side panel, and the clamp to fit around the wires, and general usage to not exceed 200A to avoid clipping.
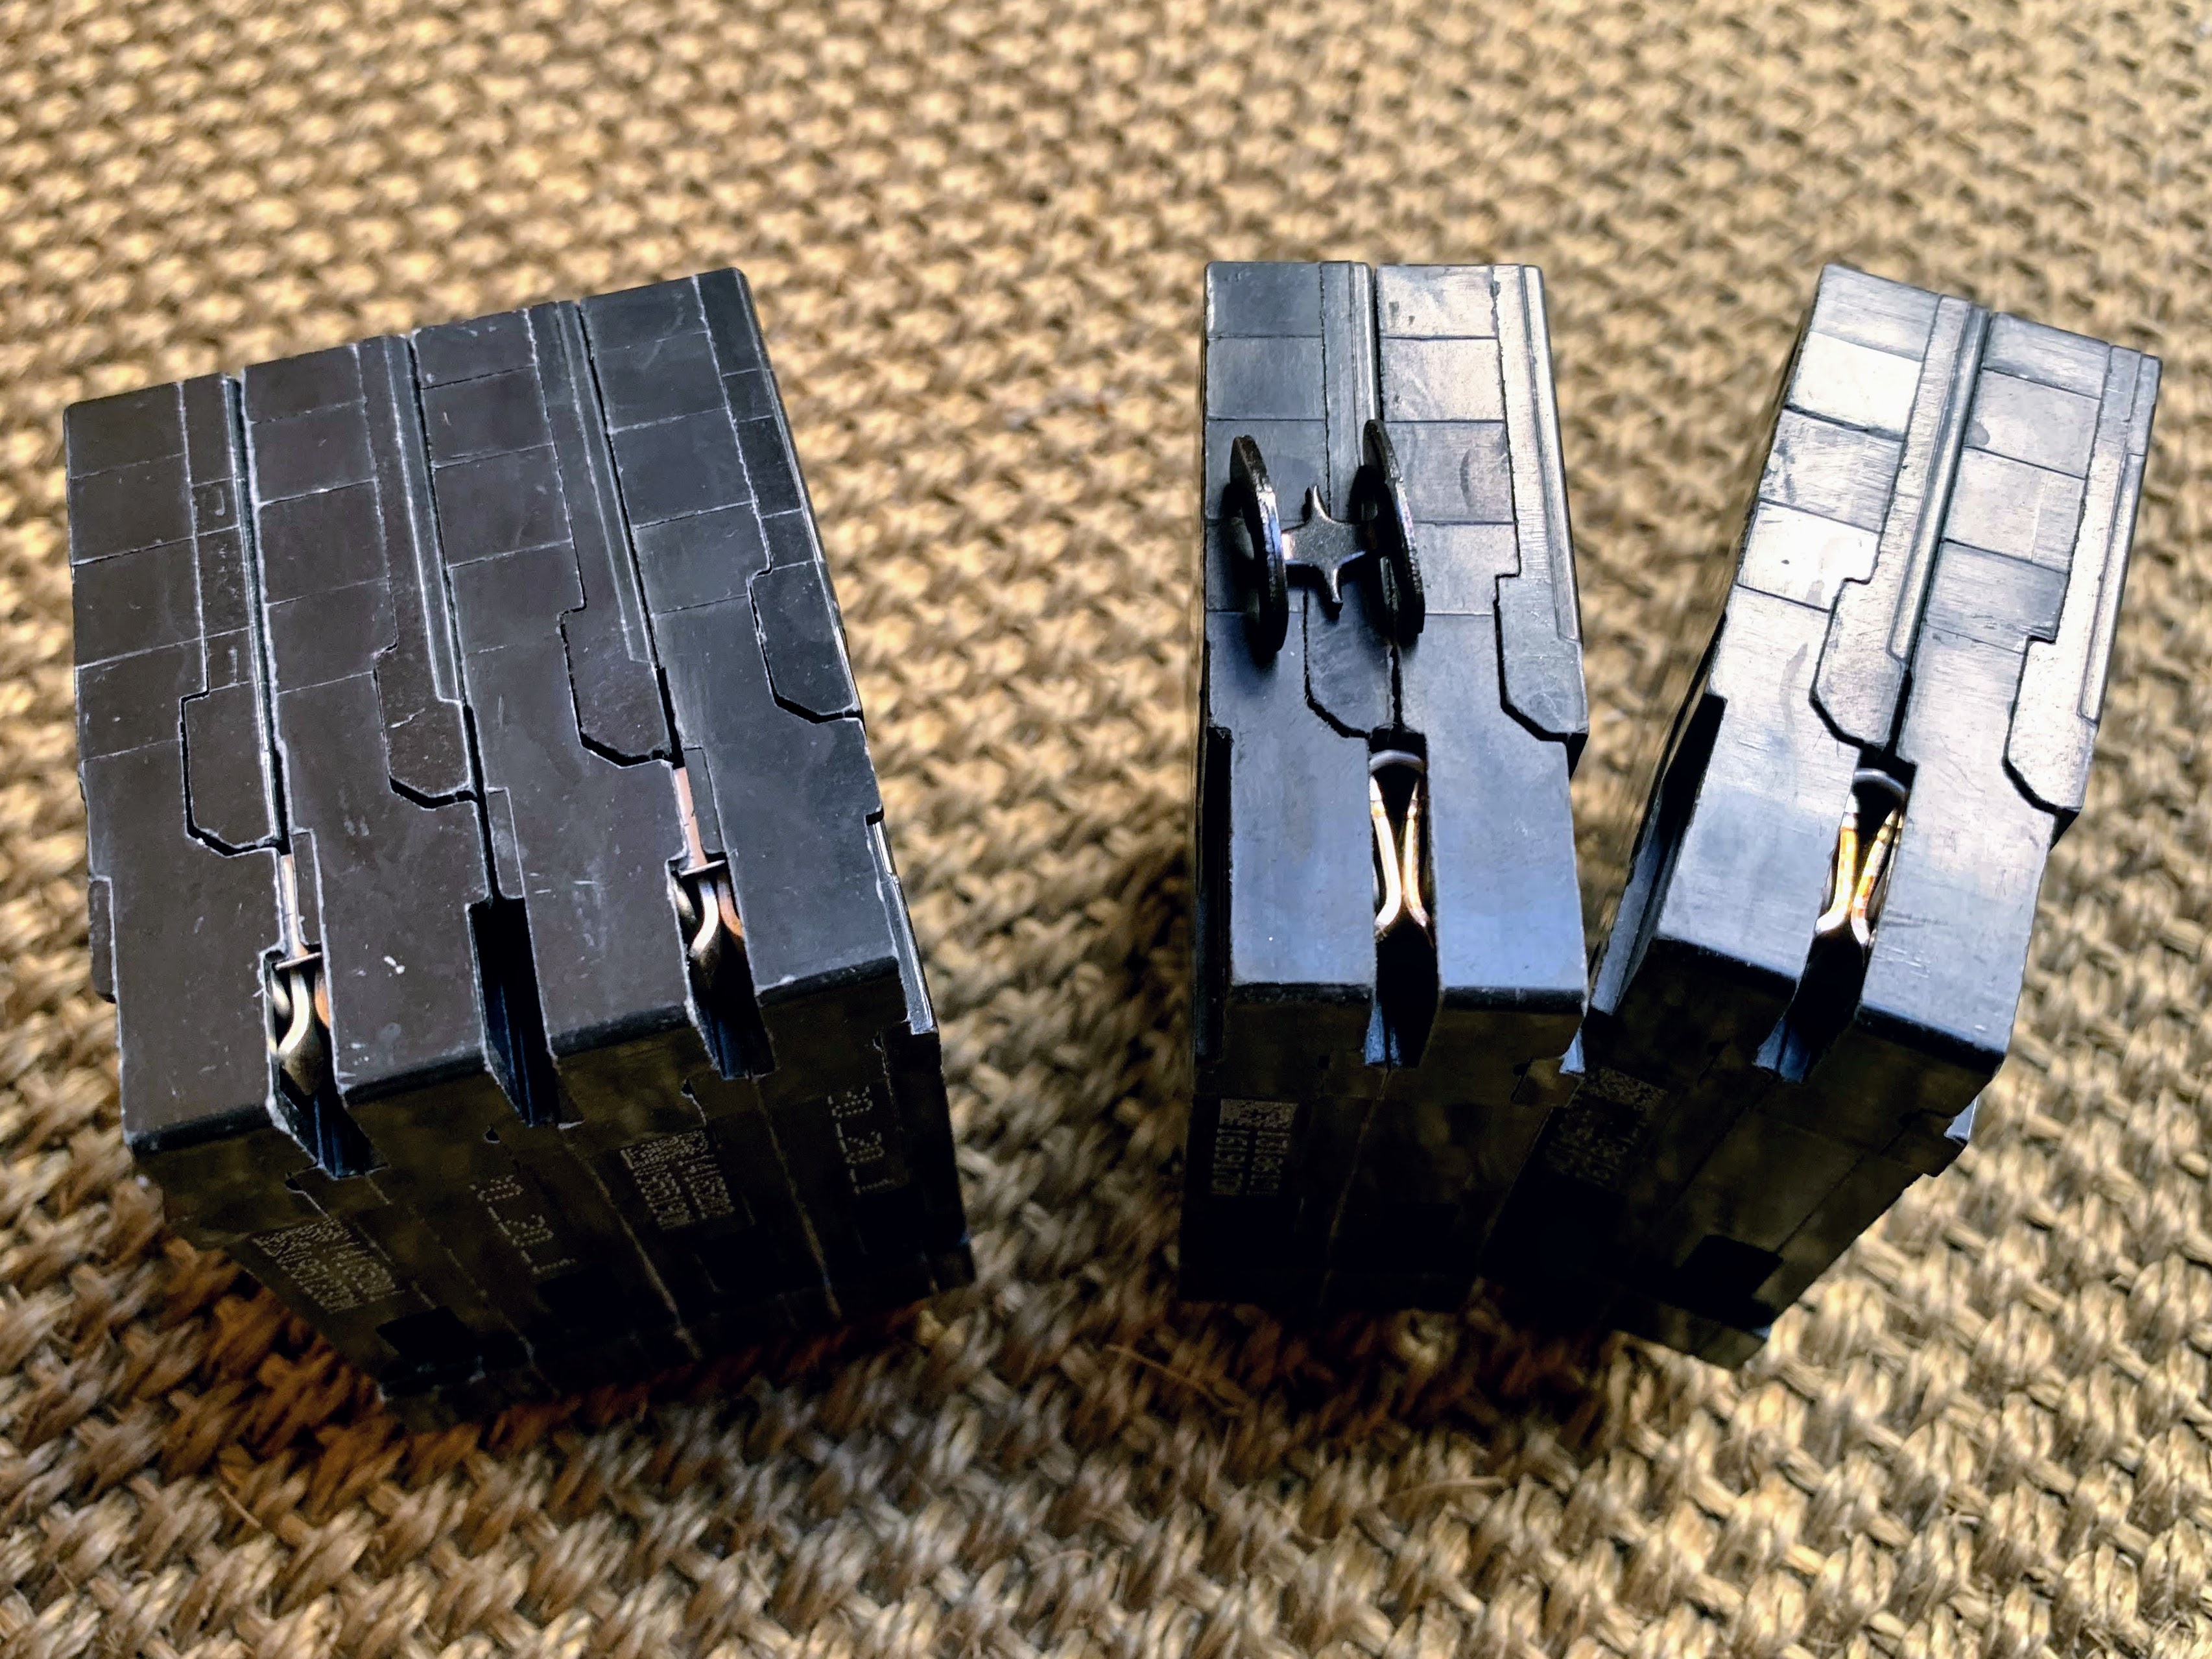
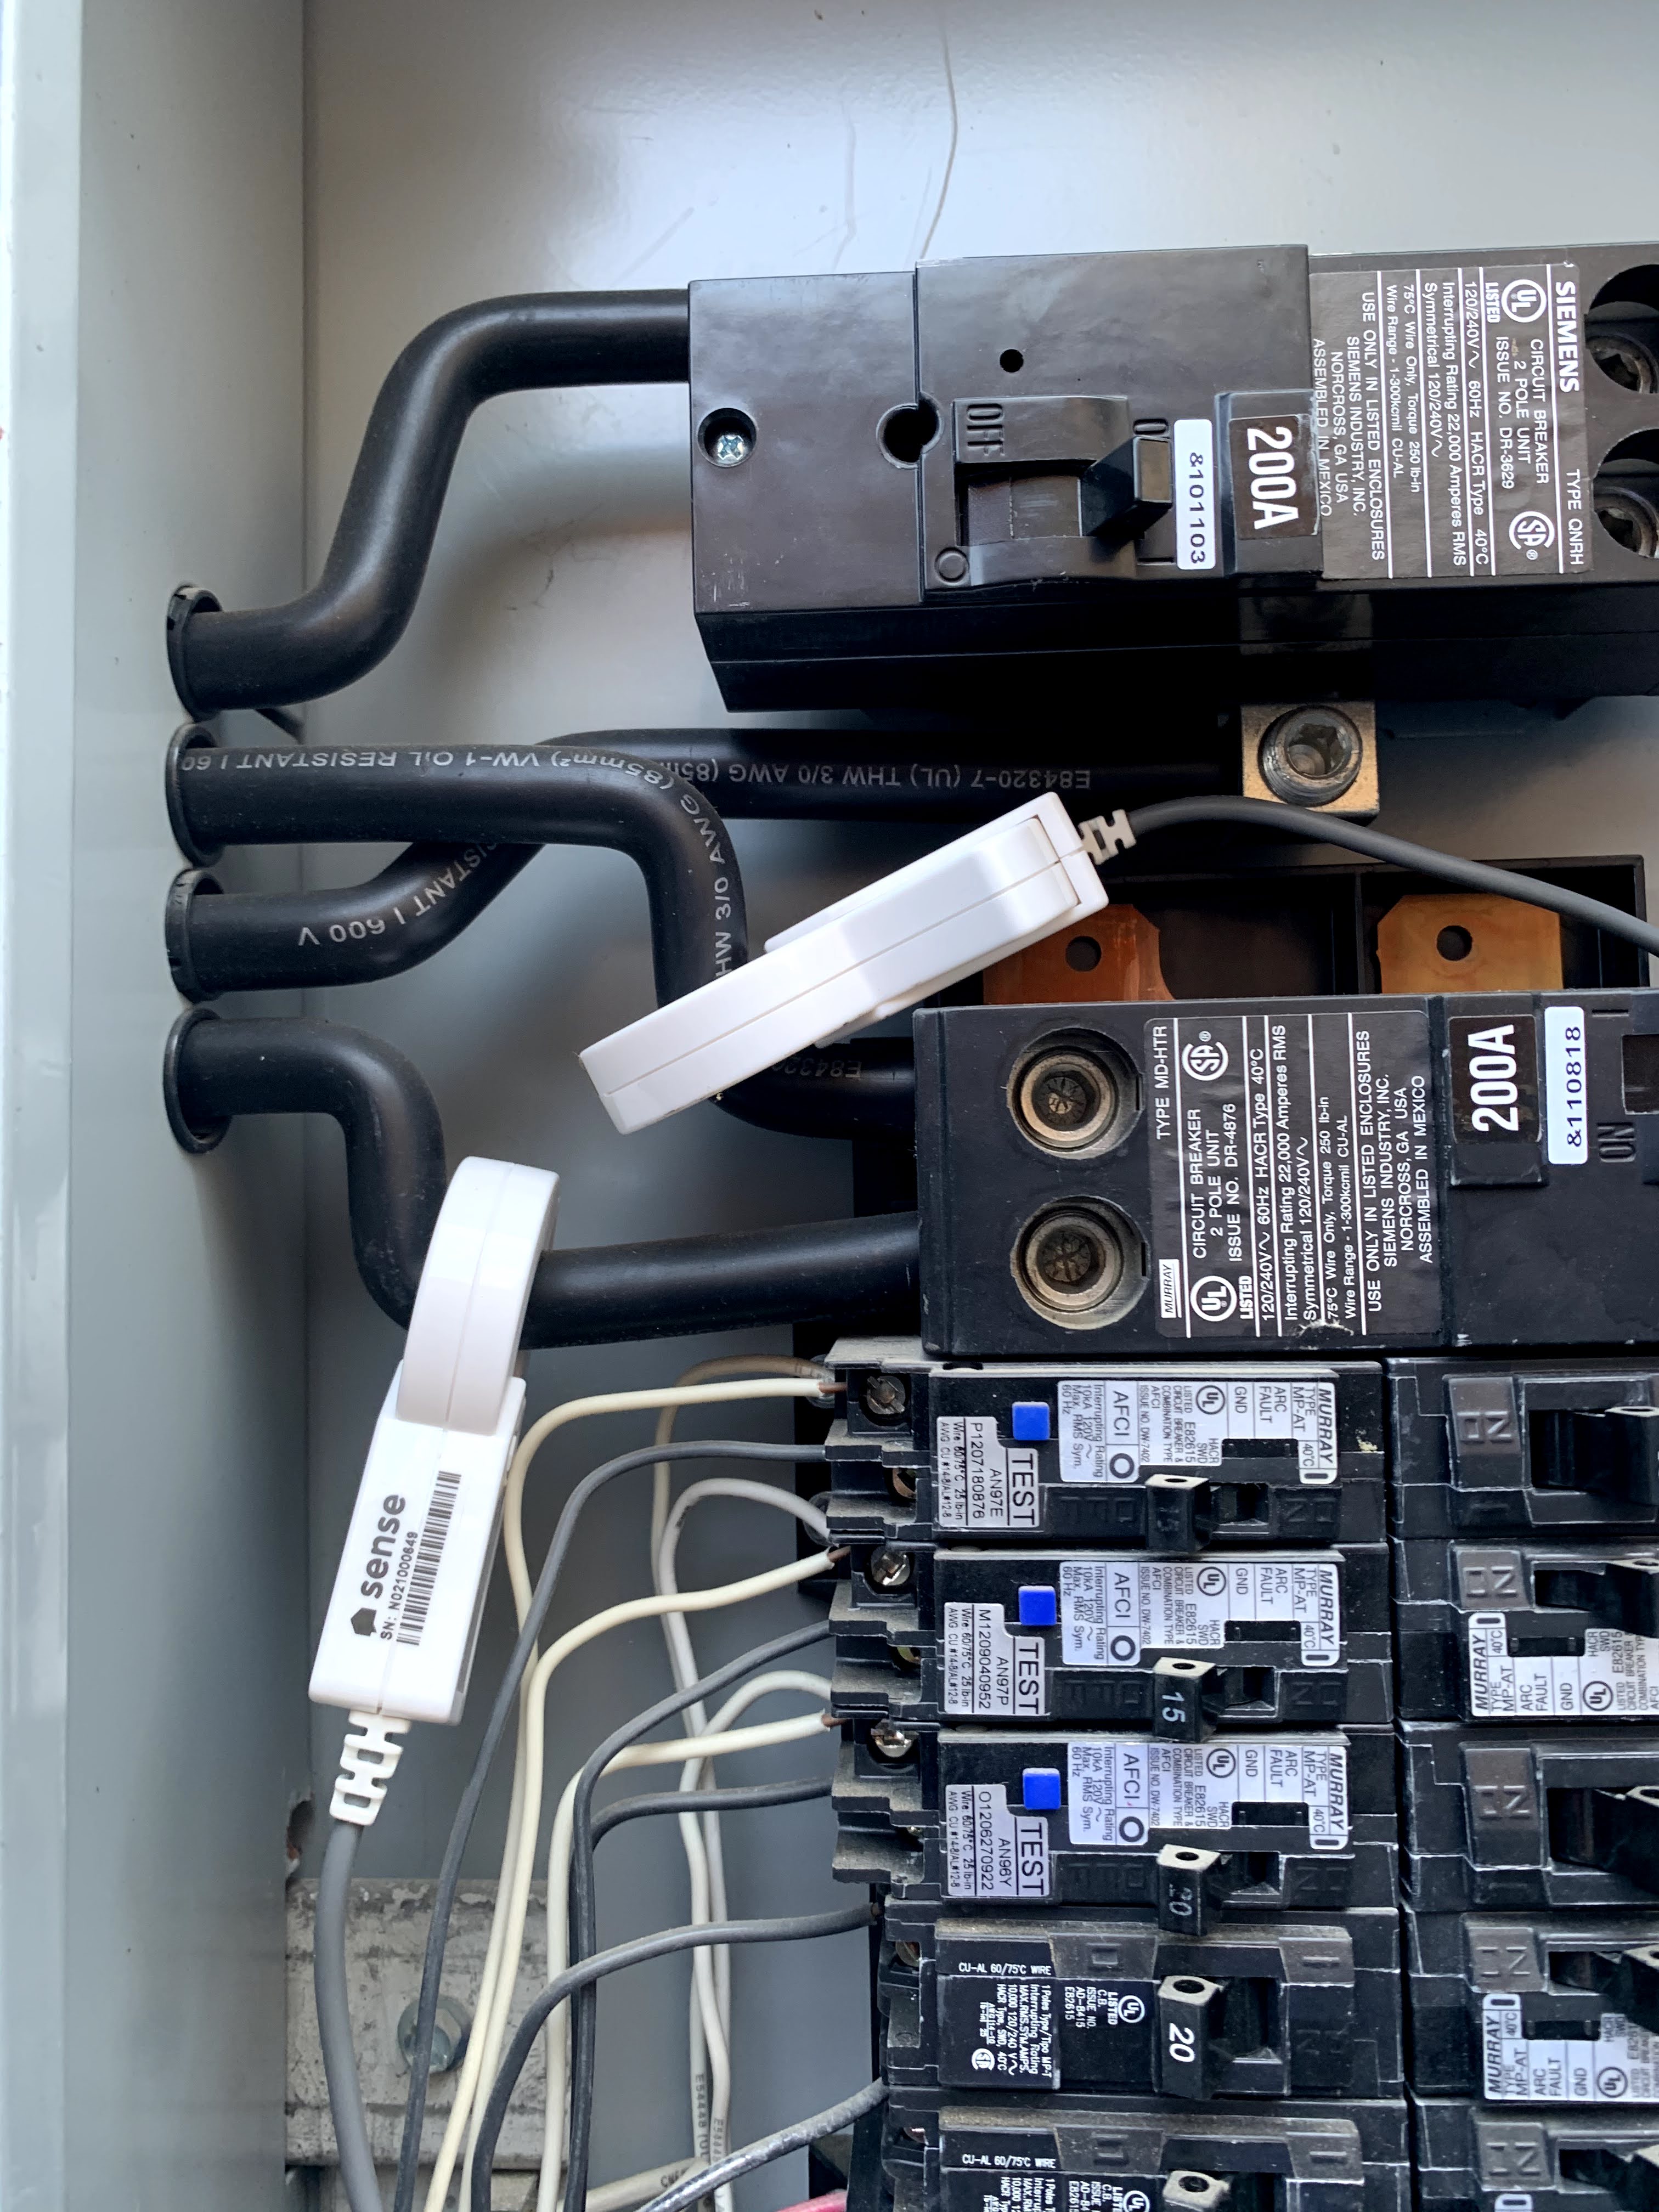
The Sense device requires a 240V double breaker to monitor each of the 120V legs. My one panel had space for a double breaker, my other panel was already full, and required the use of a quad breaker. My panels are Murray brand, acquired by Siemens, so for convenience I bought two Siemens Q22020CT triple circuit breakers. To my surprise it did not fit, and I learned the hard way about Rejection Clips and Circuit Total Limitation (CTL). Long story short, some panels allow double breakers on one circuit, others don’t, and some panels allow doubles on some locations only, limiting the total number of circuits per panel. The Q22020CT has rejection clips, while the model without rejection clips is Q22020NC, and is apparently no longer being manufactured. My local electrical supplier offered an easy solution, use two double breakers with a connecting breaker clip.

I picked one of the hottest days of the year to install the two Sense units, I know, not ‘sens’ible, but I did it early morning and it took me less than an hour to install both panels. I installed the antennas of both units in the wall of the recessed panels, the upstairs panel is near an access point and has good signal, while the downstairs panel currently has poor signal. During onboarding, the Sense app reported the WiFi signal as low, but speed as sufficient, so I may add another AUP-AC-M access point in the garage if the Sense reports ongoing signal issues.
While the panels were open I double checked all the breakers, and I was surprised, and concerned, to find that several high current breakers, like the electrical oven, AC compressors, and solar inverter, had loose connections. Several of the loose screws were on multi-strand wire, so I don’t know if they were never properly torqued, torqued too tight cutting strands, or loosened over time.


It is really unfortunate that I need to run two Sense accounts, it is not just inconvenient, but it also means that the network based device discovery may not work, as the same network is seen by both devices, but equipment is only connected to one of the monitored panels. I do hope that Sense will either support combining of multiple Sense devices under a single account, or release a new device with support for three current sensors (solar + 200A + 200A).
Update: I followed advice from the Sense community forum; I confirmed my total load has never exceeded 200A / 24KW, and installed the CT’s on the 400A supply side, alleviating the need for a 2nd Sense unit. I drilled a hole between the user and utility side, installed a rubber grommet, and ran the primary CT’s to the utility side. Secondary CT’s are still on solar, and I uninstalled the 2nd Sense unit. So far so good.
I am still in the process of converting the gas and water meter pulse counters from the GEM’s to an ESP32 with ESPHome, and I’ll report on that later.
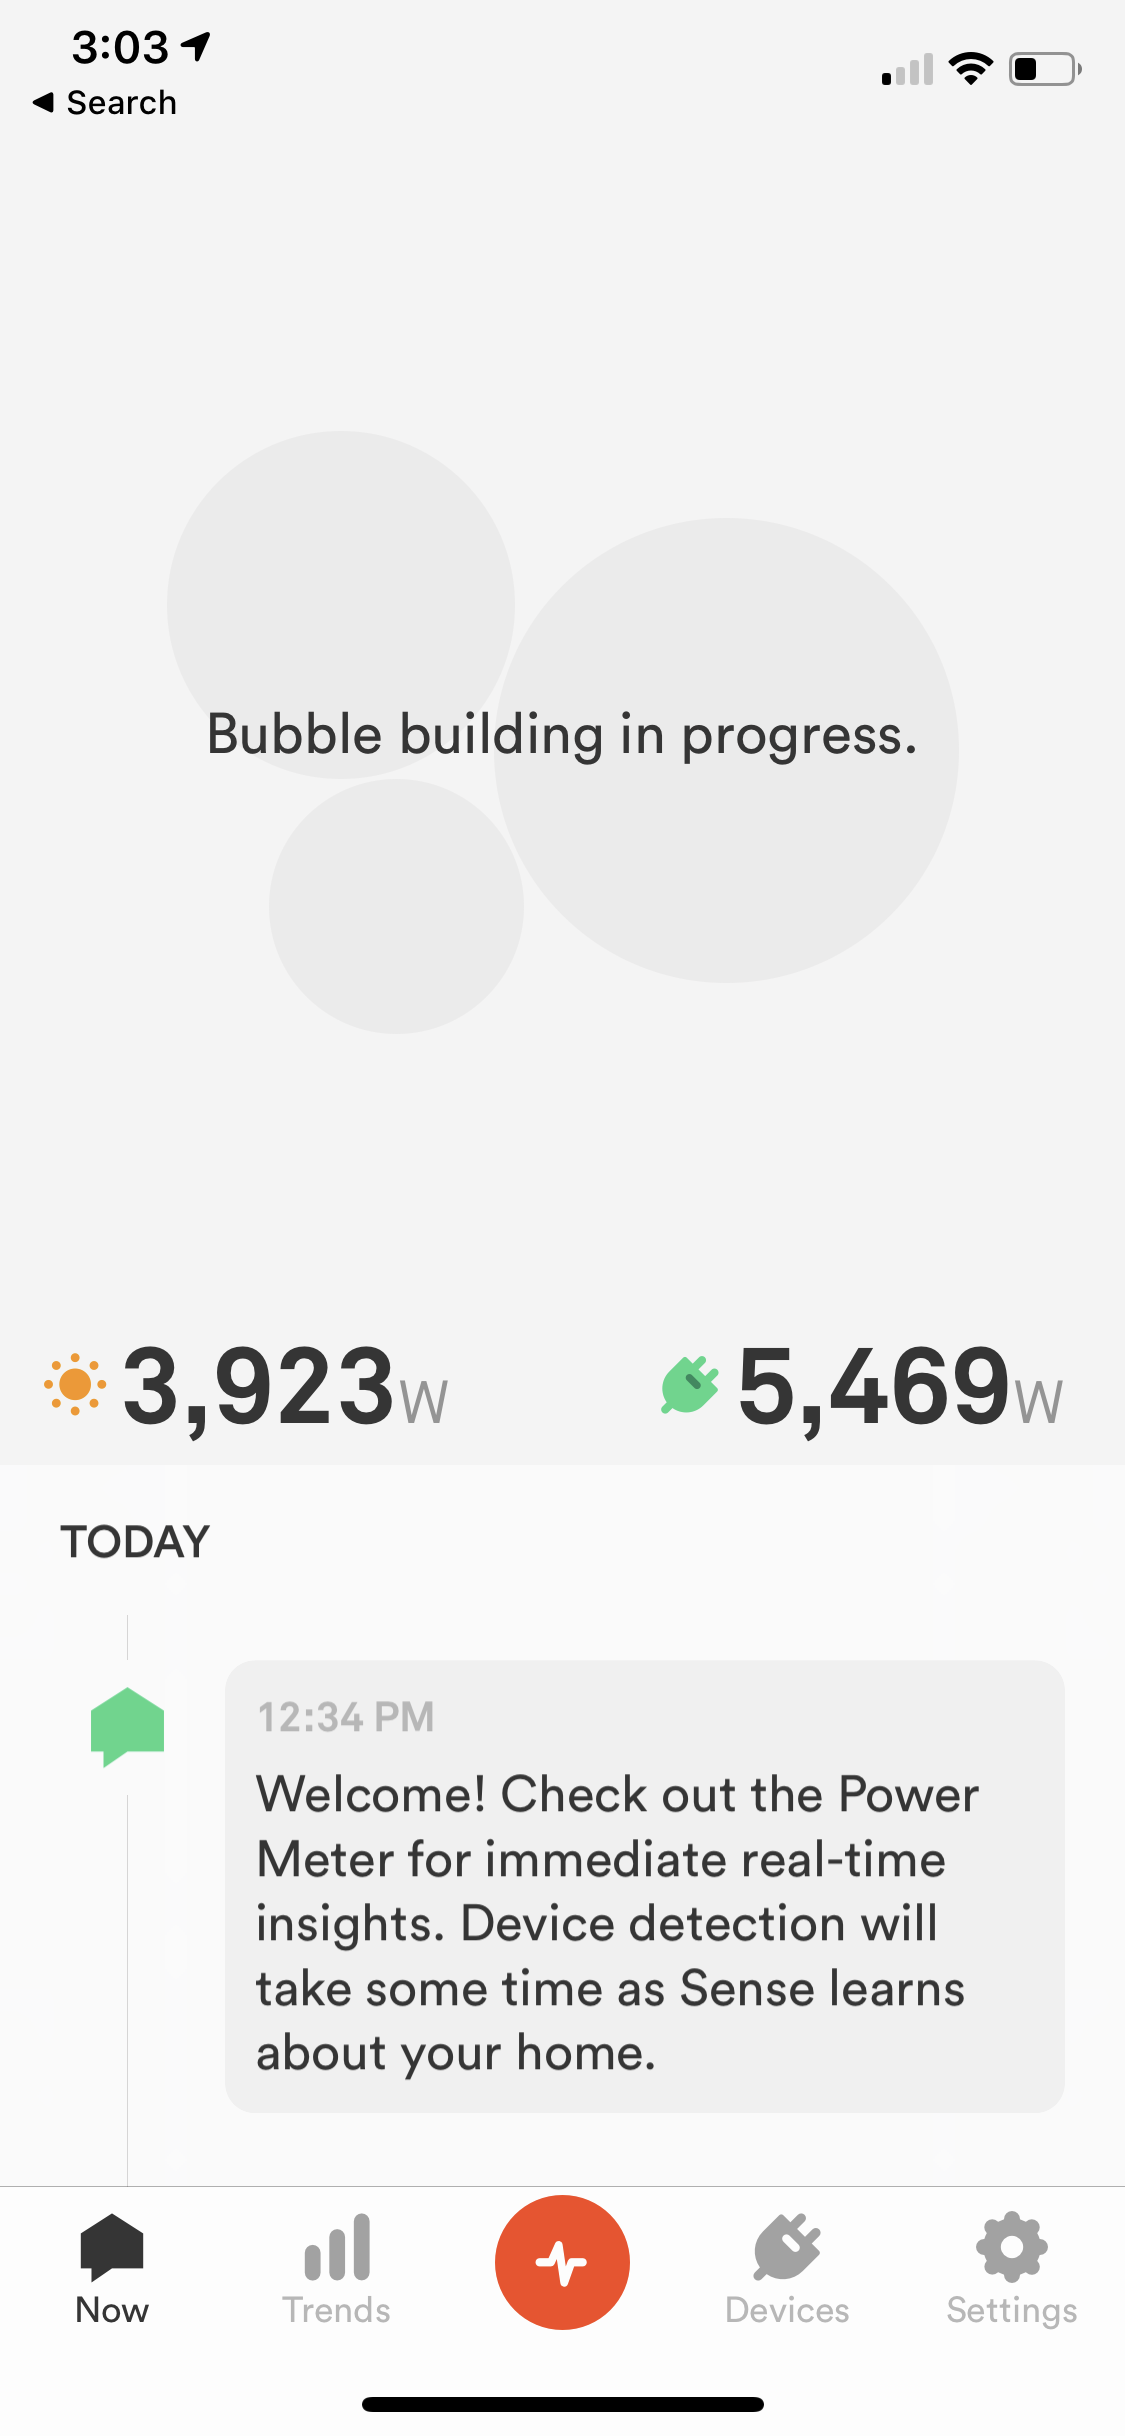
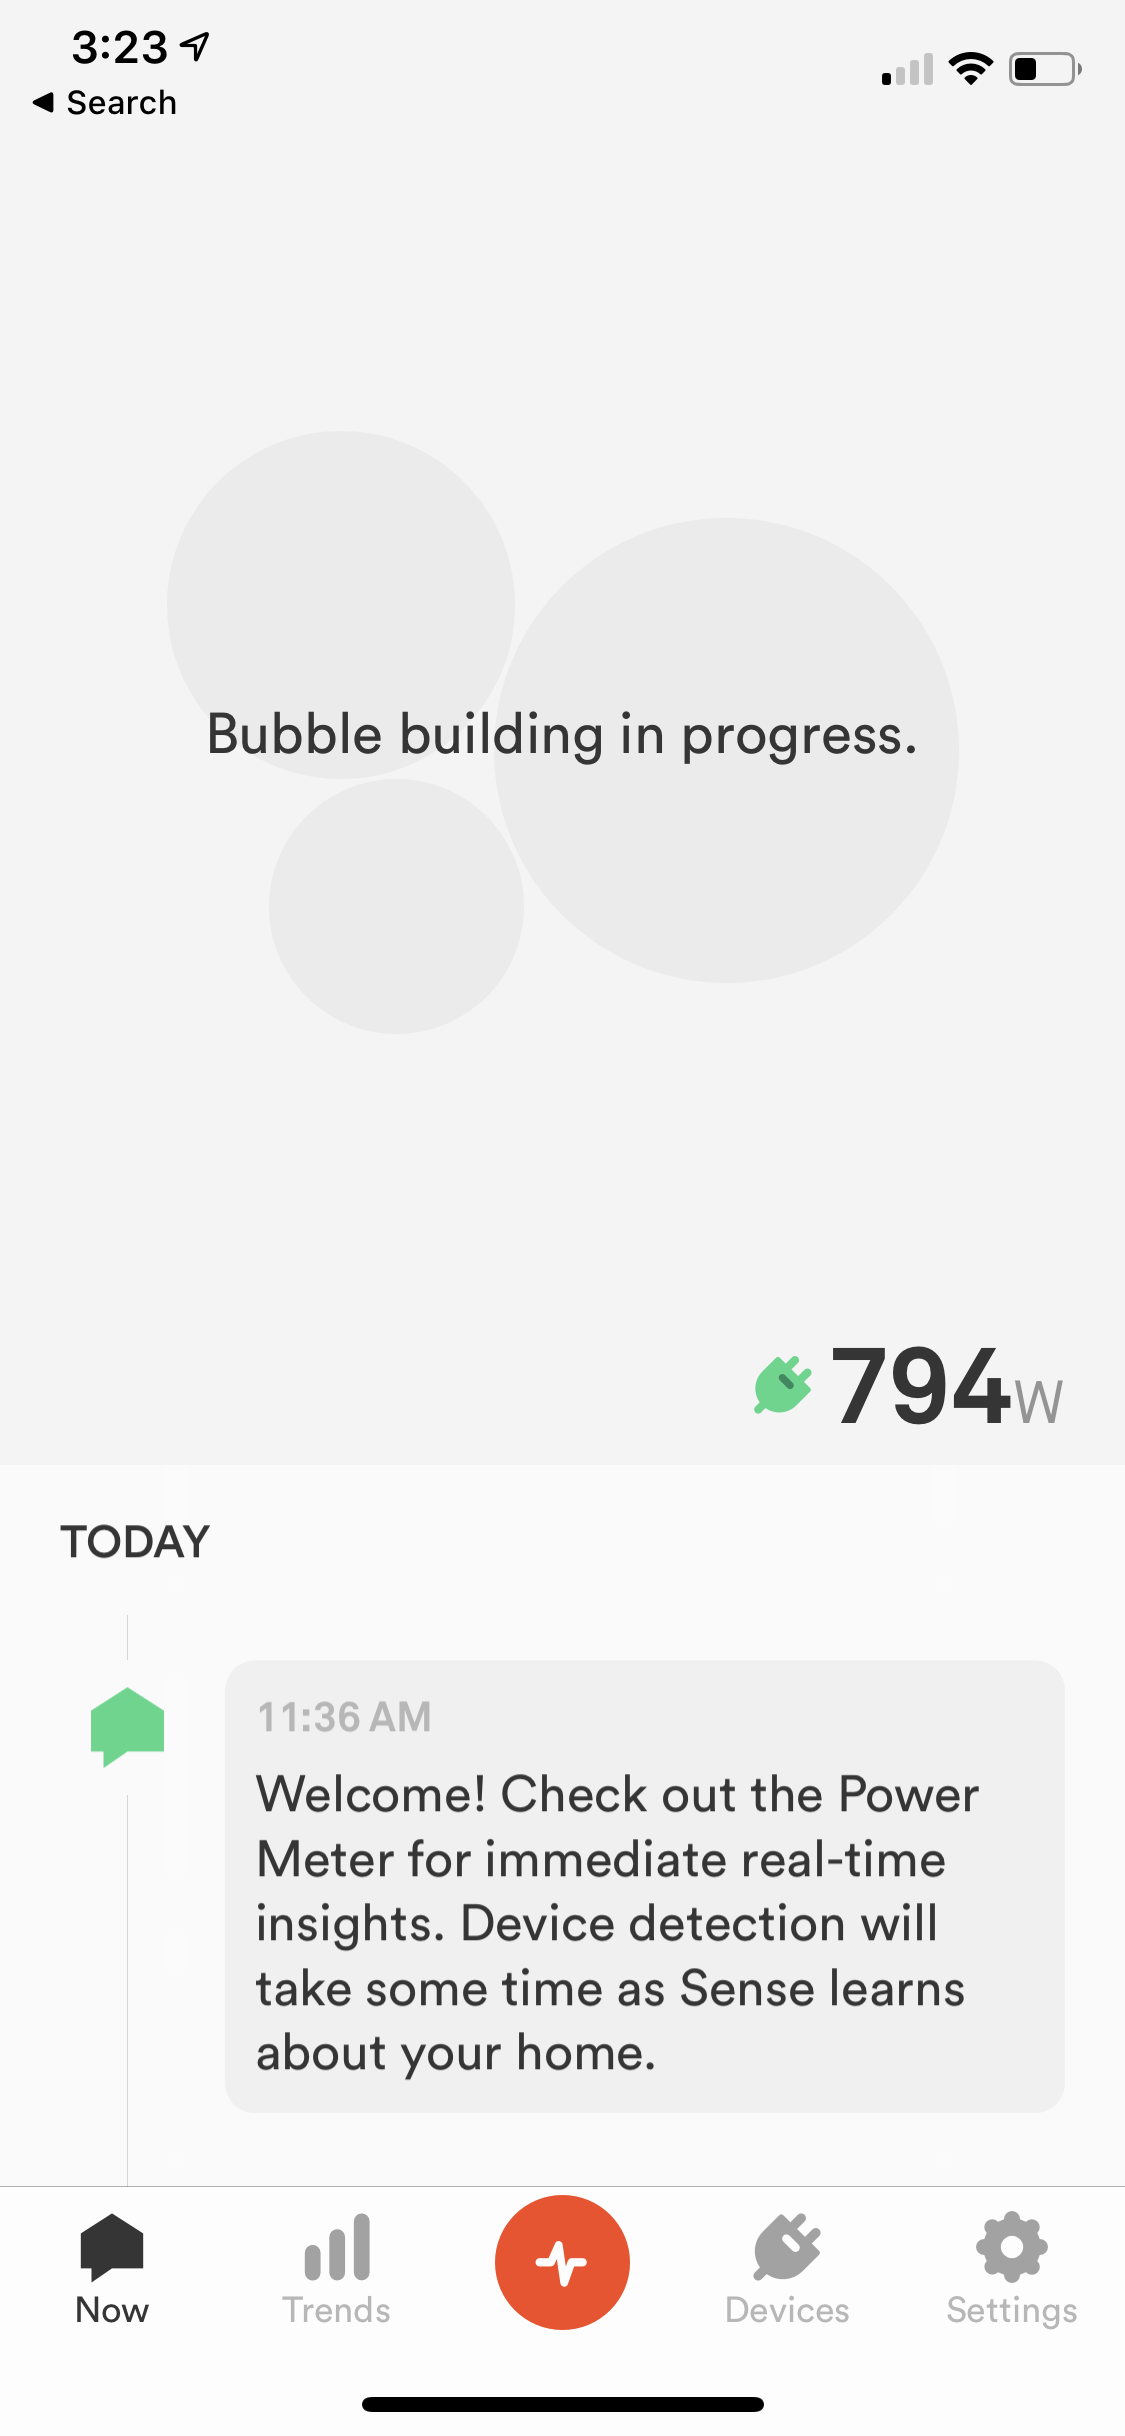
It has only been a few hours of runtime, and my Sense units are still learning, so I’m eager to see what they discover.

I have a similar setup. I have a split 400amp meter and solar. I am looking at Sense to monitor my power usage. I have not seen anyone use the two devices. When I contacted Sense they suggested that I either don’t monitor the solar and use the two leads to monitor the power used by the two panels or try and connect one set of leads to the main line at the meter before it splits to the legs of meter. This would work but Sense will not report anything greater than 200amps. I have an electric tankless water heater for my home and it pulls right at 200amps so I know there will be times more than 400amps will go through the leads on the main lines.
My question is. How is this working out for you having the 2 sensors? You have been running them for almost a year now.
Thanks
JW
LikeLike
I ended up following some advice from the forum, and moved the sense in my 400A panel to monitor the utility supply side. So primary CT’s on 400A supply, and secondary CT’s on solar. So far so good, no more need for the 2nd Sense unit.
LikeLike
I came across your page as I am trying in vain to flash the firmware on my GEM, heh, yeah, all of exactly what you said. Totally a great system for the author of the system if he was installing them in rich customer’s houses and running/managing it all himself for making dashboards for them. But as a customer? It’s kinda just terrible.
I bought a pair of emporia vue 2’s and flashed them with esphome and it took all of about an hour to have everything feeding nicely into home assistant with pretty graphs and individual load monitoring. I also have split 400 amp service, with one 200a panel in the garage where the solar is, one panel in the house 200+ feet away, and a sub panel in an in-law apartment with big loads… I’ve got the garage and in-law suite covered by the vues now… I think I might slap an esphome on the GEM in the house to parse out the bin48nettime data raw and pump it directly into home assistant too… feed that into an influxdb later if i miss the per minute dashboards too much.
First I gotta reflash the gem though, from my mac somehow, from recovery mode. argh.
LikeLike