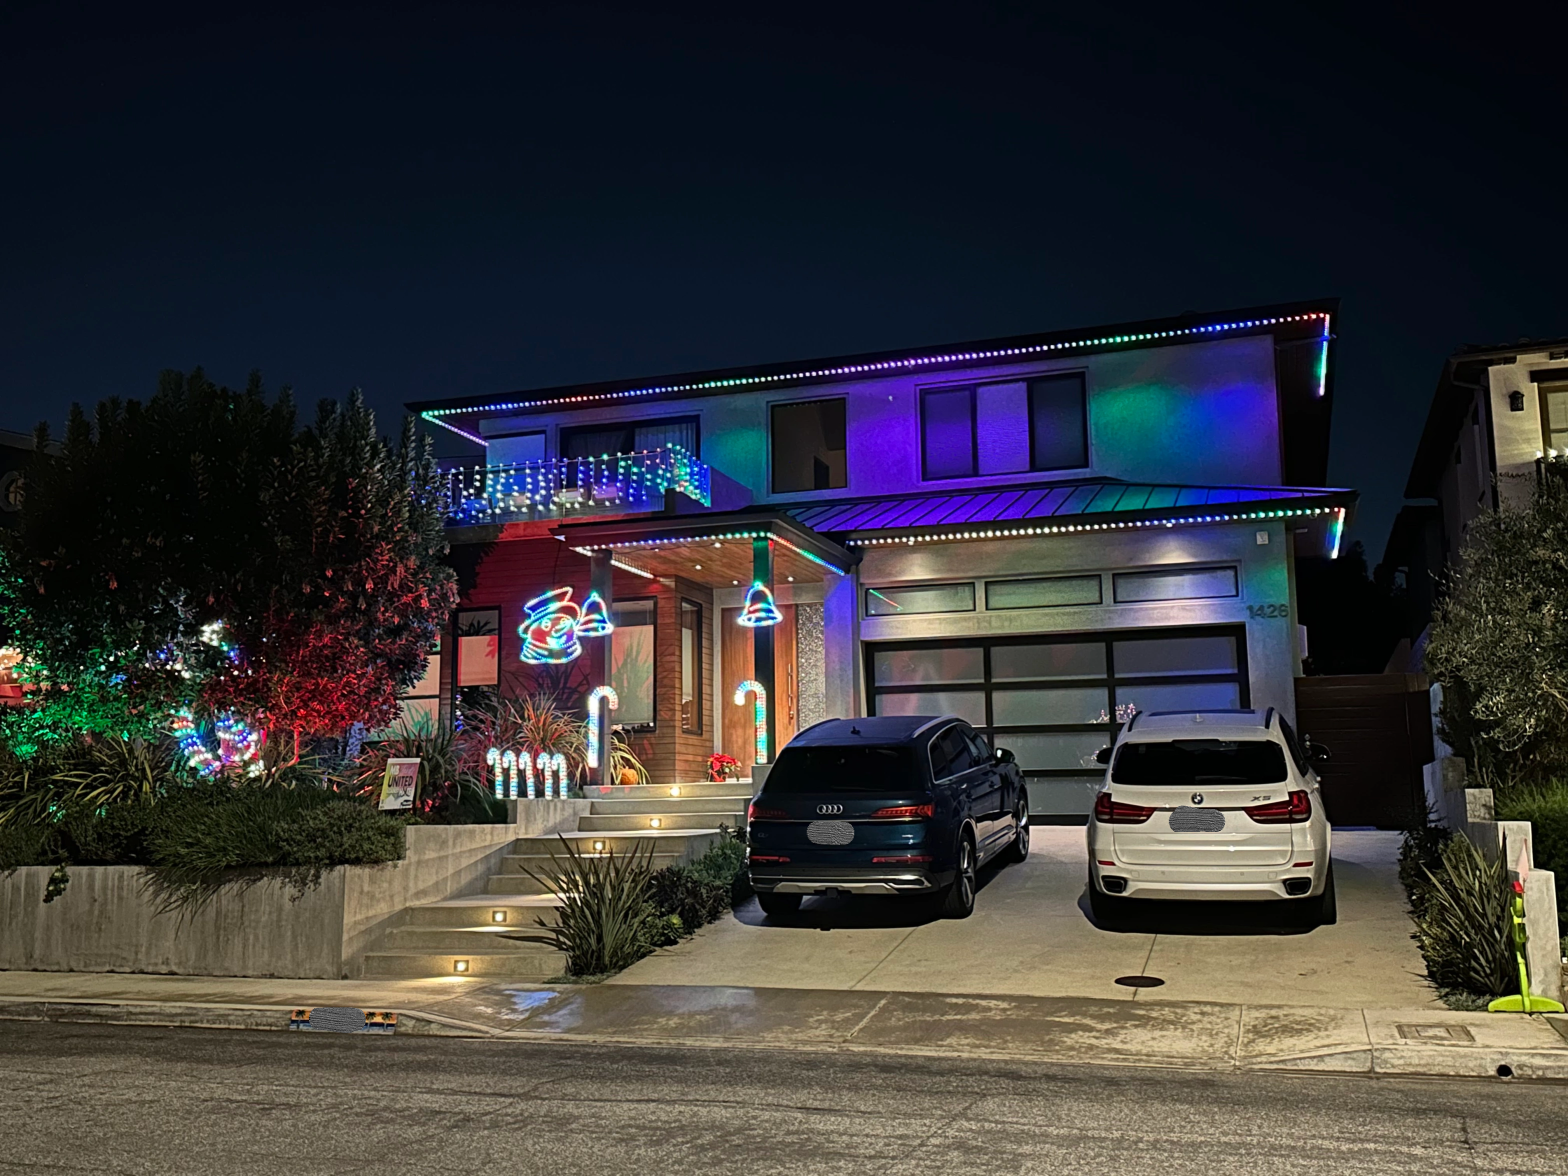
[Late post] I finally got around to installing permanent under eve roofline RGB lights, and I’ll share me experience and opinion of the Mattos RGB Trim I used. See my previous post and post on RGB holiday lights for background.
I pre-ordered Mattos Engineering RGB Trim in December 2021 and received the shipment end of January 2022. The boxes have been sitting in my garage for a year, and I just got around to installing them mid December 2022.

Before I went down the self-install path, I did look for commercial vendors, including oelo, EverLights, Inception, TrimLight, Jellyfish, Gemstone, but nobody was servicing the Los Angeles area, maybe lack of demand, or insurance and code requirements, or lack of snow and pretty holiday lights. By the time I finished my install, I did start seeing ads for EverLights, so residential install options are now available. Also note that I chose the Mattos tracks because at the time they were the only available self-install option matching my eve design, but today there are a variety of vendors offering similar looking tracks.
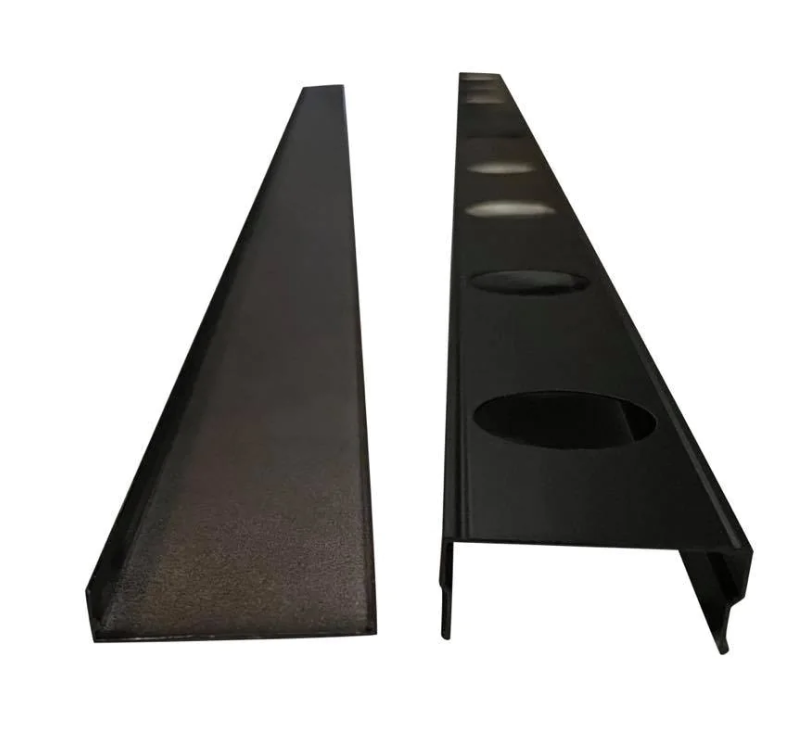
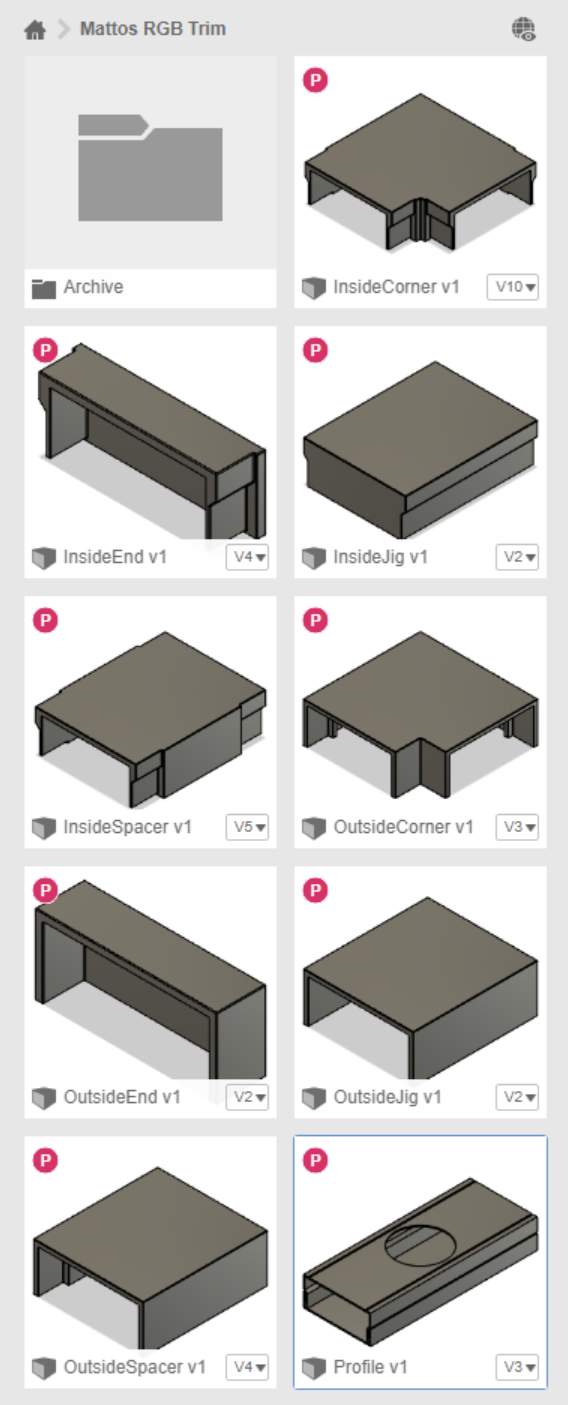
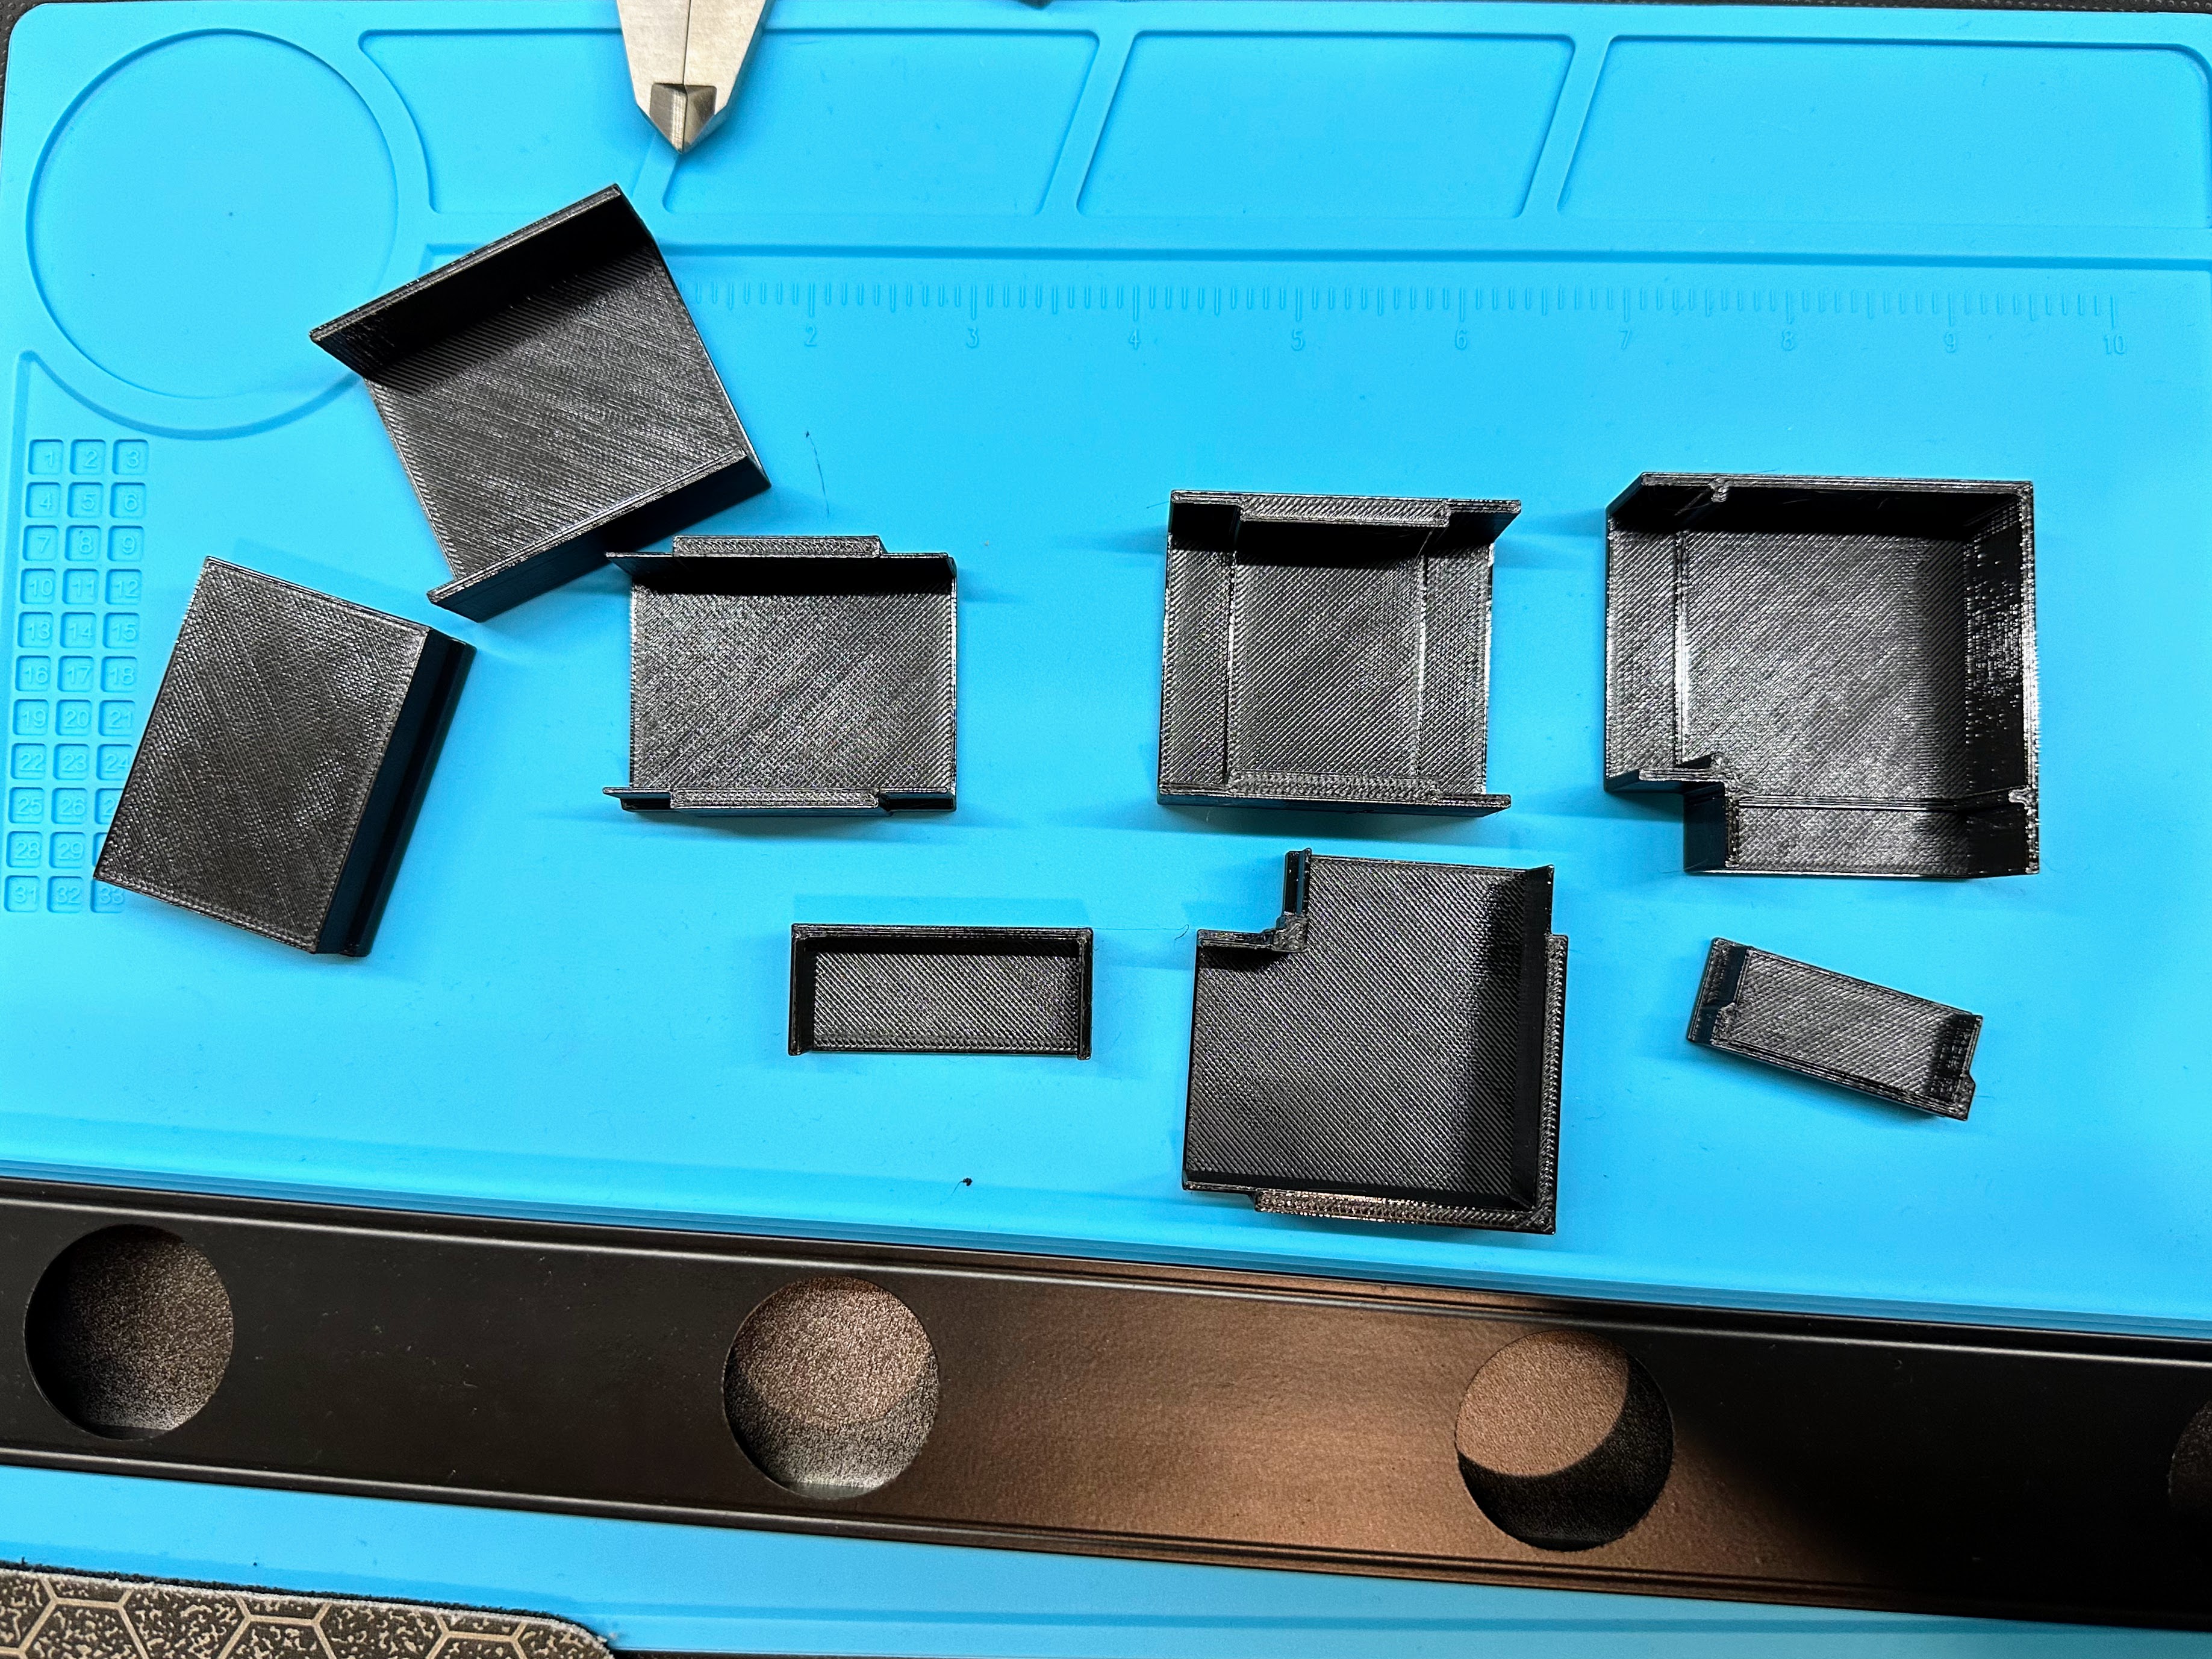
One of the early disappointments with Mattos was the lack of vendor supplied track corner / connector pieces, I was told coming soon, no really coming soon, but nothing ever materialized. I resorted to doing my own 3D design and printing of connector pieces. I don’t know what other installers did without connectors, but I do think the connectors made for a clean looking finish with some moisture and bug protection. I did the design in Fusion 360, printed prototypes using PETG on my Prusa MK3S+, and had the final designs printed by Craftcloud in black polished PA12 Nylon. The polished black was a bit too matt looking compared to the track finish, and I spray painted the pieces semi-gloss black to match. The Fusion 360 designs are shared on Autodesk Gallery, and the 3D printable files are shared on Printables.

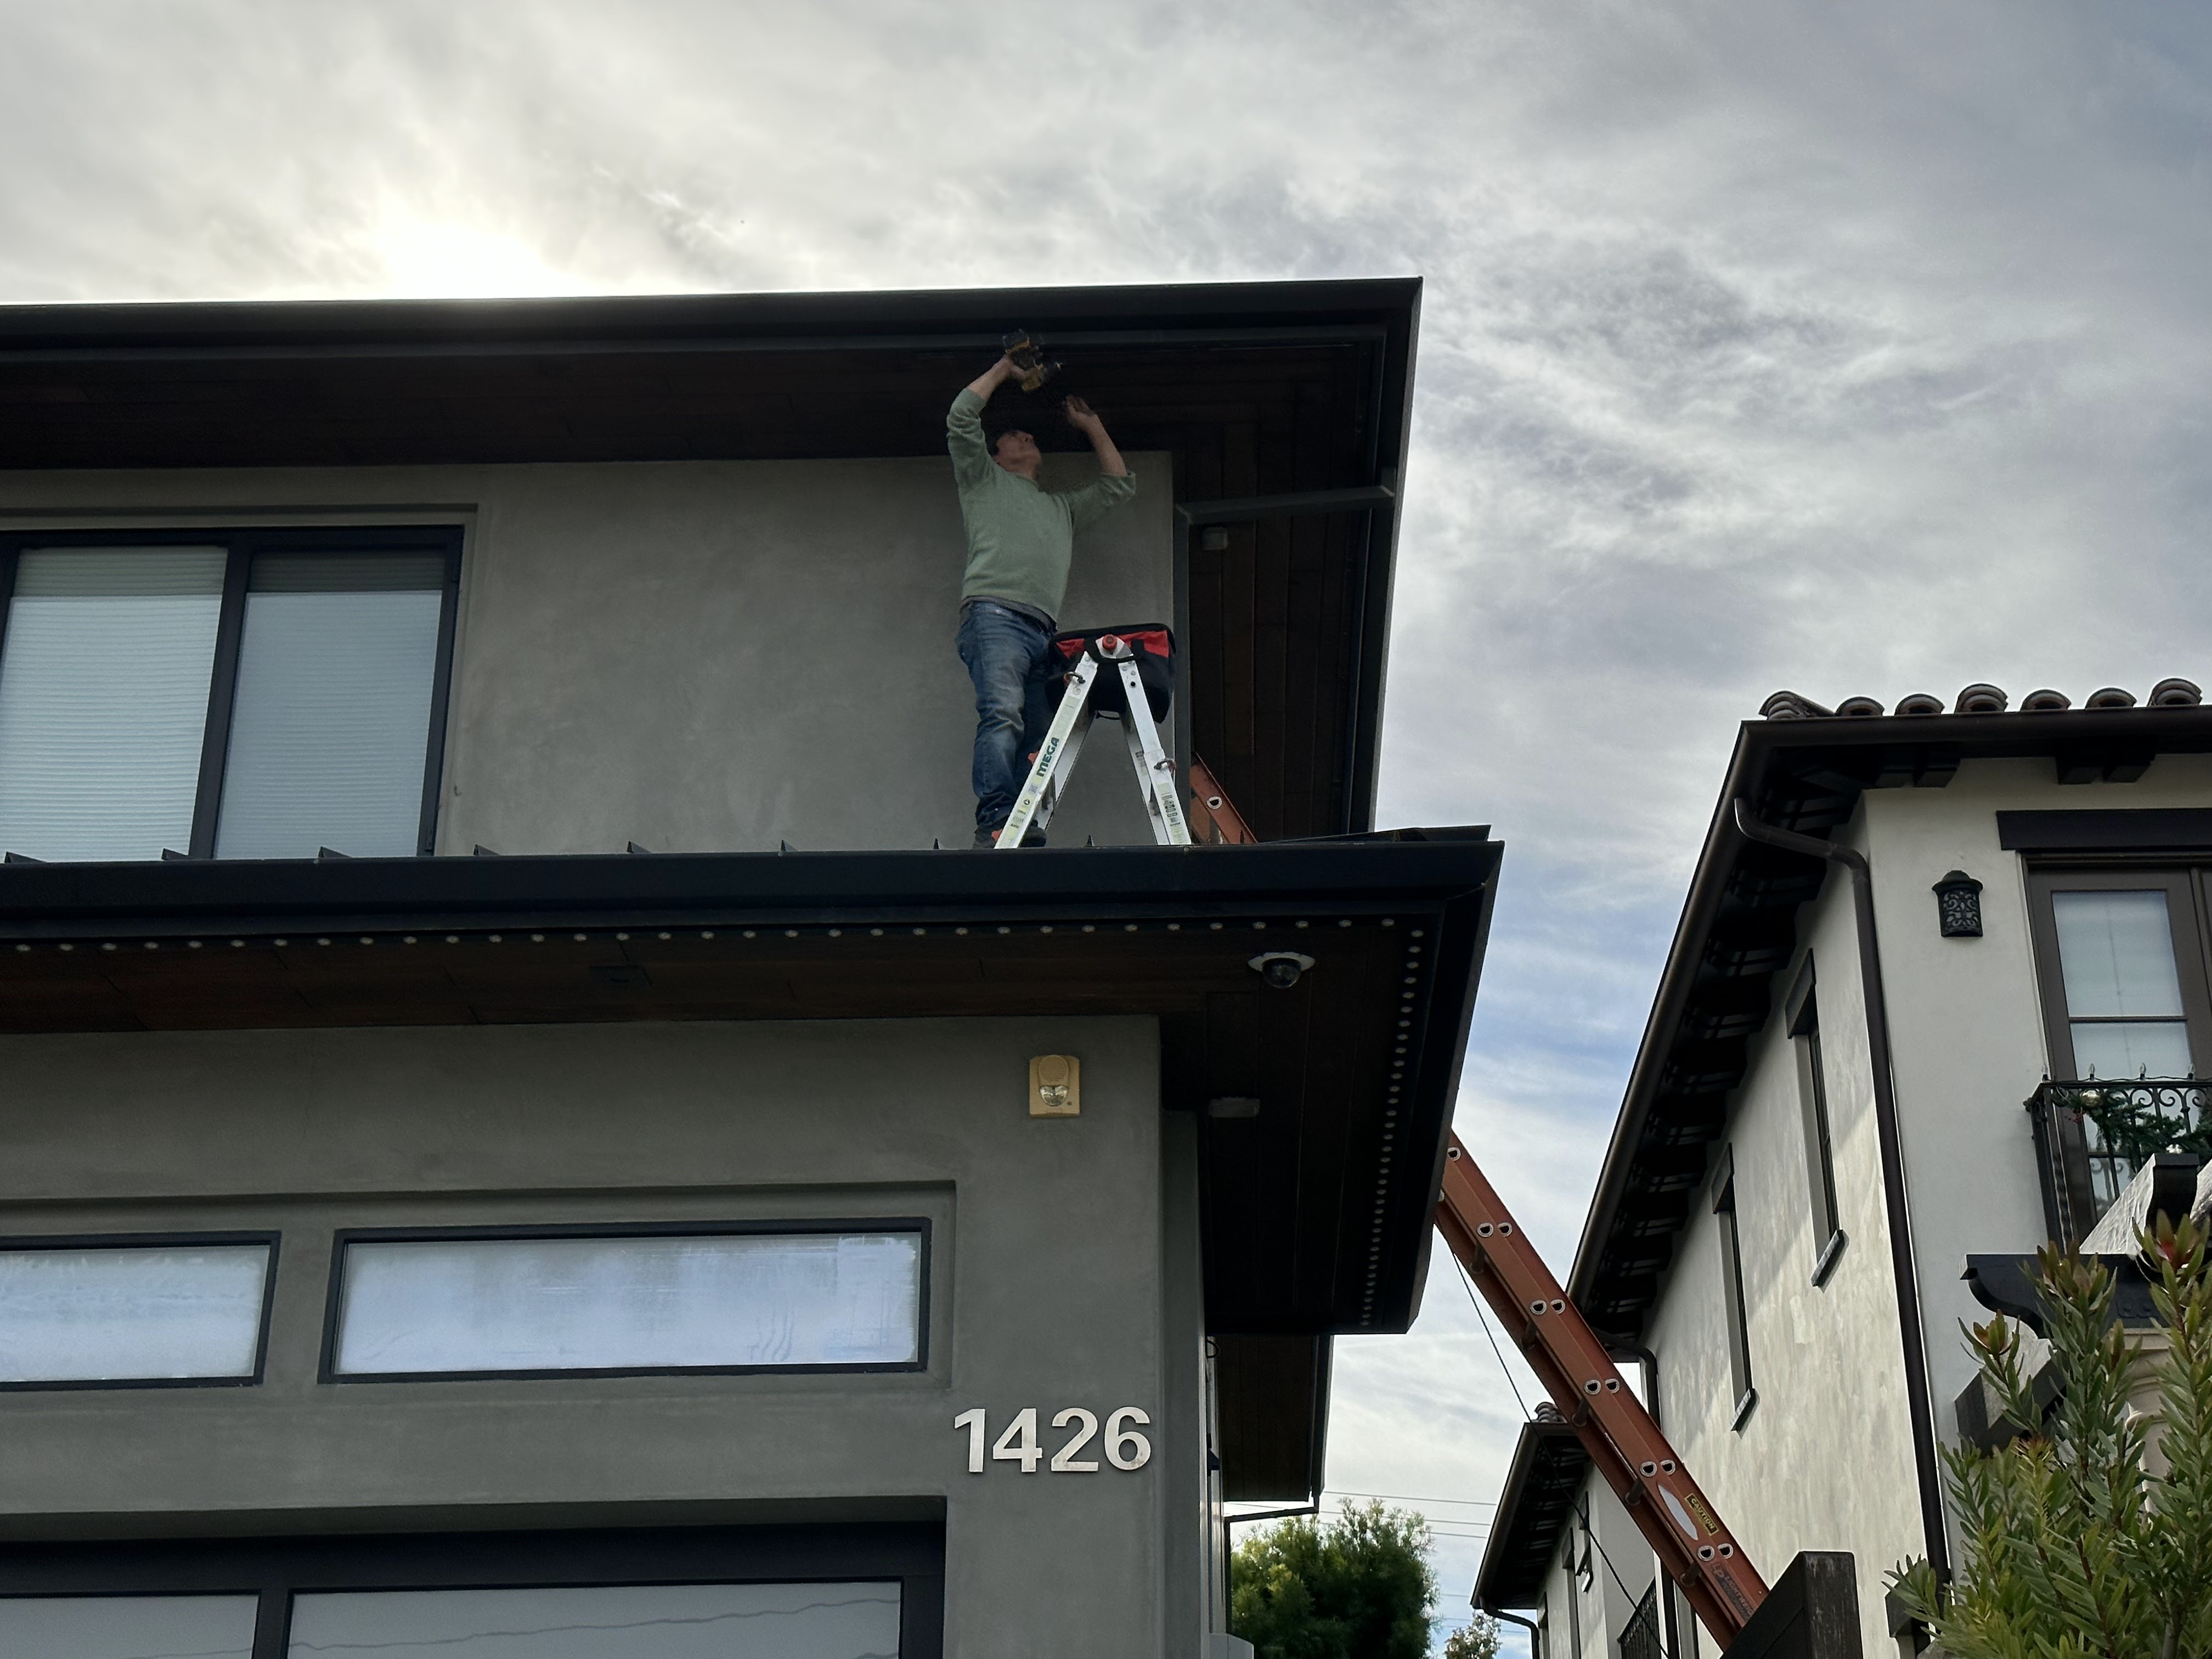
The installation location under the roof eves is difficult, with the upper eve being 24′ (7.3m) high and a section is over the garage roof making access very tricky. It was surprisingly difficult to find a contractor that was able and willing to help me install the lights, those that did respond or showed up to take a look said they’d need a cherry picker, not worth their time, not familiar with the system, not wanting to be responsible for electrical wiring, etc. In the end I resorted to assisting my “no fear of heights” local handyman, and I did the electrical wiring myself.
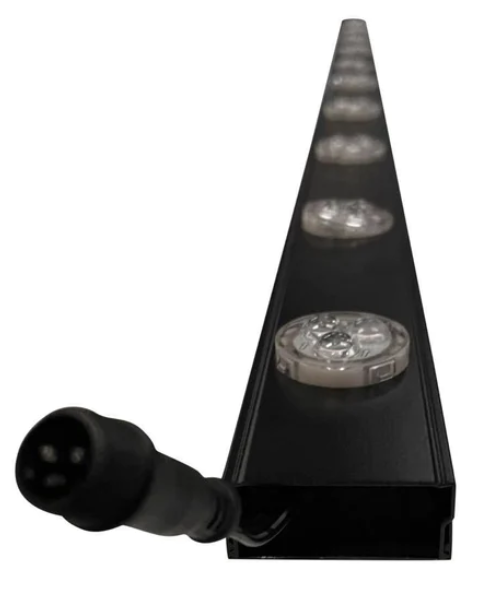
Cutting the track to just the right length took careful measuring, especially to get the pucks to be evenly spaced around corners, sometimes requiring short filler pieces. I initially tried to cut the track with an angle grinder, but results were poor, so I used the opportunity to “justify” buying a mitre saw with an aluminum cutting blade, getting perfect cuts.
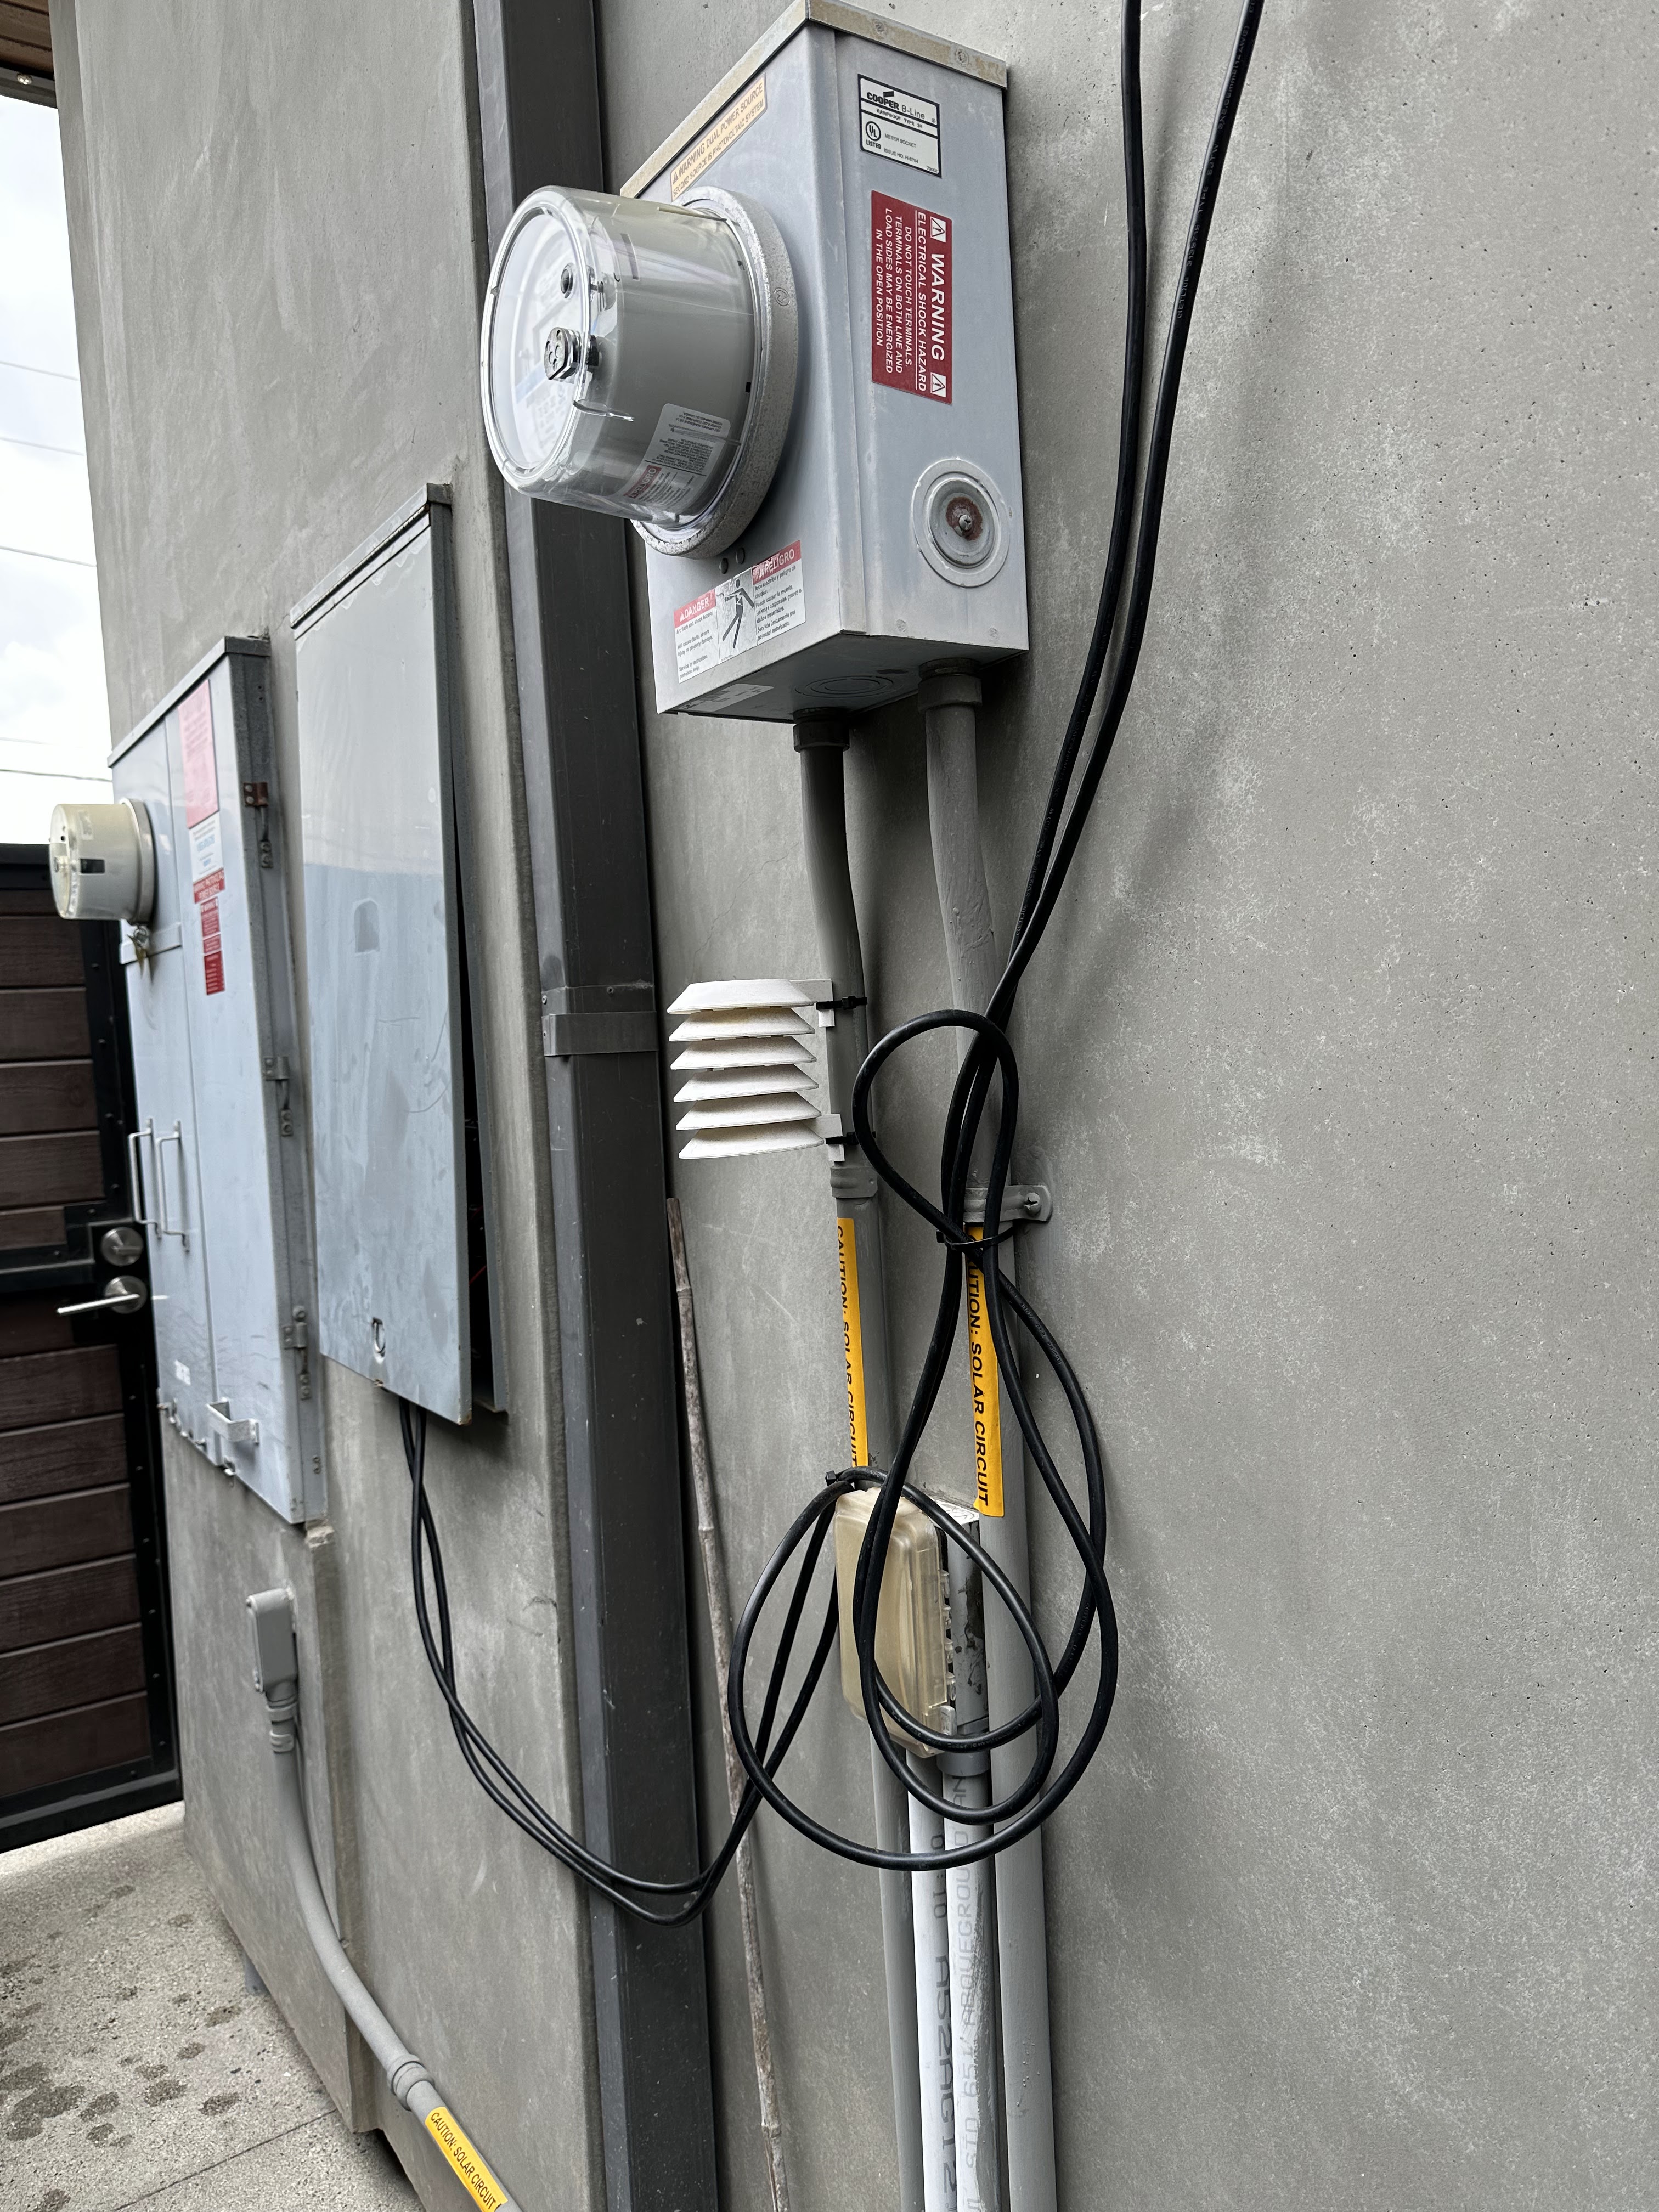
For wiring I ran 14/3 SJWT extension cords (great value for money) from the utility cabinet up the wall (cables will eventually be in EMT) to the track entry points, and then used 14/2 bonded silicone wire for power injection. The silicon wire is flexible and easy to work with, but connecting it to the much thinner RGB leads was tricky due to the lack of space in the track. Of the various techniques I tried I opted for heat shrink spade and butt crimp connectors, using a suitable crimper (my vanilla crimper did not crimp tight enough). I found that solder sleeve and T-splice connectors were just to difficult to work with or too big to fit in the tight space.


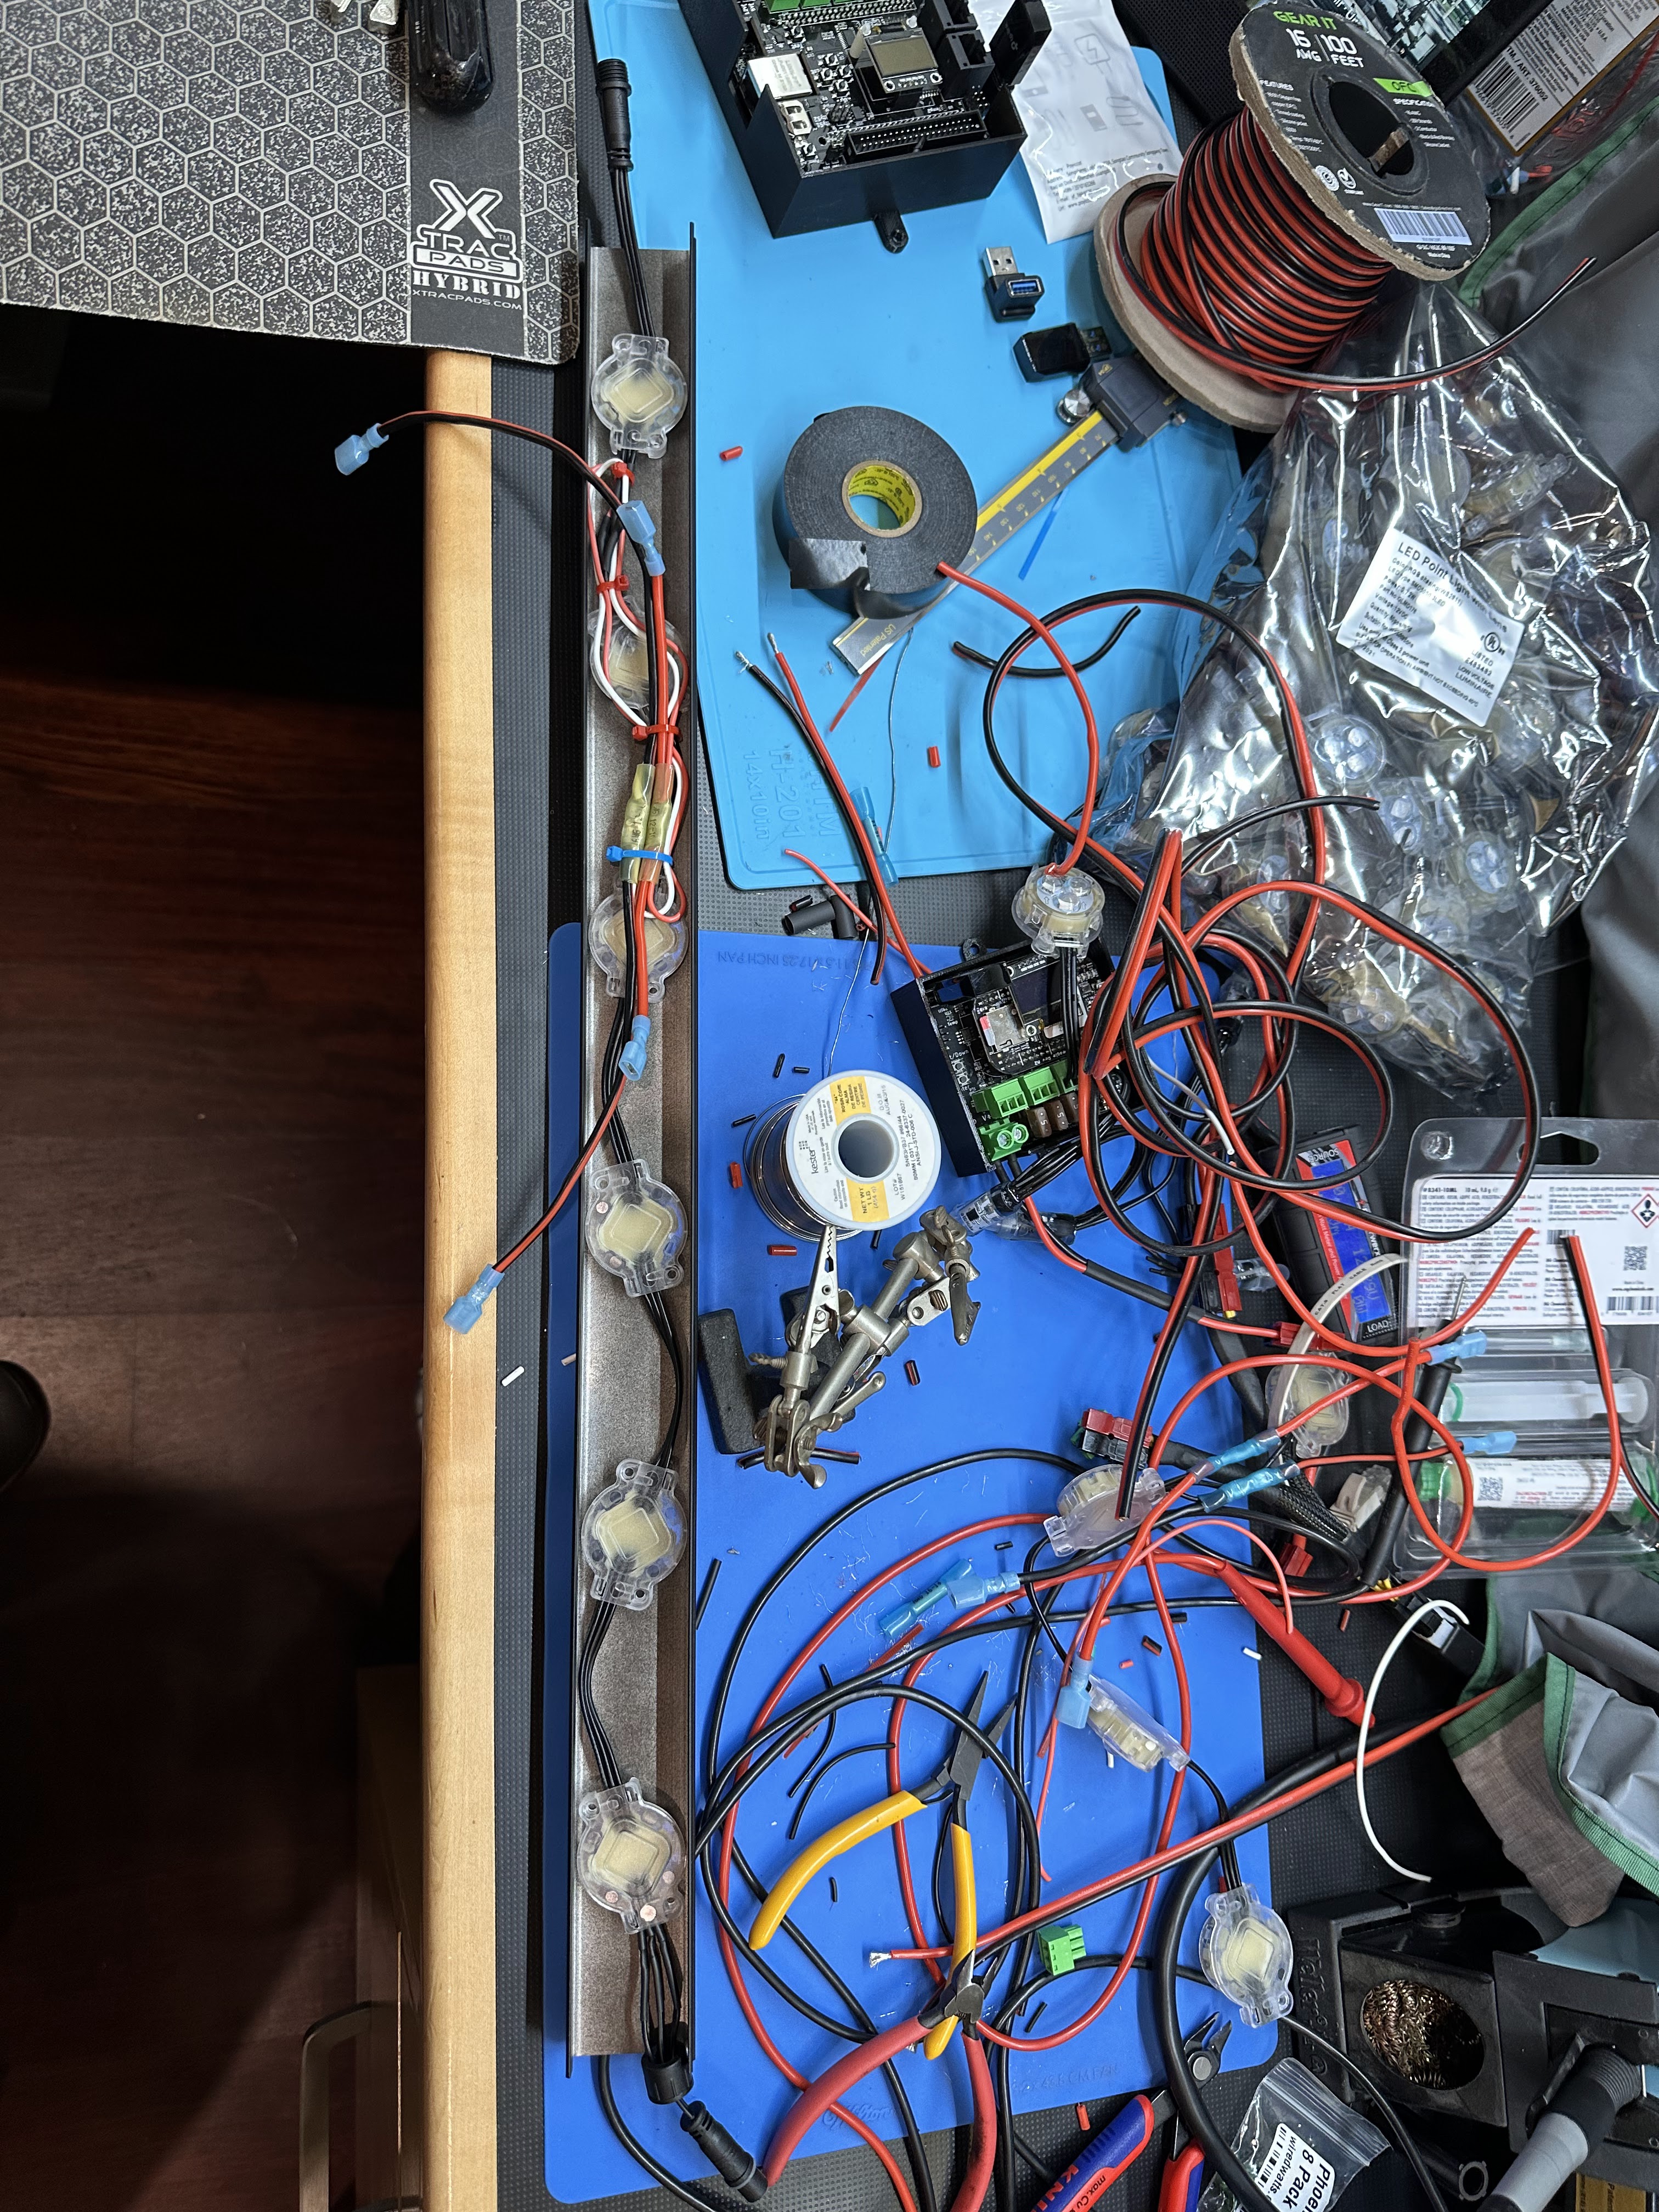
To drive the lights I installed a Kulp K4-PB controller and two Mean Well XLG-200-12 PSU’s in the outdoor utility cabinet. The two 200W PSU’s are overkill, but I plan on extending use to other temporary holiday season lights. I used Anderson PowerPole connectors and a proper crimper for power, really great connectors. While testing I had issues with the LED’s not being the right color, turns out the current Mattos product page lists the pucks as being RGBW (that I used for programming), but apparently the pre-orders used older RGB LED’s, changing from RGBW to RGB solved the color issues. I had high hopes of completing the install with EMT conduit on the wall, but between holidays and rain and more rain, I’ll leave that task for summer.


Was the install easy, no, would I recommend the use of Mattos track, maybe. It was disappointing (I understand technology changes, but still) to learn that the current tracks use RGBW pucks while the pre-order used RGB, but as for repairs I have lots of unused tracks with pucks, so spares for the foreseeable future. The track profile is such that the thin section of track gets mounted on the surface, but the mounting surface is not perfectly flat, resulting in the thin profile easily bending, and when the profile bends, the top section can’t be inserted, or keeps falling out pulling other tracks with it. When you are working off the ground and upside down, this was super frustrating, at points I got so frustrated I was tempted to just super glue it or screw the entire track down. I did not even think of taking pictures, wish I did, would have demonstrated the bending issues. I think a better design (applies to any track of this profile, not just Mattos) would be for the surface mount track to be very rigid such that it does not bend and makes installing the top track very easy.
In summary, if you’re not up for the frustration and effort, and are not set on using xLights (to my knowledge none of the commercial products works with xLights), consider paying a pro for a commercial product. But the end product does look fantastic.

You must be logged in to post a comment.