
[Late post] I finally got around to installing permanent under eve roofline RGB lights, and I’ll share me experience and opinion of the Mattos RGB Trim I used. See my previous post and post on RGB holiday lights for background. I pre-ordered Mattos Engineering RGB Trim in December 2021 and received the shipment end ofContinue reading “Mattos RGB Trim permanent roofline RGB pixel install”
Moving from UniFi-USG and Circle to Firewalla

I replaced my aging UniFi Security Gateway Pro and slow Circle Home Plus with a Firewalla Gold Plus, giving me gigabit speed firewall and parental controls in a single easy to use and actively developed device. Why Firewalla? We have 1Gbps internet, and I want a feature rich firewall that can operate at line speed.Continue reading “Moving from UniFi-USG and Circle to Firewalla”
Halloween pumpkins and lights

Last year was the first time I used RGB holiday lights for decorative outside lights, and this year Halloween I started with some Halloween pumpkins. I used a Boscoyo Pumpkin King and a Goofy Gourd because they are printed in color so they look good day and night. The Pumpkin King stands 95″ / 2.4mContinue reading “Halloween pumpkins and lights”
Installing FLAIR Smart Vents to keep room temperatures balanced

Every year on the hottest days and coldest nights, with the HVAC on, our bedrooms are either too hot or too cold, and I installed FLAIR Smart Vents to try and remedy the situation. In this post I am sharing my experience with the FLAIR installation and configuration, and my opinions and mini review ofContinue reading “Installing FLAIR Smart Vents to keep room temperatures balanced”
eNom Datacenter Move Borks DNS

eNom really borked their datacenter move resulting in two days and counting of no DNS. I first noticed the issue Saturday (15 Jan 2022) night when my inbox remained clean for several hours, yes, I am one of those people that like to keep email organized and the inbox clean. A bit of head scratchingContinue reading “eNom Datacenter Move Borks DNS”
Getting carried away with RGB holiday lights

What started as a small project quickly snowballed; taking way more time than anticipated, going through multiple scrapped plans and hardware changes, my fingers still hurting from making cables and pushing pixels through corrugated plastic. But for all the overkill, it does look pretty. It started when I ordered two strands of Govee RGB patioContinue reading “Getting carried away with RGB holiday lights”
Trying to Keep my Garage Cool

We live in a moderate climate, and when we built our house my plans were for my home server rack to be installed in the garage and vented through the outside wall to the alley. Unfortunately plans changed, and the instant hot gas water heater had to be moved blocking rack access to outside ventilation.Continue reading “Trying to Keep my Garage Cool”
ESP32 Water and Gas Utility Meter
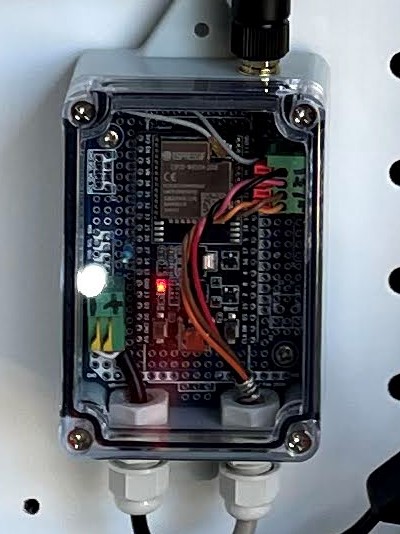
The recent release of Home Assistant’s energy dashboard inspired me to restore my gas and water utility meter monitors. I lost the measurements when I removed my Brultech GreenEye energy meters in favor of Sense energy monitors. To recap, my local city and utilities do not allow any connections in any form to their utilityContinue reading “ESP32 Water and Gas Utility Meter”
Cooling an Overheating MVMe SSD
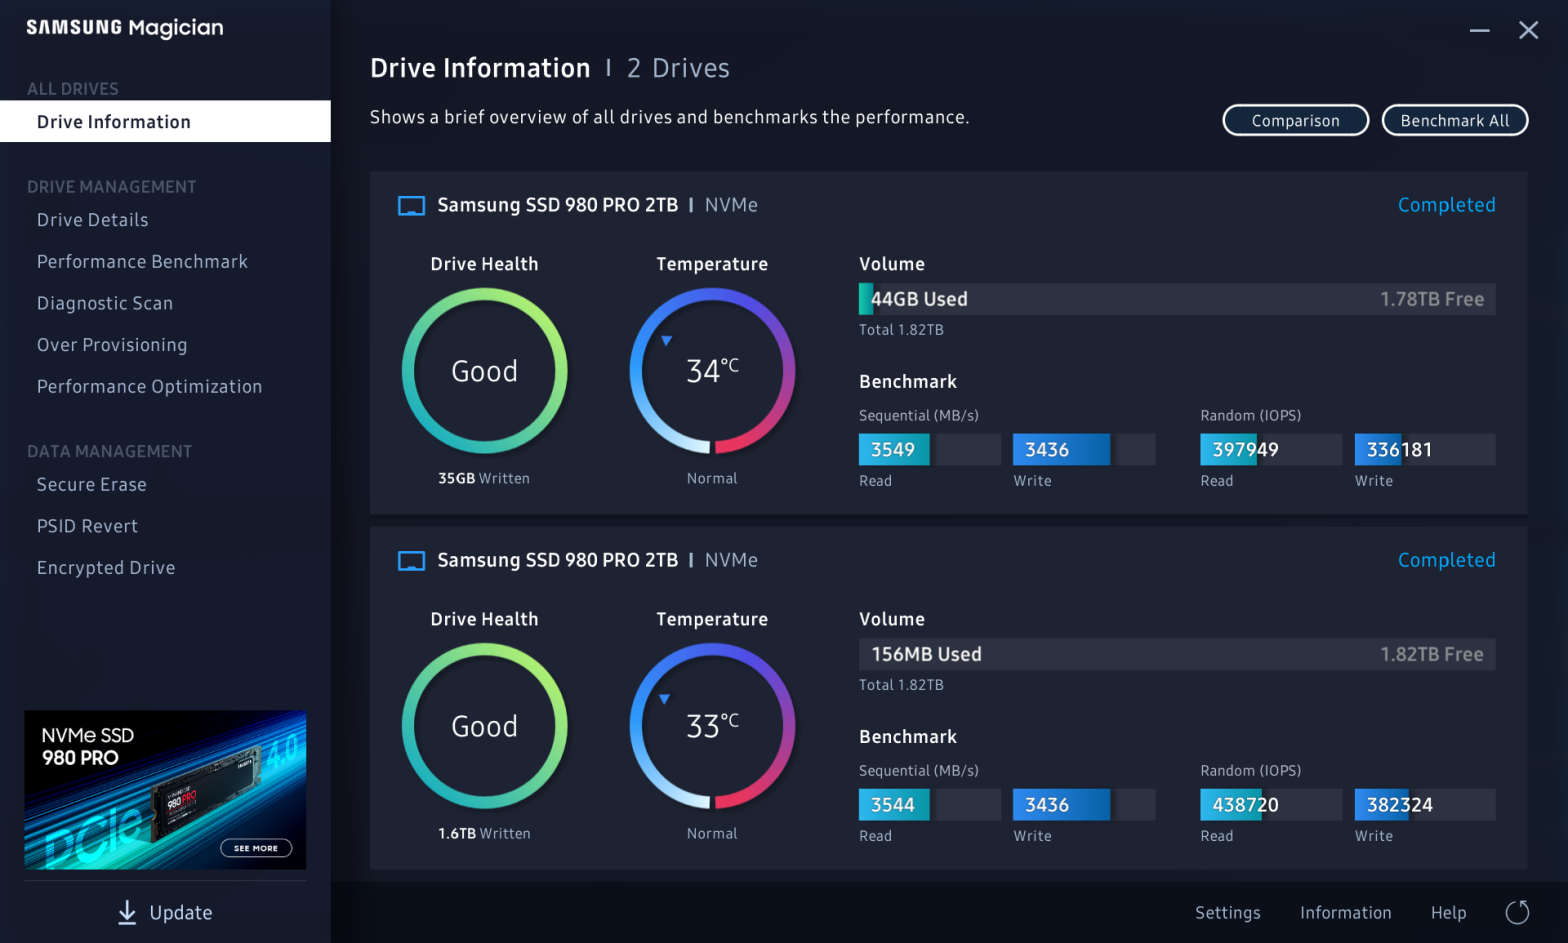
The SSD in my Windows 10 system started reporting failures, and as luck would have it, died while I was cloning it to a new drive. I suspect death was caused by overheating, and I addressed that with my new setup. This Windows 10 system is in a NCase M1 v5 SFF case with anContinue reading “Cooling an Overheating MVMe SSD”
Using ESP to Debug an ESP

This post is about troubleshooting the sporadic ESP8266 hardware watchdog resets in my water recirculation pump controller project. The ESP8266 would randomly restart, which I can observe by monitoring the uptime reported by ESPHome to Home Assistant. It is difficult to debug because the Sonoff TH10 is in a waterproof case in my garage, makingContinue reading “Using ESP to Debug an ESP”
